MyGlue Scenario 5 - Self-Service
If you'd like to know more on how to deploy MyGlue, please view MyGlue Deployment Guide.
Scenario Purpose
Deploy MyGlue account as a value-added service for a client so you can share documents and SOPs you have documented in IT Glue through MyGlue so the clients are empowered to solve simple IT issues themselves.
Scenario
Many simple IT issues can oftentimes be handled on a self-service basis where clients can access always up-to-date SOPs that you have already documented in IT Glue. Now your clients can simply access them through MyGlue. With this, clients are empowered to solve simple and repetitive issues on their own rather than waiting in a queue for IT support. For example, it can consist of a simple set of instructions such as how to troubleshoot a printer or how to configure work email on their mobile phones.
MyGlue Deployment Steps
- Navigate to Account > MyGlue and click + New.

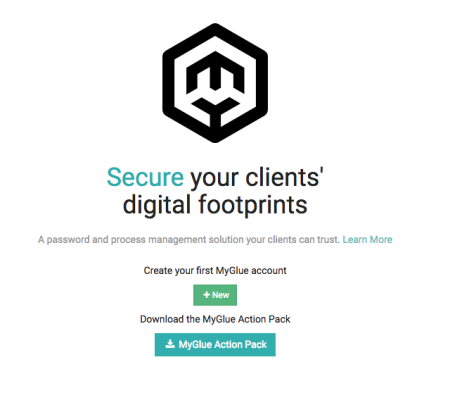
If you have never set up a MyGlue account before, you will see the screenshot below when you click MyGlue from the sidebar.
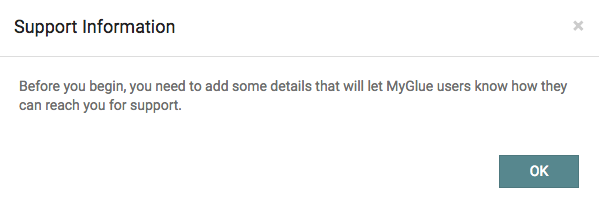
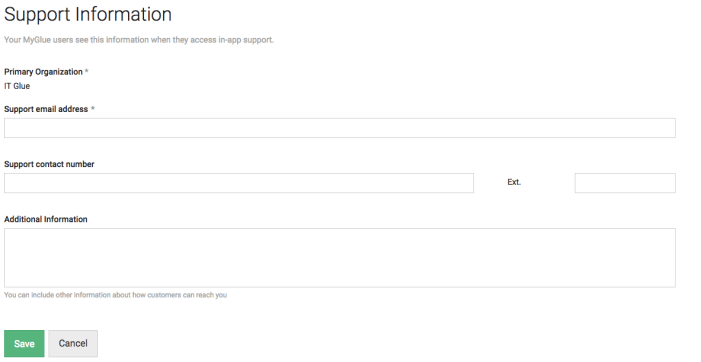
- If this is the first MyGlue account you are setting up, you will be prompted to enter support information. If not, please skip this step.
- In the New Account page, complete the following:
- Enter a name for the new MyGlue account.
- Choose the existing IT Glue Organizations you’d like to assign.
- If you want to enforce MFA for the account, check Require MFA for access to this MyGlue account. Refer to our KB article here for details on prerequisites needed for this setting.
- Select a global default security permission for the account. There are three options:
- All MyGlue users with access to the organization have access by default - Passwords created by MyGlue users will be visible to all other MyGlue users with access to the same organization. This ensures that a low-risk and widely used password is easily accessible.
- Only the creator has access by default - Passwords created by MyGlue users are visible only to that user. This ensures that a password is not exposed to an entire group or organization upon creation.
- Specific groups and/or users with access to the organization can access by default - Passwords created by MyGlue users will be automatically shared to specifically chosen MyGlue groups/users or IT Glue groups. This means that MyGlue users don’t need to remember to set those permissions each time they create a password. The password creator will still have access.
Note: It is a pre-requisite that specific IT Glue groups should have been already created to use this option. If not, the list of IT Glue groups will not be listed under this option. You will be able to create and add MyGlue groups to the MyGlue account only after you create the MyGlue account.
- Click Save.
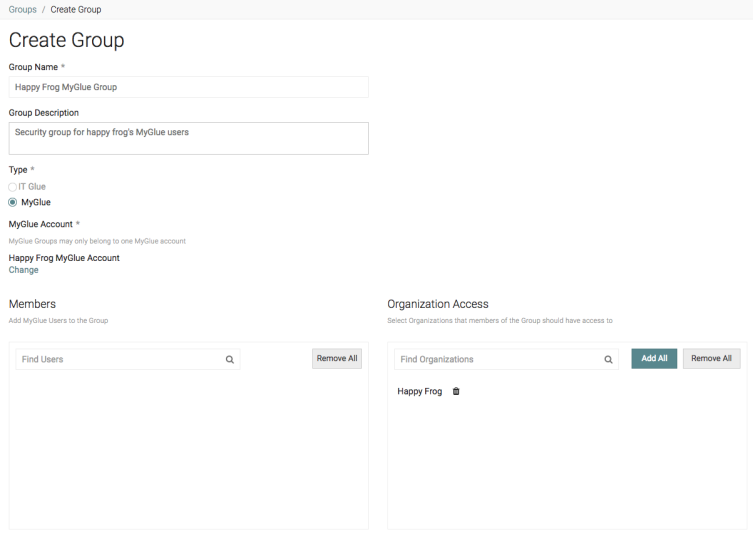
- You will be prompted to create MyGlue Groups as MyGlue groups are required to create MyGlue users. Click OK.

- Create a security group for this MyGlue account. Enter a name and an optional description for the group, and add all MyGlue users who should have access to the group. If you do not yet have MyGlue users in IT Glue, you can invite them on the next screen. You can also add additional organizations here.
- Uncheck Grant access to unrestricted ("All IT Glue Users") IT Glue data within the allowed Organizations to restrict asset access to the MyGlue Users / Groups you specify.

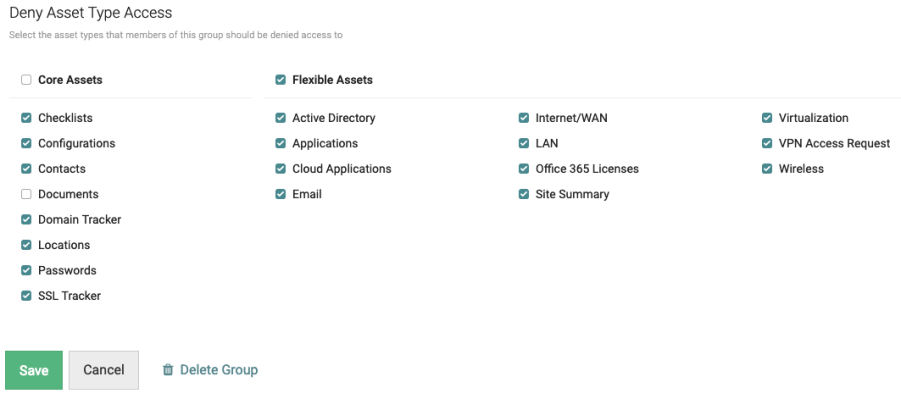
- All asset types are checked to deny access by default. Uncheck Documents, and click Save.
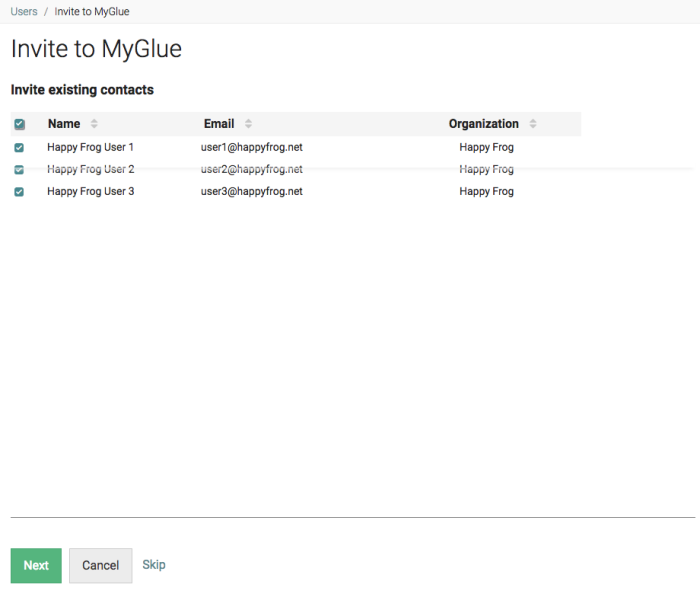
- Uncheck the organization's contacts you do not want to invite to MyGlue, and click Next.
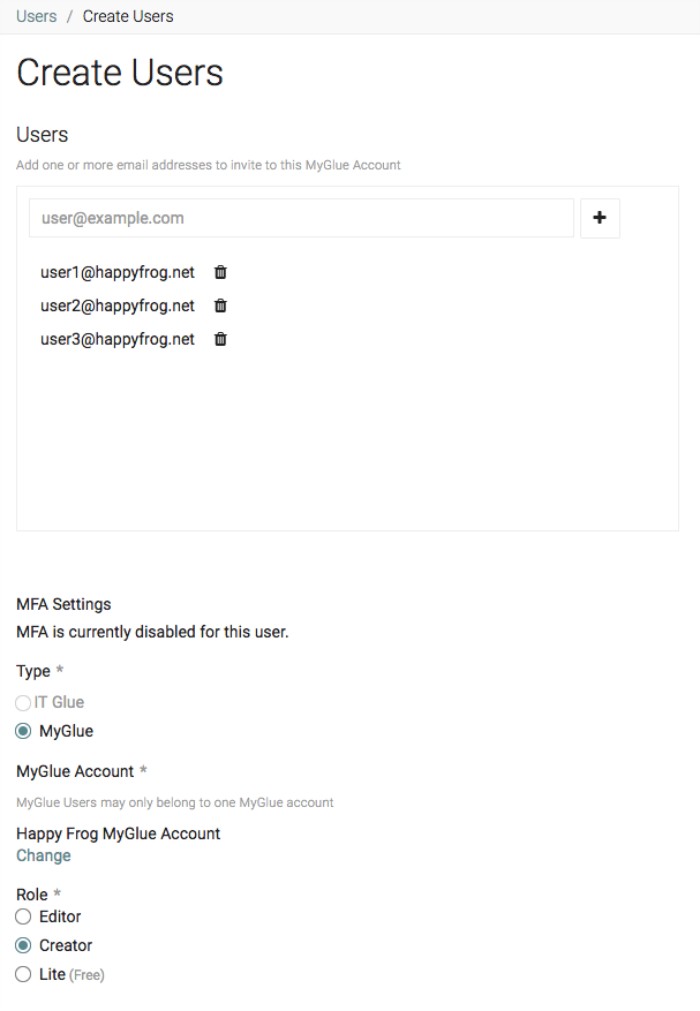
- Set the appropriate permissions for the invited users. Our MyGlue user roles, groups, and permissions KB article will help you decide which role to give the users. Click Save.
Sharing Documents and SOPs with MyGlue users
In MyGlue, you can share valuable Documents and SOPs with your MyGlue users to help them self-serve on a number of IT topics. Learn about the two ways you can do so below:
Sharing to specific MyGlue users only:
You may have multiple Documents and SOPs applicable to specific clients only. In this case, you can manually select and share the exact assets they need to perform self-service. Let's assume you want to share 'How to Connect Personal Devices to WiFi', and 'How to Request VPN Access' in the screenshot below with your client user.

- Edit each of the documents you wish to share and grant access to the MyGlue group you created when you deployed the MyGlue account.

- Alternatively, create a folder and drag the documents into it.
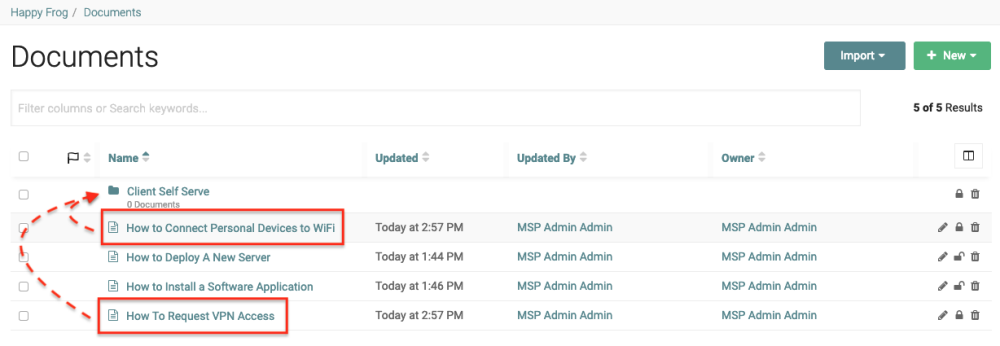
- To assign permissions to the folder, check the box next to the folder "Client Self Serve". Then, click the arrow next to the checkbox column heading and choose Security.
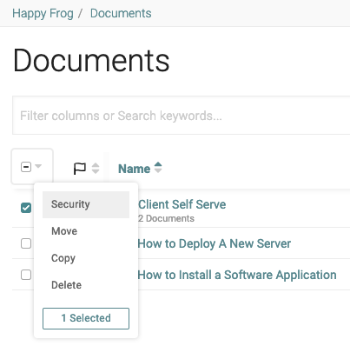
- In the MyGlue Groups field, search for the MyGlue folder or users you want to give access to. Click Save.
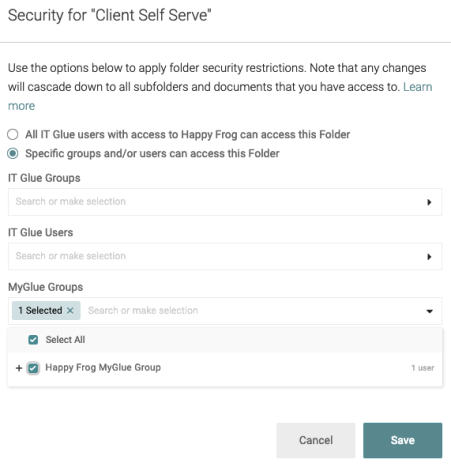
NOTE When you apply permissions to folders, any documents already in the folder will inherit the permissions set. Any new documents you put in the folder will not inherit permissions. To have new folder documents inherit permissions, you will need to repeat the two steps above, set the permissions back to All Users and then change them back to the specific groups you want to have access.
Your specified MyGlue users will only see Documents in their sidebar, and will see the documents you have given them access to.
Sharing to all users across every MyGlue account you manage:
You may have multiple Documents and SOPs that would benefit all of your MyGlue users across the board. In this case, you can add read-only versions of them to the MyGlue Help Center. Direct your clients to the Help Center as the central repository for valuable help documentation that everyone can access directly in their instance.
For full instructions on this, please review our Setting up MyGlue Help Center KB article.
MyGlue users managing their own permissions
MyGlue users can also self-manage their security permissions. Your clients are able to create, edit, and update their own groups and security permissions. By self-servicing these actions, your IT admin can focus instead on delivering higher, more complex-level services for your clients.
Users can easily move or delete multiple passwords in bulk within an organization, saving them time from having to edit password permissions individually.
- From any MyGlue organization, click Passwords in the left sidebar.
- Then, select the passwords to be bulk updated, click the down arrow next to the checkbox column heading, and click Security.
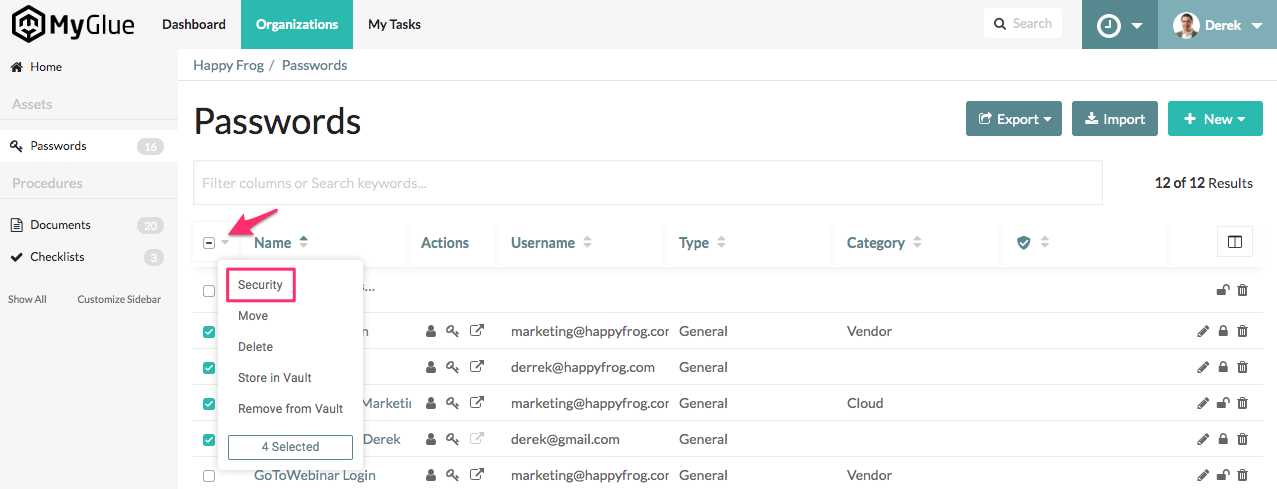
- Select either "All MyGlue Users..." or "Add or remove Groups/Users".
- If you select "All MyGlue Users...", review Step 5.
- If you select "Add or remove Groups/Users", use the filter fields to add and review users and groups as needed.
NOTE This option will only work if individual passwords are selected. Users will not have an option to manage folder security here.
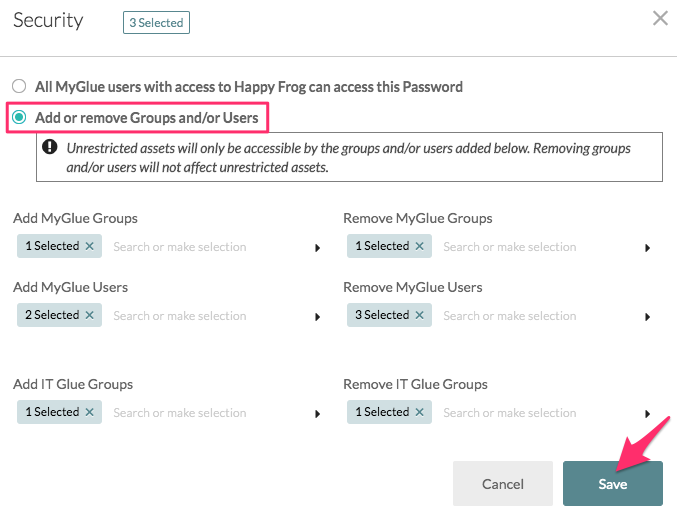
- After all the selections have been made for each Group and User field, click Save.
- A red banner will appear allowing you to confirm your changes. Please ensure the changes you make are intended as the operations cannot be undone.

Once complete, a green confirmation banner will appear. Security permission changes are applied in the background and may take a while depending on the number of passwords being modified.
For more details on the Bulk Security feature, please visit our Bulk Security for Passwords KB article.
Please also see the below scenarios for other ways you can utilize MyGlue.


