Quick guide for workflows
For partners subscribed to Select or Enterprise plans.
Introduction
This article will show you how to get started with workflows, which let you work more efficiently. IT Glue workflows help:
- Notify of an upcoming expiration when something is within the specified lead time
- Automatically update users when passwords or documents are added or updated
- Filter out any irrelevant notifications that don't require action
- Target notifications to specific users
- Choose how to notify your team: by email or in third-party activity feeds
Workflow Triggers
There are two types of workflows in IT Glue:
Instant Trigger: Document, Flag, Password, and Password Access are instant triggers. Whenever the trigger criteria is met, an instant notification will be sent as defined in the workflow actions.
Scheduled Trigger: Document Expiration, Domain Expiration, SSL Expiration, Configuration Expiration and Flexible Asset Expiration are scheduled triggers. These workflows run once every 24 hours. Assets that have changed to meet your trigger criteria since the last run will be notified as defined in the workflow actions.
Breaking down your process into simple steps
With workflows, you have many different combinations of triggers, filters, and actions available to you, meaning you can take your routine processes and create repeatable workflows.
For instance, when a domain, license, warranty, or SSL certificate in an "Active" organization is about to expire, you can set a workflow to send an email to the service desk to take action. Or, when an important password or document is changed, you can have a notification sent to specific team members to review the change.
Workflow actions are delivered as notifications. Choose notification types that work for you. A powerful webhook output is provided for integration with Microsoft Teams, Slack, or other third-party activity feeds which means you can monitor IT Glue activity from external systems without having to write any code. Services like Zapier also offer RESTful APIs that can be leveraged to help IT Glue talk to different apps, like Zendesk and Asana.
Workflow example:
- Trigger: Domain Expiration
- Lead time: 15 days
- Filter: Include domains in active organizations only
- Action: Send email to the Service Desk
- Action: Also notify the team in Microsoft Teams #general channel
Accessing the workflows feature
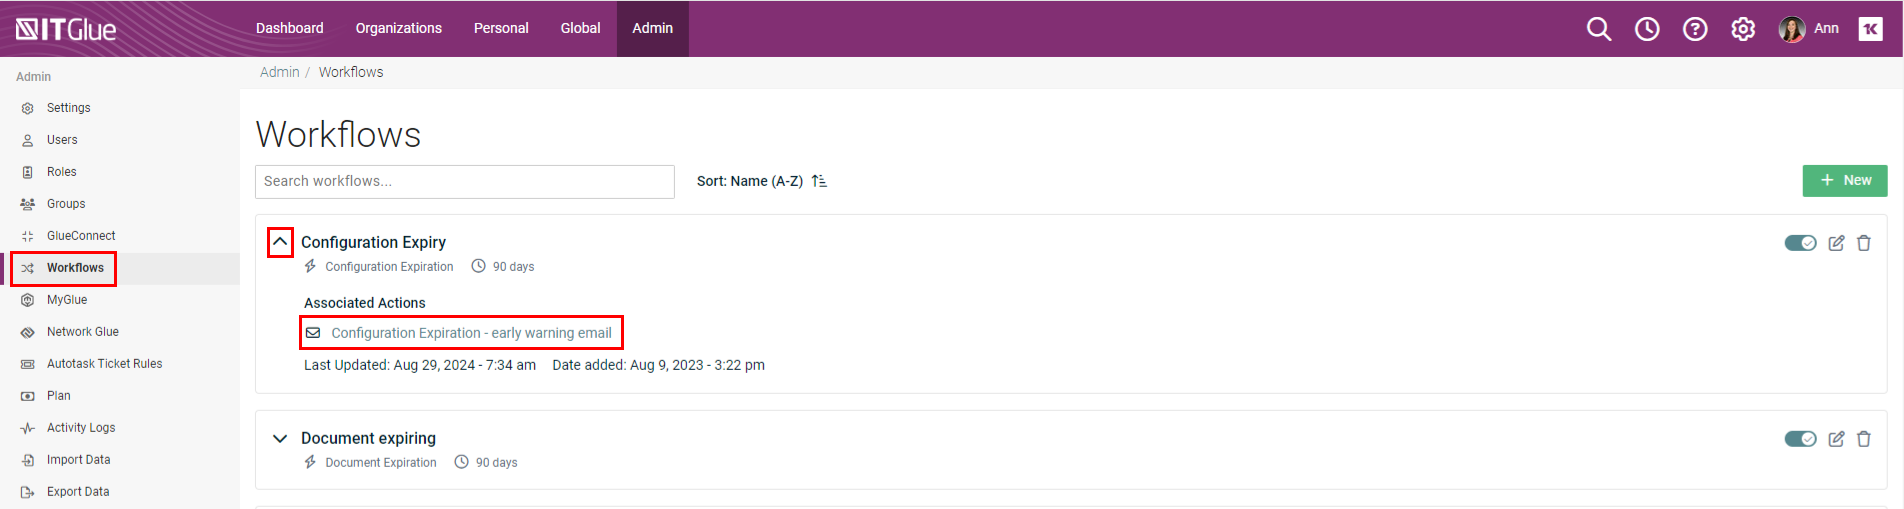
You will need to be logged in as a Manager or Administrator. Navigate to Admin > Workflows. In the workflow management page, feel free to edit, delete or turn on/off your workflows as needed. You also have search and sort options at the top of the screen.
NOTE If your IT Glue account was created after GlueX 2021 (May 4, 2021), you can take advantage of our Default Workflows. These are set to notify the first account Administrator when Configurations, Domains, SSLs or Flexible Assets in their account are 90 days away from expiration. Default Workflows are fully configurable and can be disabled or removed.
Clicking the arrow in the upper left on a given workflow shows you the actions associated with it. Click on an action to go edit the action directly.
Instructions
Create a new workflow
Click the green + New button at the top-right corner of screen to be taken to the new workflow setup screen.
Each workflow is organized into different sections. By default, all workflows come with Add Trigger and Add Action sections. Filters and other actions can be added, as needed.
New workflows will be in an off status by default, so that you don't accidentally send incomplete notifications while building your workflow.
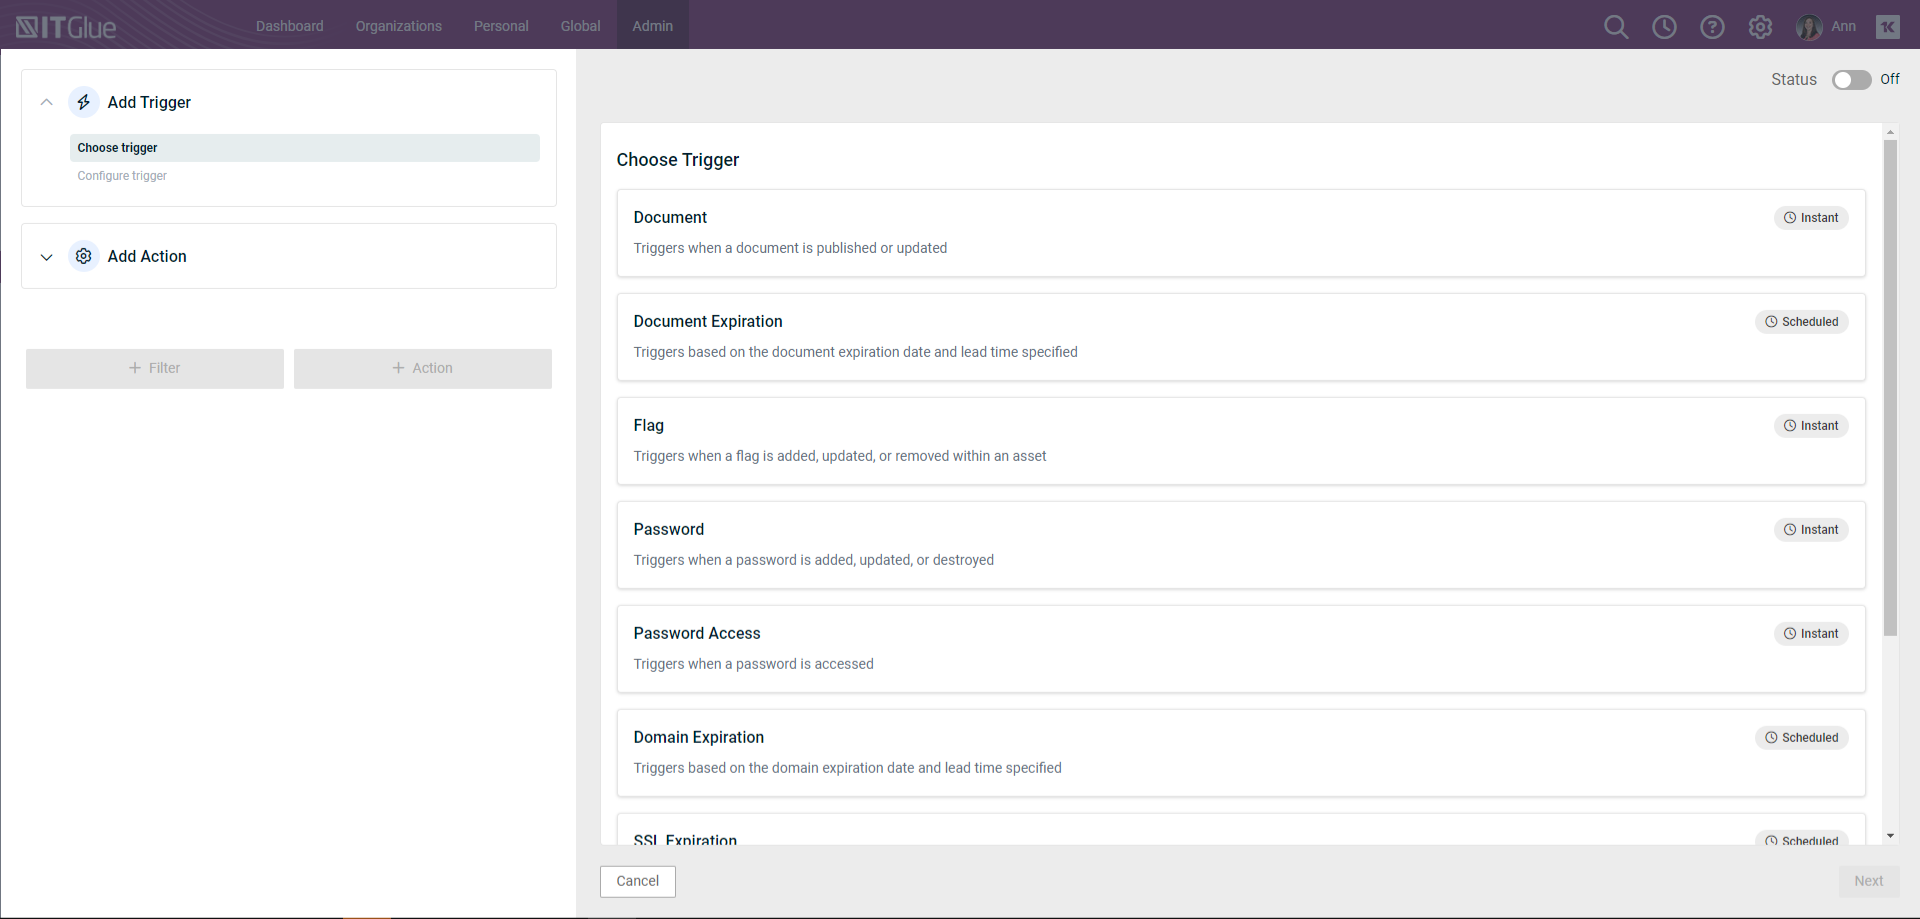
Choose a workflow trigger
- Start creating a new workflow by choosing one of the available triggers:
- Document - Triggers when a document is published or updated
- Document Expiration - Triggers when the specified lead time is met on a document's expiration date
- Flag - Triggers when a when a flag is added, updated, or removed from a document
- Password - Triggers when a password is added or updated
- Password Access - Triggers when a password is accessed
- Domain Expiration - Triggers when the specified lead time is met on a domain's expiration date
- SSL Expiration - Triggers when the specified lead time is met on a SSL expiration date
- Configuration Expiration - Triggers when the specified lead time is met on a configuration's (warranty) expiration date
- Flexible Asset Expiration - Triggers when the specified lead time is met on a flexible asset's expiration date
- Click the Next button.
Configure the trigger
- Enter the required information for your chosen trigger:
- Trigger Name: Enter a descriptive name for the notification. The name will be shown in the workflows management page and should be globally unique across workflows to make identification easy.

- Include Archived Assets: Select the checkbox if you want to include the archived assets in the workflow notifications.
This option is not selected by default.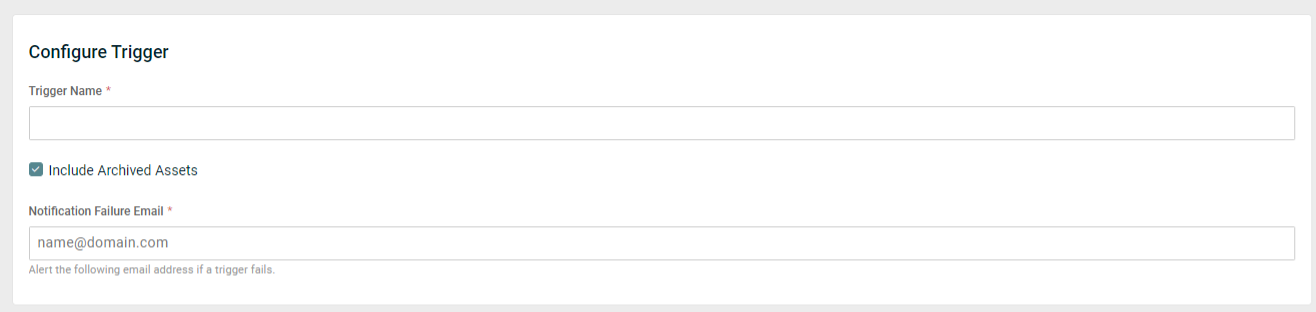
- Notification Failure Email: If there is a bounce back from the notification, an email will be sent to this email address from notifications@itglue.com.

- Notify At (Lead Time): Only applies to expiration-based triggers. Specify the number of days in advance that you want to be notified when an asset is nearing its expiration.
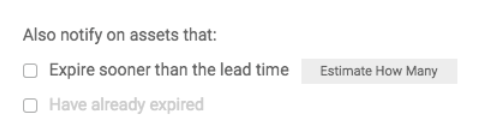
- Also notify on assets that:
- Expire sooner than the lead time: This will schedule a one-time job that will notify you of existing assets that are about to expire. Click the Estimate How Many button to estimate how many notifications will be triggered when the first job runs. Depending on how much data you have, this might be a large number. Estimates may increase slightly if the below is checked as well.
- Have already expired: This will schedule a one-time job that will notify you of existing assets that are already expired. After the first job runs, edit the workflow so that it fits your business needs. For example, you may decide not to be notified when configuration items that are past their warranty date are uploaded.
NOTE This expiration-based trigger is only required in the Domain Expiration, SSL Expiration, Configuration Expiration, and Flexible Asset Expiration workflows.
NOTE Changing the lead time may affect the timing of notifications. Specifically, if the lead time is reduced, notifications will be adjusted to align with the new lead time window. The system avoids skipping notifications and ensures timely delivery of events within the updated window.
- Trigger Name: Enter a descriptive name for the notification. The name will be shown in the workflows management page and should be globally unique across workflows to make identification easy.
- Click the Next button.
Add a filter (optional)
You can dial your notifications down to focus on fewer things through the use of filters. This can help you reduce unnecessary or unwanted notifications so that your team is seeing only what they need to see.
Filters let you add specific criteria that must be met before a notification will occur. For example, you have a client that decides they want to let one of their domain names expire. You can add a filter that will exclude the domain from the relevant workflow. Now, your team won't get notified when the domain is nearing its expiration date.
Another helpful use for filters is when you want to create separate notification options for different flexible asset types. For example, you can specify that you want to notify only on "Licensing" flexible assets to help you create specific workflows for license expirations.
IMPORTANT If you're setting up workflows based on flexible asset expiration dates, make sure you're using the Expiration attribute to identify your expiration dates.
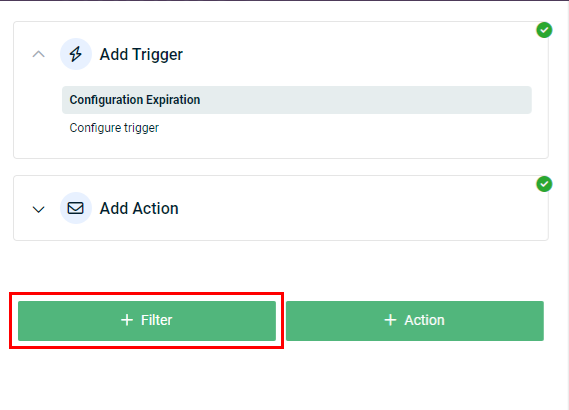
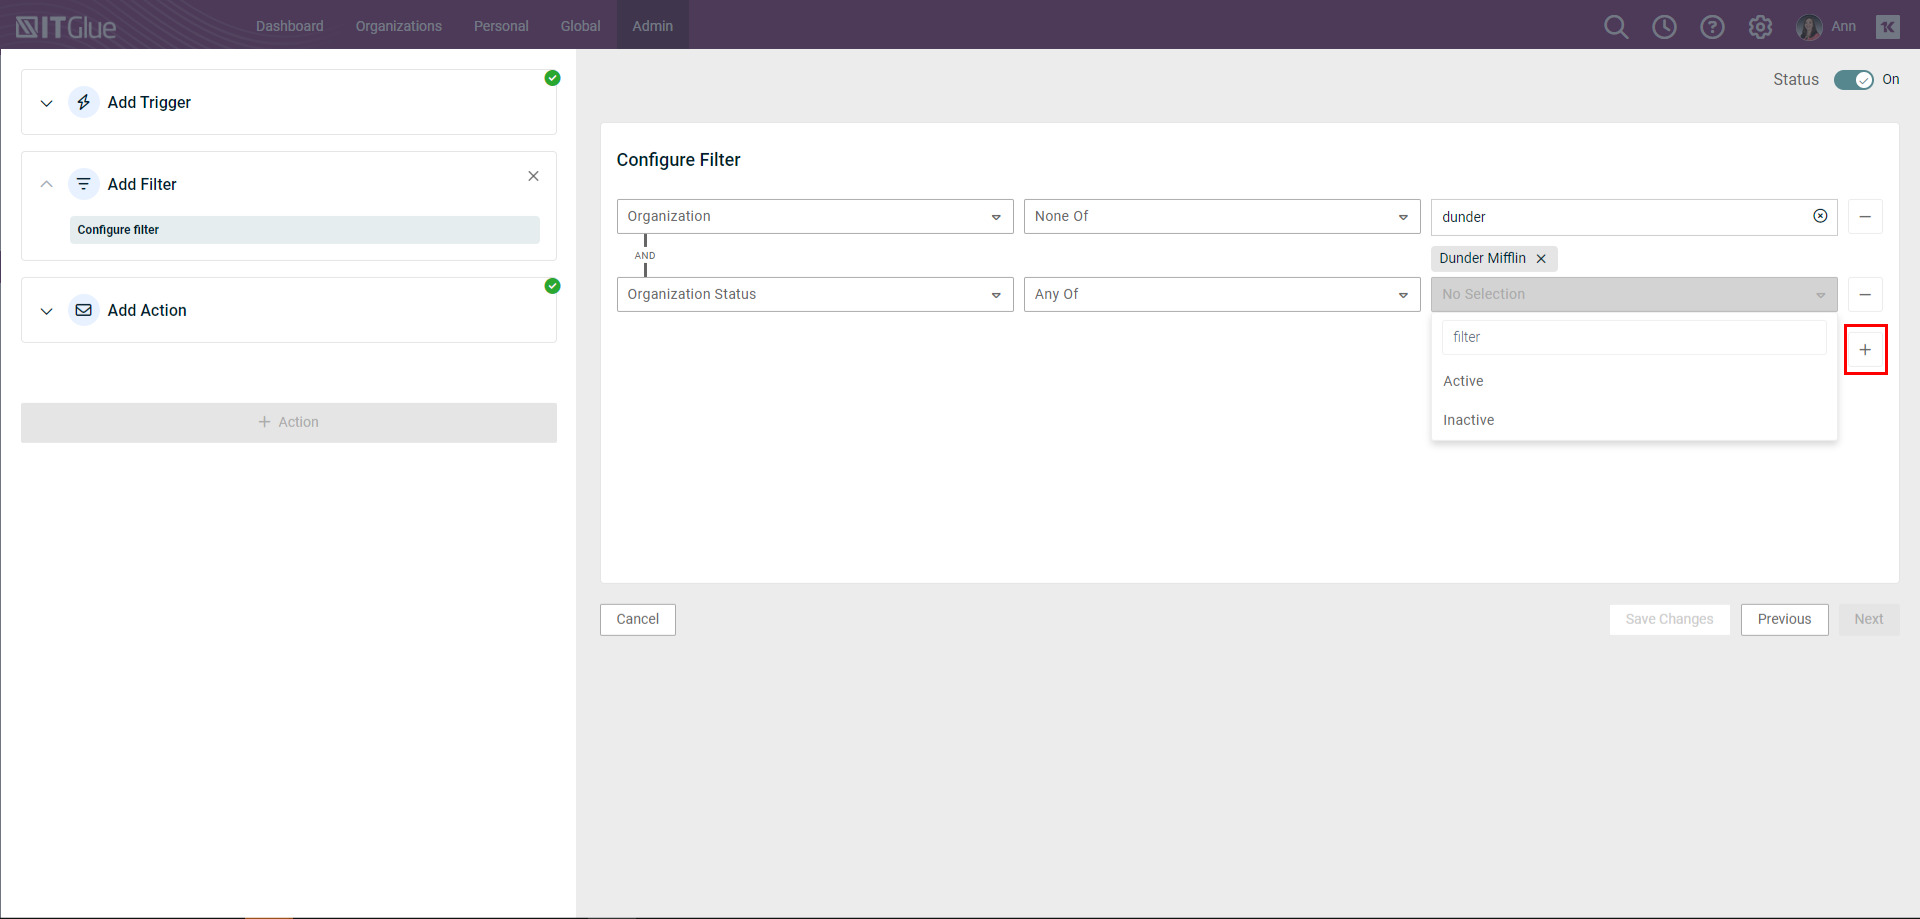
To add a filter:
- Click the + Filter button on the left side of the screen.
- Select your filter criteria using the drop-downs. To add additional filter criteria, click the plus icon.
Note the definition of each filter operator:
|
Operator |
Definition |
Example |
|---|---|---|
| Contains | Text field must contain a specific value. | The Installed by field contains the name Tim anywhere in the field. |
| Does not contain | Text field must not contain a specific value. | The Domain Name field does not contain your-able-experts.com. |
| Starts with | Text field must begin with a specific value. | Document Name starts with the word Project. |
| Ends with | Text field must end with a specific value. | Document Name ends with the word SOP. |
| Any of | Field must have at least one of the values you select. | Password Category is Domain Admin or Server. |
| None of | Field must not have any of the values you select. | Organization Status is neither Inactive or Vendor. |
| Is | Field must have the exact value you select (for example, true or false). | Make document public check box is True. |
Choose a notification method
- Choose the notification method (the action that will be triggered). The type of actions you can create with this feature include:
- Email: Notifications you receive by email
- Slack Webhooks: Notifications you receive via a Slack custom integration
- Webhooks: Notifications you receive via simple connections with other third-party apps
- Click Next .
NOTE Webhooks are used to trigger an outbound API message to an external system. This means that you will need a third-party integration for webhooks to work. If you are interested in using webhooks, see the following articles for further reading and to start building webhook-based actions. Please feel free to contact us if you have any questions or need further tutorials.
- Setting up Slack webhook notifications
- Setting up Microsoft Teams webhook notifications
- Setting up an Asana zap in Zapier
- Setting up a Zendesk zap in Zapier
Configure the action
- Provide some additional information. In this example, we are using the Email Notification action.
- Configure your email action using variables (optional). You can use variables in the subject and body fields to pull values from the asset that triggers the notification. All available variables are listed at the bottom of the screen when you click on "Need Help? Click Here to See Available Variables".
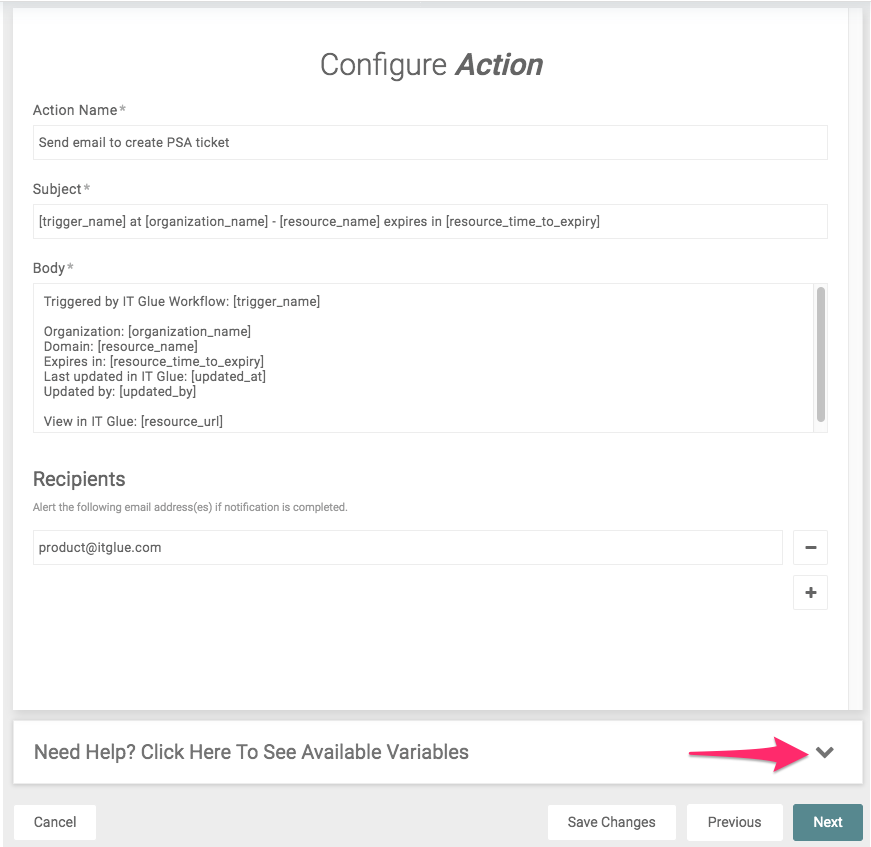
- Click the Next button.
Test your workflow
Click Test Action to perform the job your action is set to do with some test data. For example, if your action is email, IT Glue tests sending an email. This gives you a chance to make sure the notification is working. If the test fails or needs to be revised, you can fix it before you put the notification into production.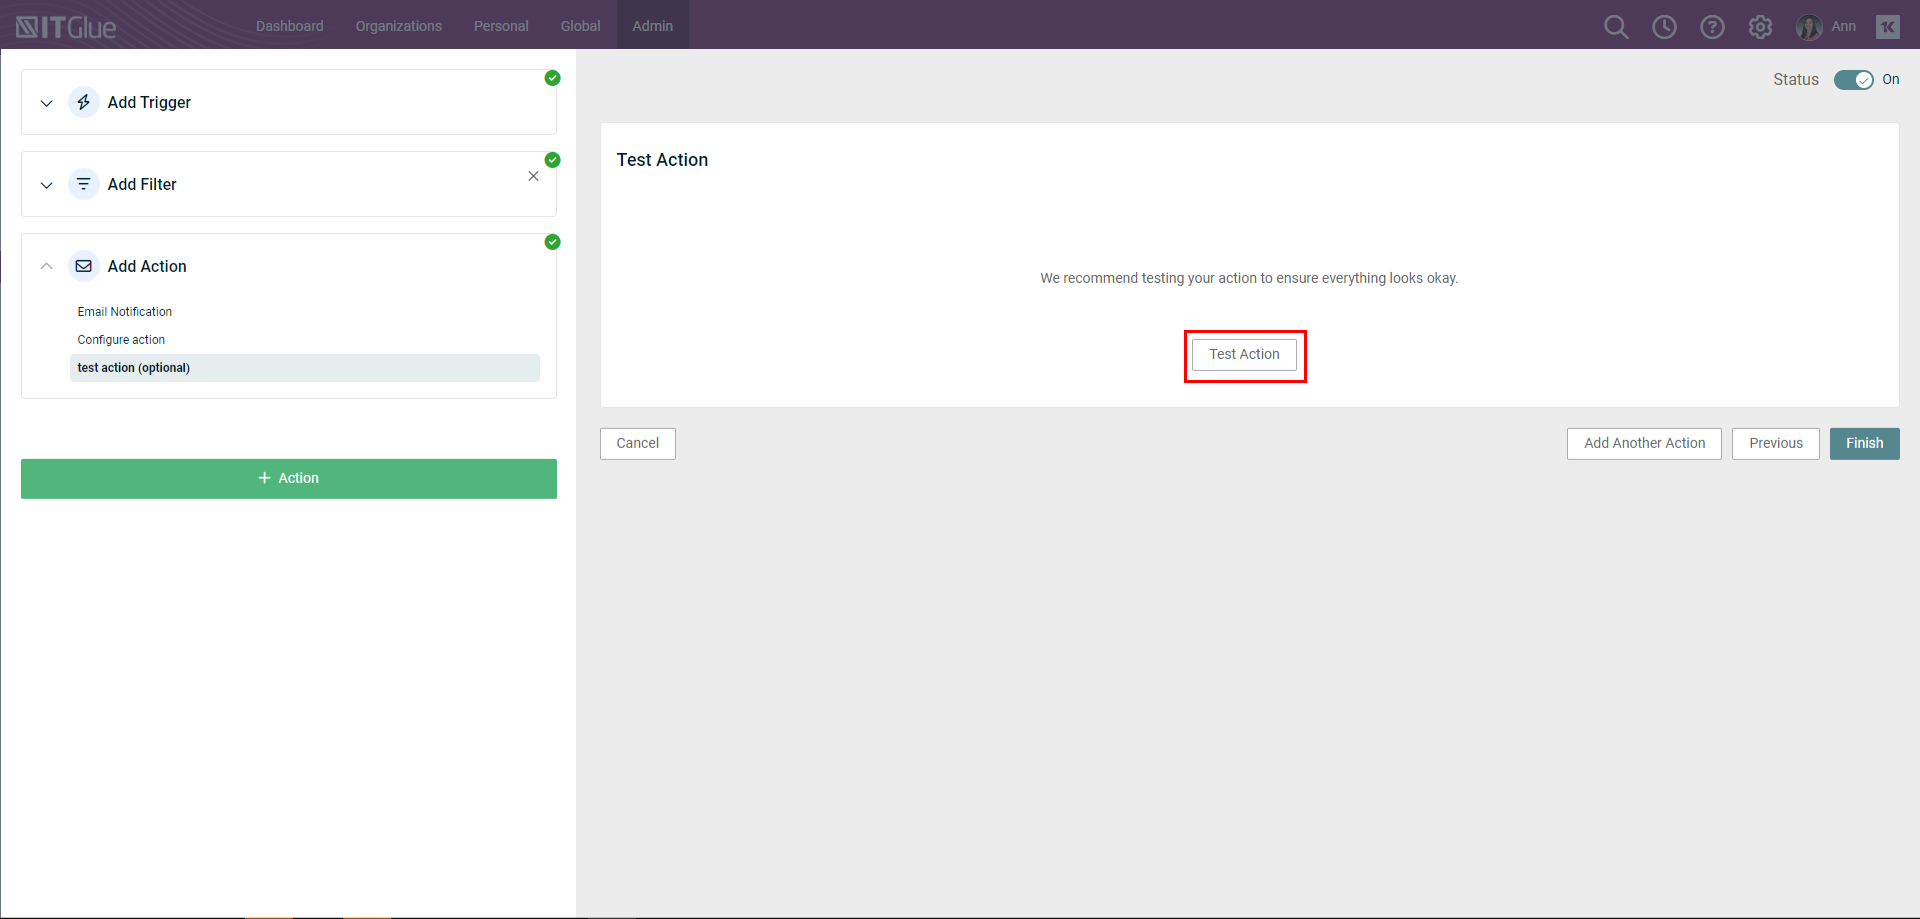
NOTE Test notifications are sent to the first email recipient, but the actual notifications will be sent to the entire recipient list.
Turn on your workflow
After testing, turn on the Status toggle click Finish to save all your changes. Your team will start receiving notifications within the next 24 hours.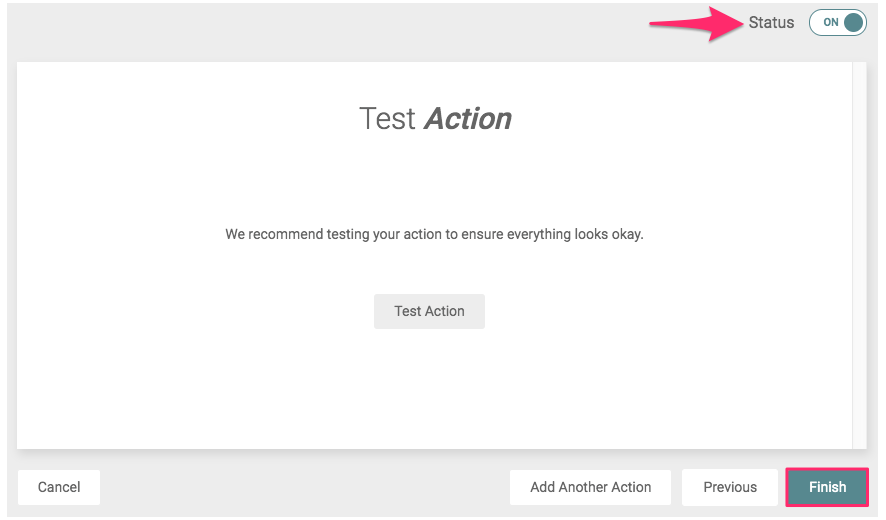
NOTE Notifications based on document or password triggers are sent in real time.
Troubleshooting a workflow
We make several attempts to send notifications before we consider the workflow unsuccessful. This allows for any network outages and third-party downtimes.
After reaching a maximum retry limit, we will notify you by sending an email to the "Notification Failure Email." We recommend that you deactivate (set status to OFF) a workflow that is consistently failing and investigate the problem.
When there are undeliverable addresses, we send an email that says "Warning IT Glue notification failed to send to recipients" and list the email address that the notification could not be delivered to. An out of office response could be the cause of an undeliverable address.


