Setting up an Asana zap in Zapier
For partners subscribed to Select or Enterprise plans.
Introduction
With a Zapier account, you can create workflows that will send webhook notifications to Asana as tasks when specific events occur in IT Glue. For an introduction to workflows, refer to our Quick guide for workflows.
In this article, we will refer to the JSON API - a universal connector for data on the internet. JSON API is a specification for how a client should request that resources be fetched or modified and how a server should respond to those requests. You don’t have to know anything beyond that to begin experimenting with this feature.
Prerequisites
- You must have Manager or Administrator access to configure IT Glue workflows.
- You need a Zapier account and an Asana account.
Instructions
Configuring a webhook URL
This integration requires a webhook URL to post data to. The following steps will show you how to get the URL from Zapier.
- Log in to your Zapier account and click the
 button. A "zap" is a specific link between apps that you've connected in Zapier.
 - On the Choose a Trigger App screen, choose Webhooks by Zapier.

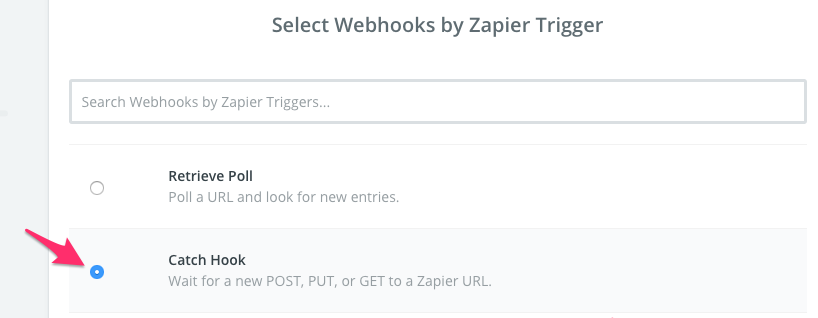
- On the Select Webhooks by Zapier Trigger screen, choose Catch Hook.
- On the Connect Webhooks by Zapier screen, copy the webhook URL.

- Leave this window open.
Setting up a workflow
The next step is to determine the specific IT Glue event that will trigger an action.
- Log in to IT Glue and navigate to Account > Workflows. Then, click on the green + New button.

- Choose a workflow trigger:
- Documents - Triggers when a document is published or updated
- Flag - Triggers when a flag is added, updated, or removed from a document
- Passwords - Triggers when a password is added or updated
- Domain Expirations - Triggers when the specified lead time is met on a domain's expiration date
- SSL Expirations - Triggers when the specified lead time is met on a SSL expiration date
- Configuration Expirations - Triggers when the specified lead time is met on a configuration's (warranty) expiration date
- Flexible Asset Expirations - Triggers when the specified lead time is met on a flexible asset's expiration date
- Enter the required information for your chosen trigger:
- Trigger Name: Enter a descriptive name for the notification. The name will be shown in the workflows management page and should be globally unique across workflows to make identification easy.

- Notification Failure Email: If there is a bounce back from the notification, an email will be sent to this email address from notifications@itglue.com

- Notify At (Lead Time): Only applies to expiration-based triggers. Specify the number of days in advance that you want to be notified when an asset is nearing its expiration.

- Also notify on assets that:
- Expire sooner than the lead time: This will schedule a one-time job that will notify you of existing assets that are about to expire. Click the Estimate How Many button to estimate how many notifications will be triggered when the first job runs. Depending on how much data you have, this might be a large number. Estimates may increase slightly if the below is checked as well.
- Have already expired: This will schedule a one-time job that will notify you of existing assets that are already expired. After the first job runs, edit the workflow so that it fits your business needs. For example, you may decide not to be notified when configuration items that are past their warranty date are uploaded.

NOTE This expiration-based trigger is only required in the Domain Expiration, SSL Expiration, Configuration Expiration, and Flexible Asset Expiration workflows.
- Trigger Name: Enter a descriptive name for the notification. The name will be shown in the workflows management page and should be globally unique across workflows to make identification easy.
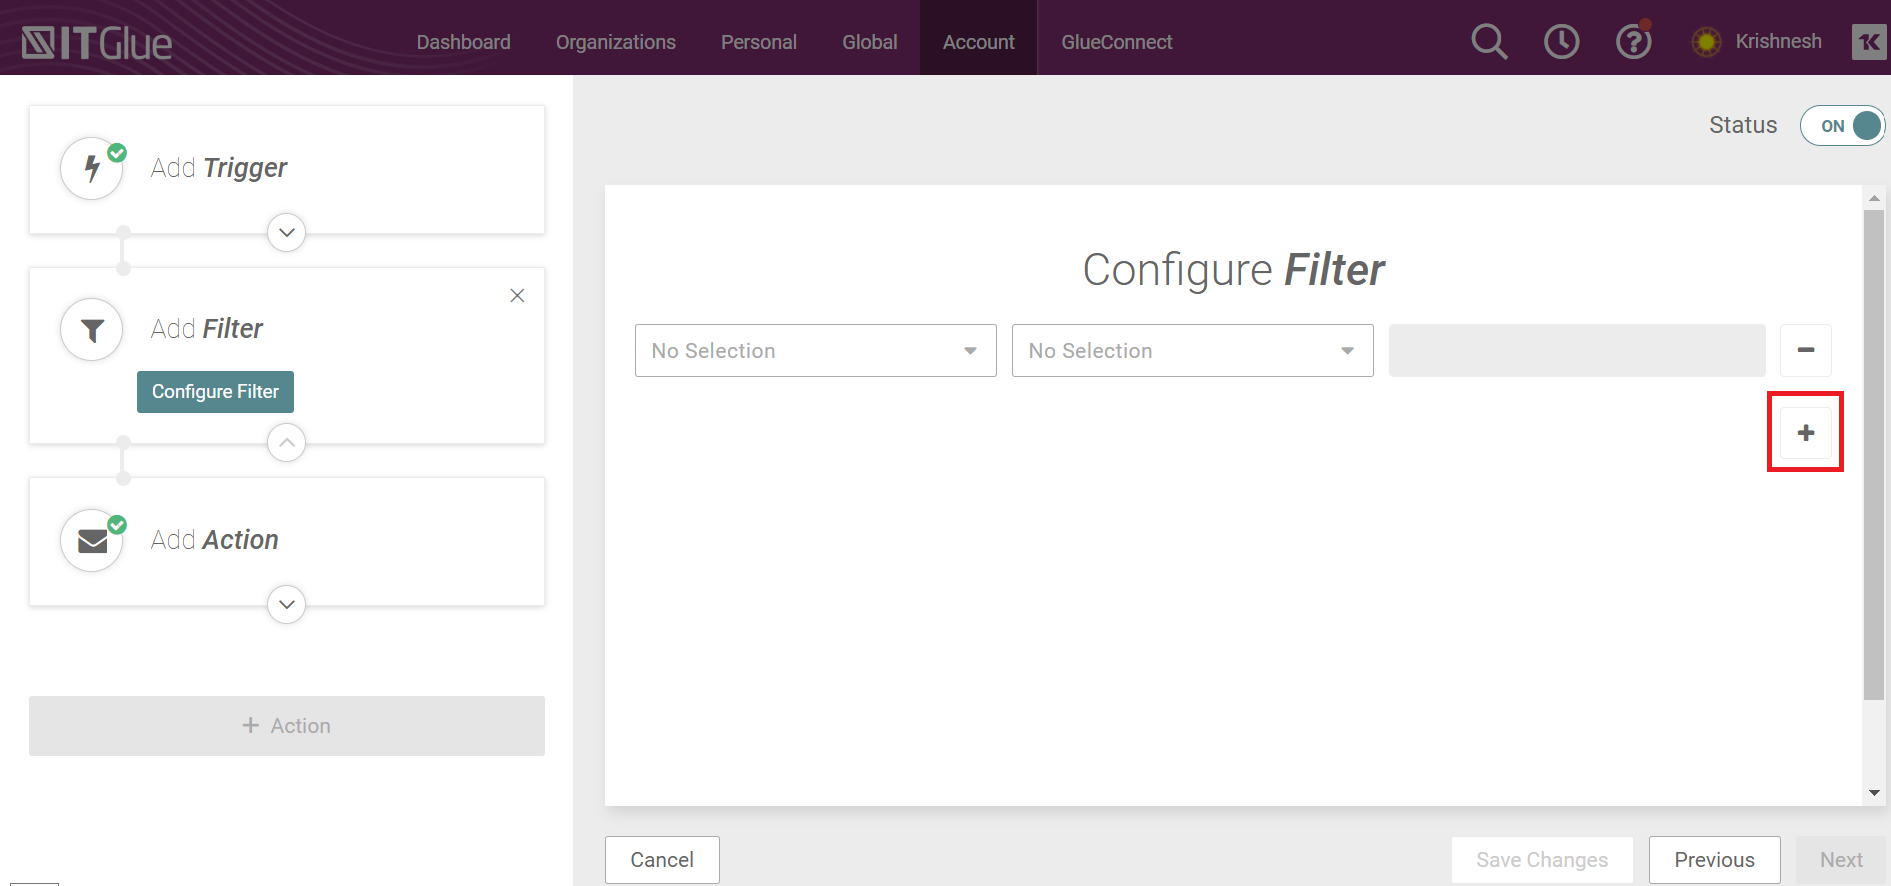
- To add a filter, click the + Filter button (left side of the screen) and select your filter criteria using the drop-downs. To add additional filter criteria, click the plus icon.
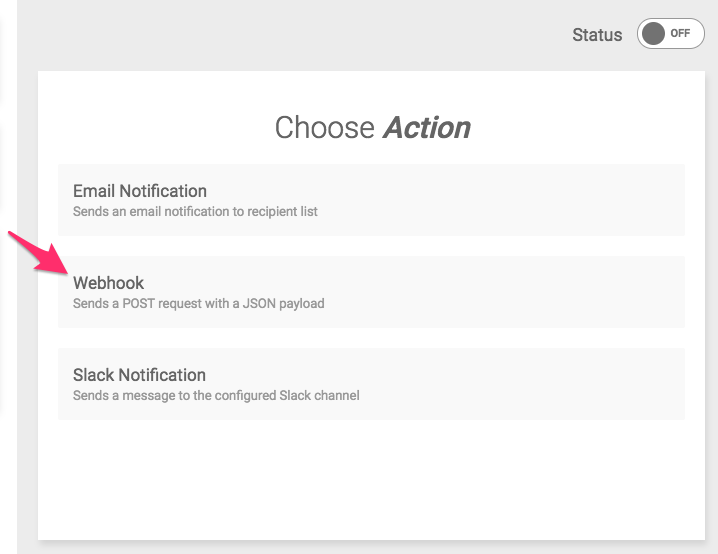
- Click on Webhook.
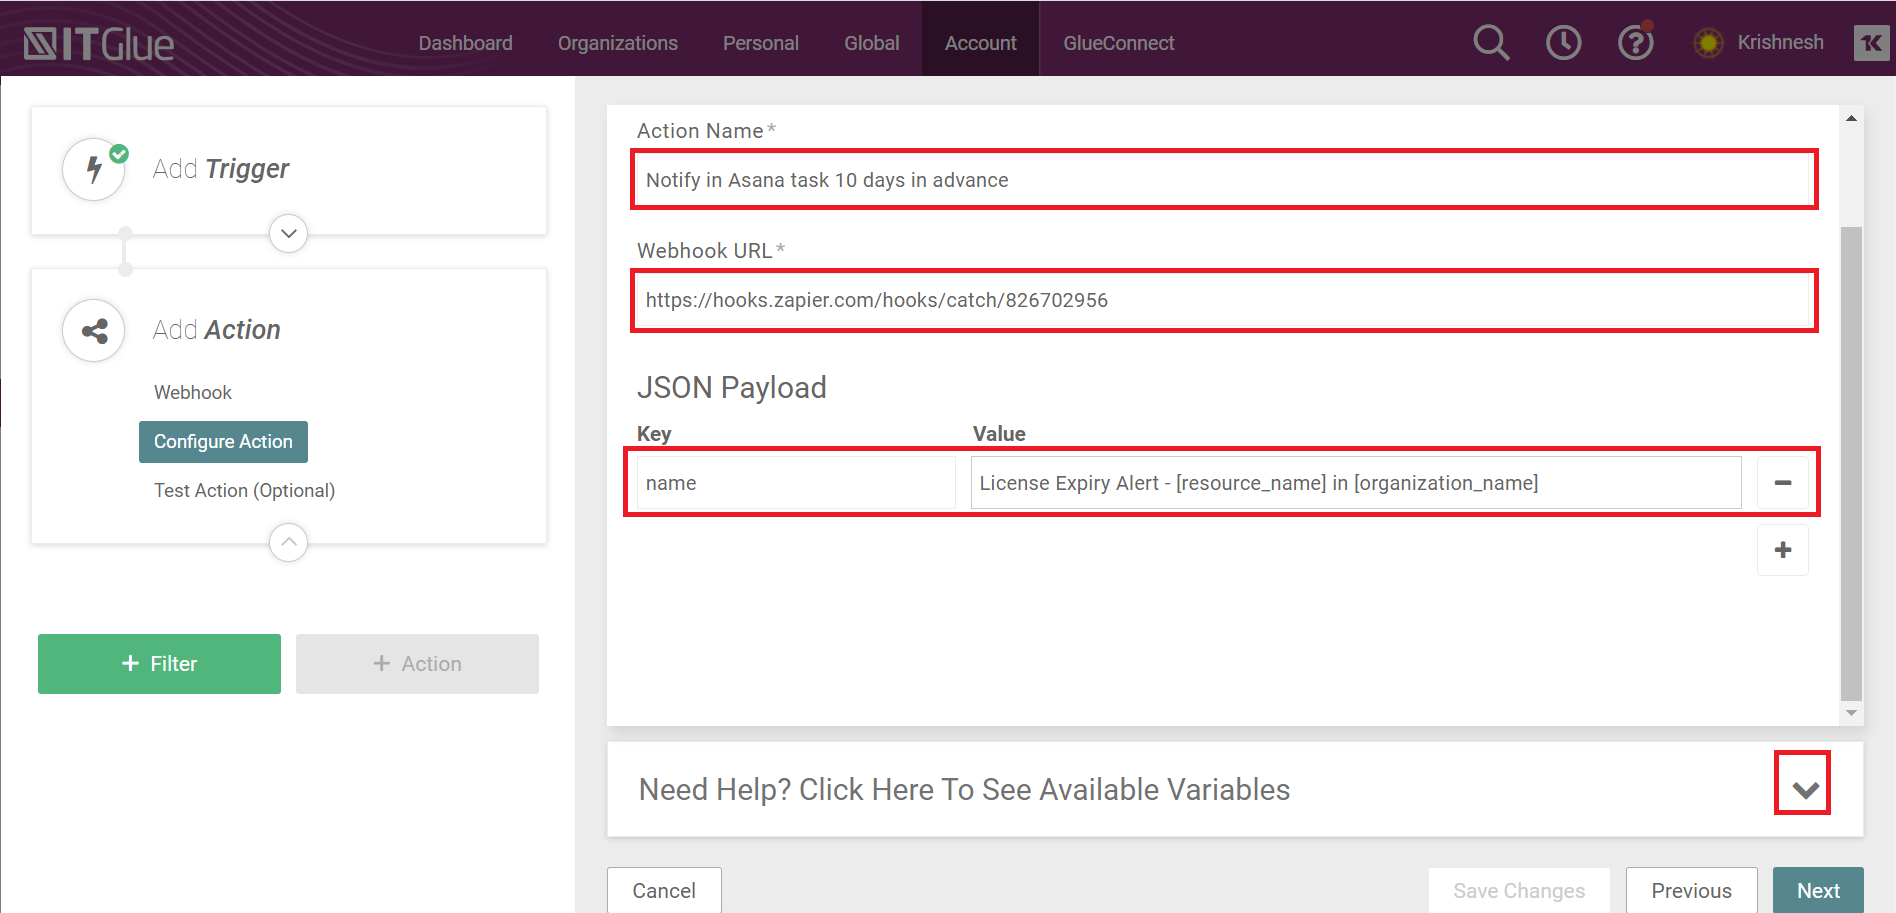
- Configure the action to create the JSON payload that will be passed to the webhook when the trigger condition is met.
- Action Name - Enter a descriptive name for the action (e.g. Notify in Asana task 10 days in advance).
- Webhook URL - Enter the Webhook URL copied from Zapier.
- JSON Payload - Enter a key/value pair. Use multiple key/value pairs to split data across multiple fields (e.g. task name and task notes).
NOTE This key/value pair includes variables that will pull values from the asset that is triggering the notification. The available variables are listed at the bottom of the screen when you click "Need Help? Click Here to See Available Variables".
- Click Next.
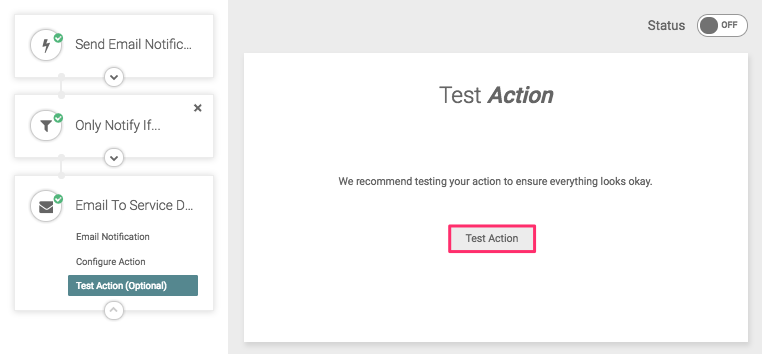
- Click the Test Action button to perform the job your action is set to do with some test data.
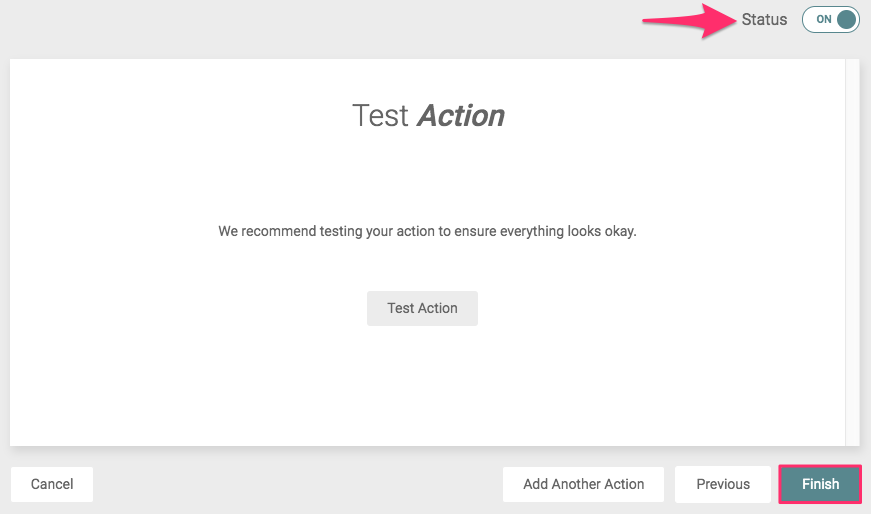
- Turn your workflow ON and then click Finish to save all your changes.
Configuring the Asana action
Now, configure the action in Asana that should occur after a notification is triggered.
- In Zapier, choose Asana as the Action.
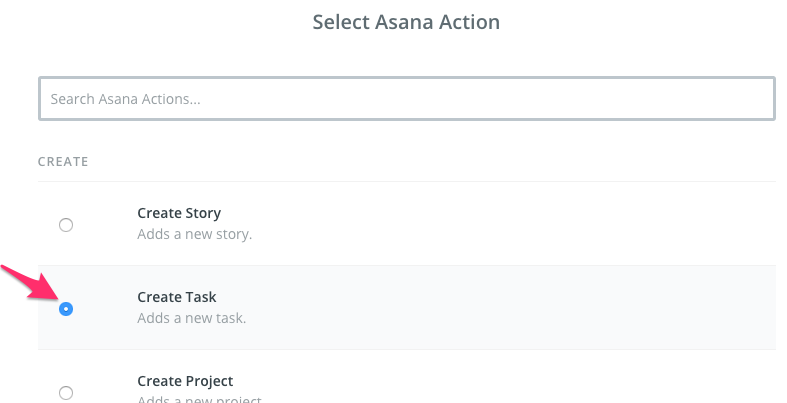
- Then choose Create task as the action and confirm by clicking on the Continue button.
- Select your Asana account and confirm the choice by clicking on Continue.
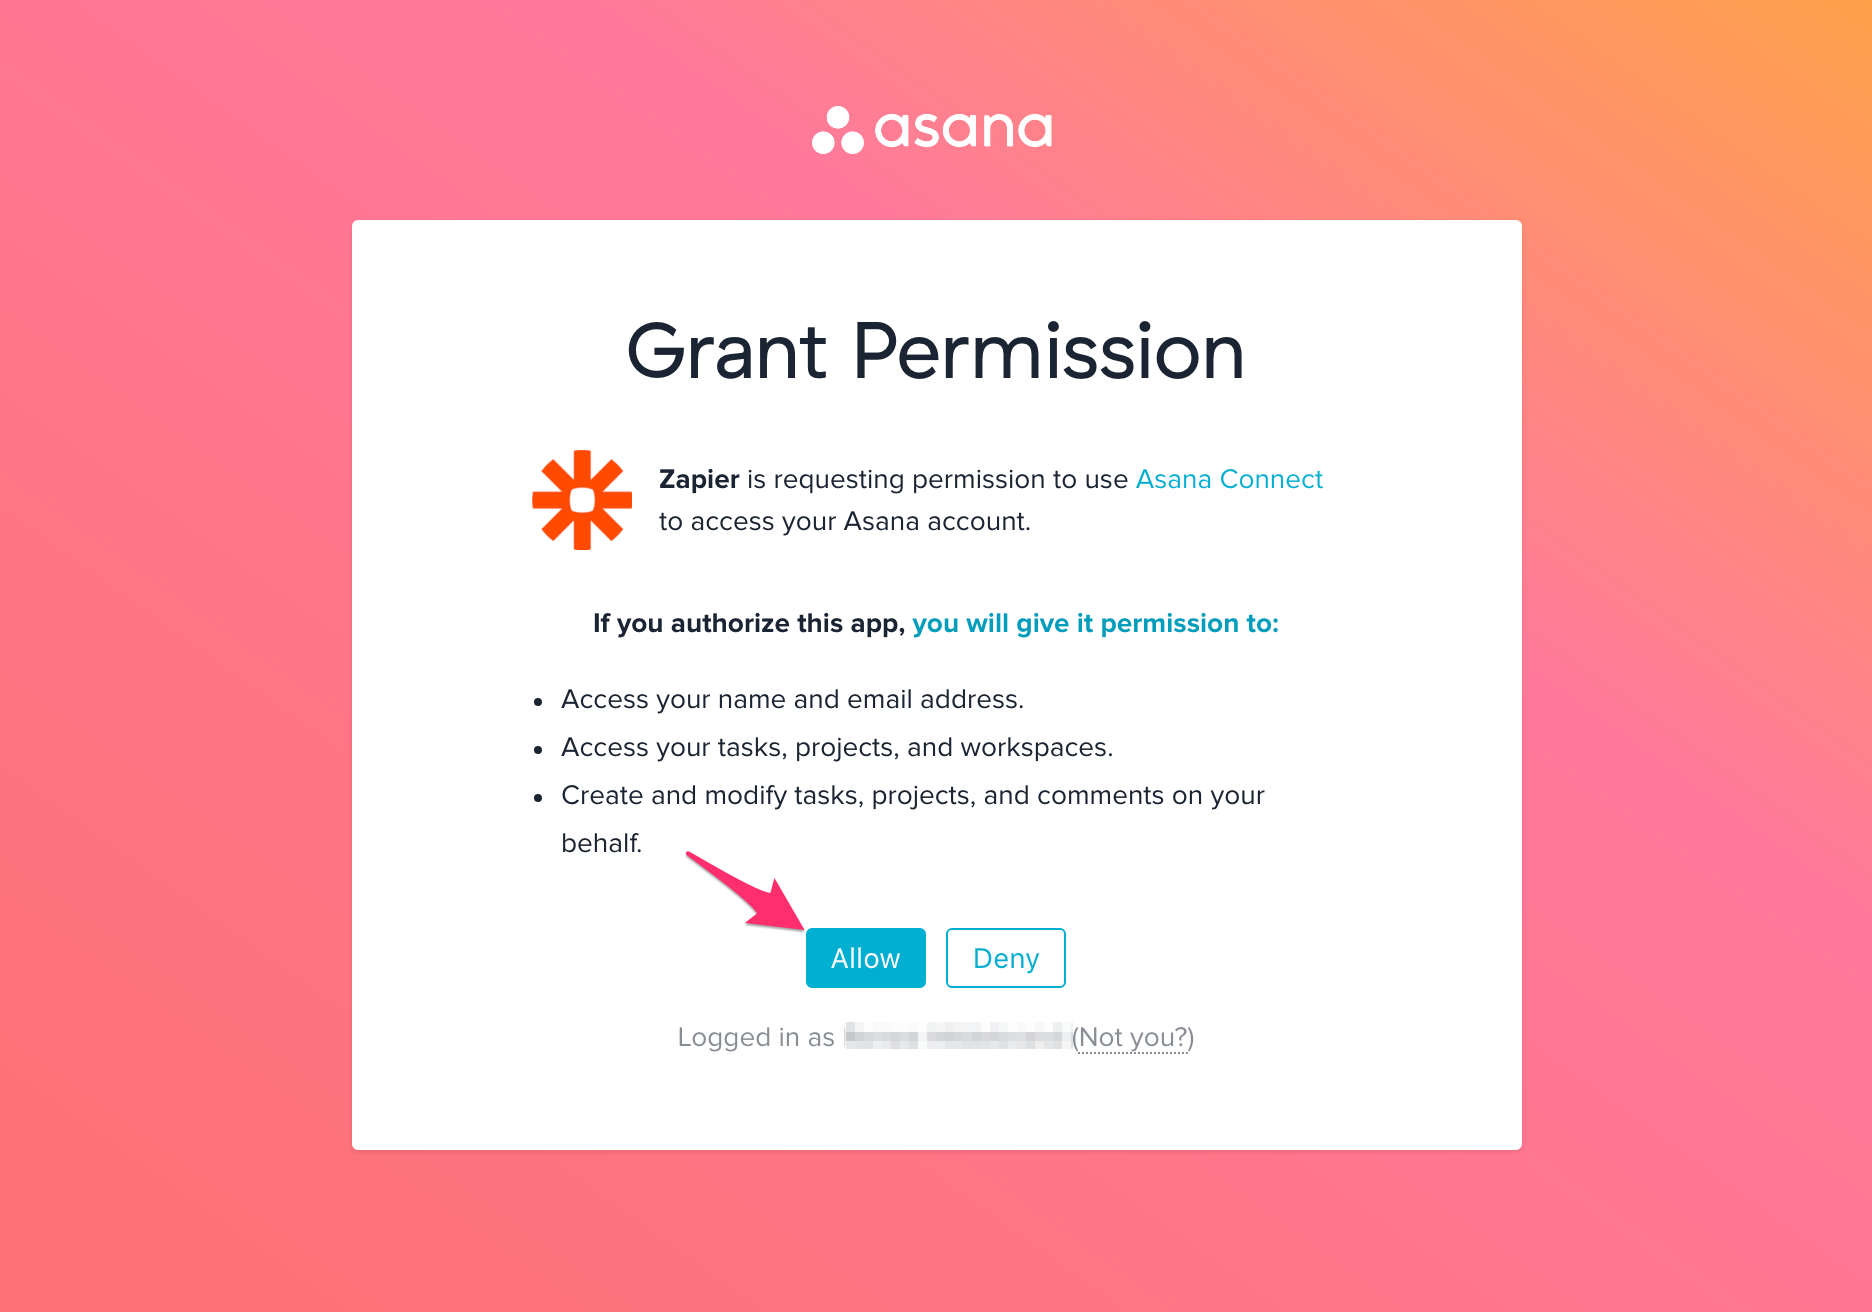
- Grant Zapier permissions to access your Asana account by clicking Allow in the pop-up window.
- Create a template to ‘map’ the information you want to send from the JSON payload to create a task in Asana. Some fields will allow you to populate values from your Asana account (e.g. Workspace/Organization, Project).
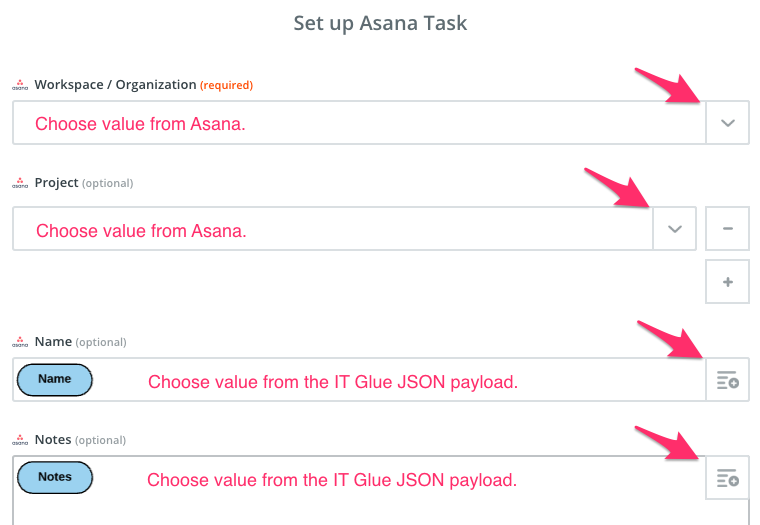
- Click the Continue button at the bottom of the screen. Zapier will ask you to test the zap. Follow the instructions to test that everything is working properly.
- Click on the Finish button.
- Turn the zap on by clicking on the grey switch and to start passing information from IT Glue to Asana. Make sure the notification is ON in both IT Glue and Zapier.
Testing the notification
- In IT Glue, click the Send test button to send a test notification to Asana via Zapier.
- Open Asana and look for the notification. You may have to refresh the Asana browser window to see the new task.
If the notification goes through, the connection has been established.
After turning the zap on in Zapier and the workflow on in IT Glue, your team will start to receive notifications to Asana within the next 24 hours. Note that notifications based on document or password triggers will be sent in real time.
If you ever want to change the Zapier integration, just go to your Zapier dashboard and make adjustments as needed. You can also check out Get Started with Asana on Zapier to learn more about what's possible with a Zapier-Asana integration.


