Integrating with ConnectWise Manage
Introduction
Use this article as a guide when you integrate with ConnectWise Manage. At any time, you can come back to the Active Integrations screen (Admin > Integrations) to make changes to the integration.
The field mappings are set up automatically when you follow the instructions below. For more information, take a look at ConnectWise Manage field mappings.
If you are migrating your PSA or merging to another instance, please contact your Account Manager. Guidance from our team is recommended to ensure this is completed successfully.
Prerequisites
- An SSL connection with a valid certificate (not self-signed) from a trusted authority is required.
- You must have Manager or Administrator access to IT Glue.
- You must have Administrator access to ConnectWise Manage to obtain the public and private keys.
- You will need your Domain Name (FQDN)/cloud URL and your company database ID (for example, mycompany in mycompany.itglue.com).
- You will need to have Role IDs, Levels, Names, Locations, Business Units, and Default Territories setup in ConnectWise Manage.
IMPORTANT For partners with an existing ConnectWise Manage integration that displays an Error/Failed integration status, submit a Kaseya Helpdesk request for guidance rather than attempting to update the credentials.
Instructions
ConnectWise supports two preceding versions from the most current one. Partners that are on older versions may experience issues. To ensure full, expected functionality with your ConnectWise Manage integration and continue receiving support, refer to their documentation on how to update your version of the platform.
- In IT Glue, navigate to Admin > Integrations and create a new integration using the ConnectWise option.
- Complete the fields in the integration setup screen.
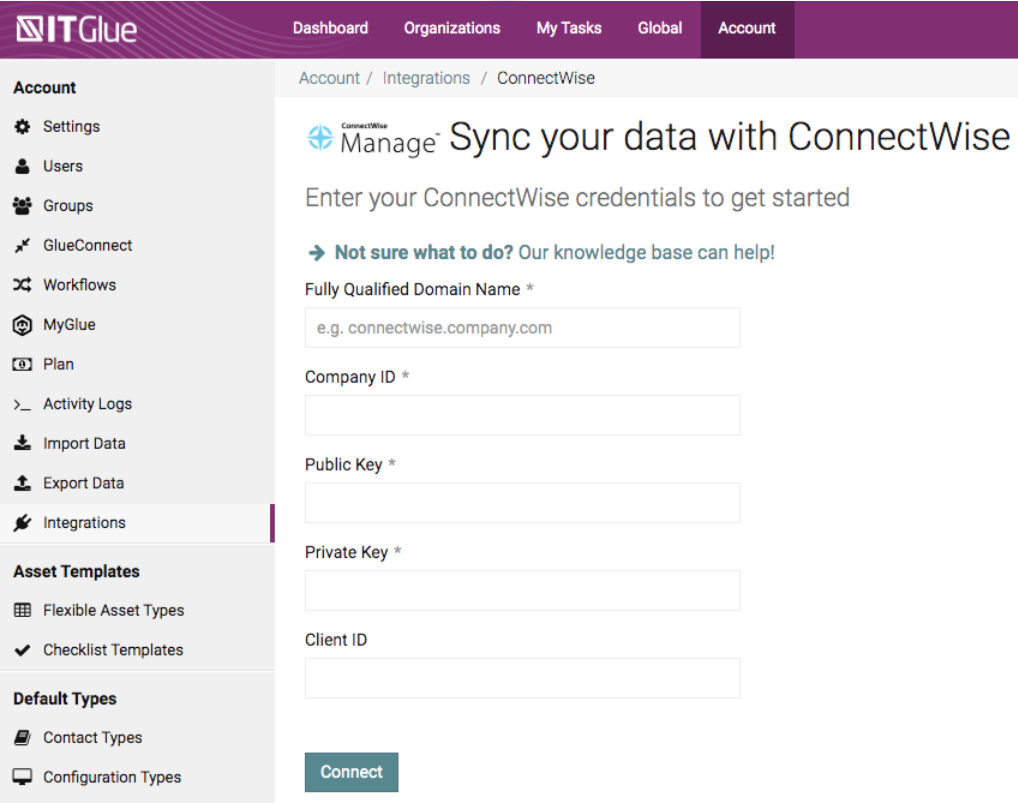
- Client ID: A ConnectWise-based unique identifier value. You can generate your own Client ID from ConnectWise directly here once you have logged in to your ConnectWise account.
- Public Key / Private Key: REST API credentials which include a public key and a private API key. Follow Step 3 below to generate these credentials.
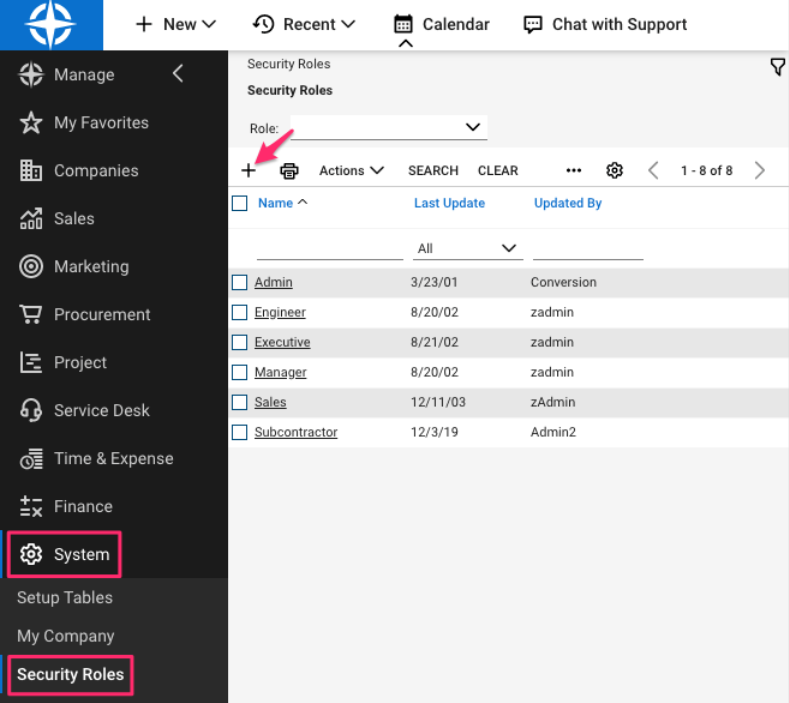
- Log in to the ConnectWise Manage app and navigate to System > Security Roles. You will create a new security role to be used for obtaining the REST API credentials by following the steps below:
- Click the plus icon (+) at the top of the screen.
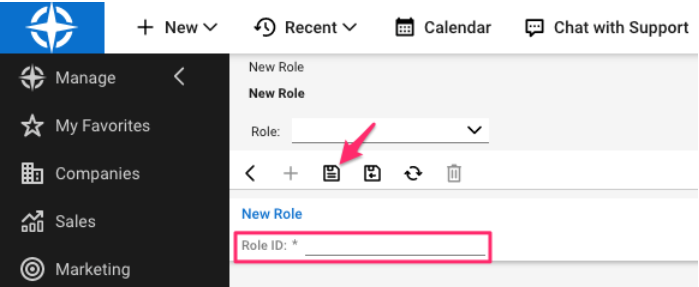
- Enter a name for your new security role (e.g. IT Glue API integration) and then click the Save icon.
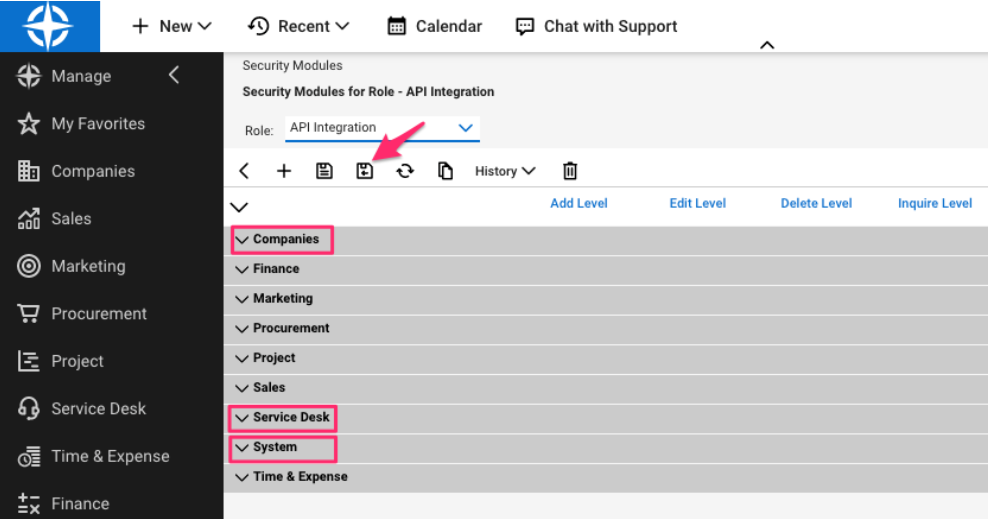
- You will be led to the Security Modules screen. Click the down arrows beside the Companies, Service Desk, and System headings to expand each section.
- In all three sections, replicate the permission parameters exactly as shown in the tables below. To do so, click the down arrows to change the permissions from "None" (default) to "All". The tables below only show the rows that will require editing.
Companies Add Level Edit Level Delete Level Inquire Level Company Maintenance All All None All Configuration - Display Passwords None None None All Configurations All All None All Contacts All All None All Service Desk Add Level Edit Level Delete Level Inquire Level Service Tickets None None None All System Add Level Edit Level Delete Level Inquire Level API Reports All All None All Member Maintenance None None None All Table Setup None None None All - After editing the permissions for each section, click the Save and Close icon.
- Click the plus icon (+) at the top of the screen.
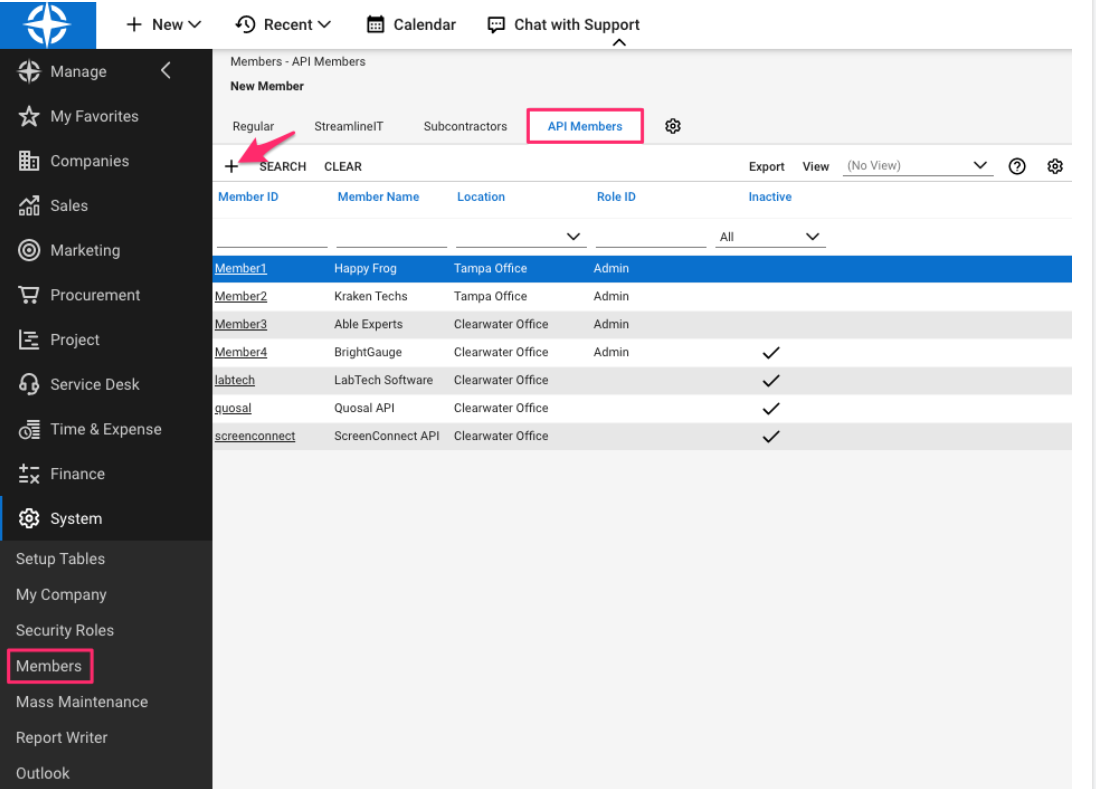
- Navigate to System > Members > API Members tab. Then, click the plus icon (+) > New Member.
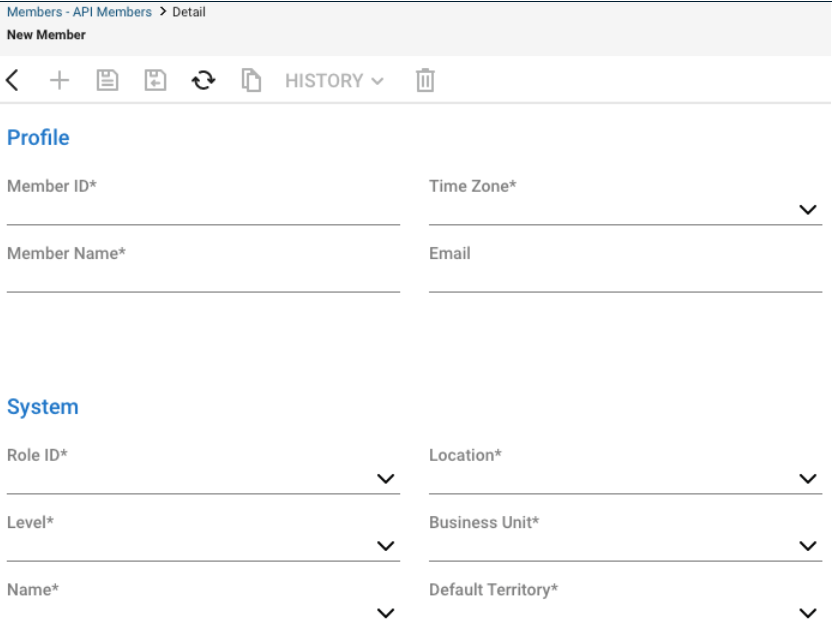
- In the next Details screen, complete the following fields in each section:
- Profile section:
- Member ID - Enter the username of the member (e.g. IT Glue). The maximum number of characters allowed is 15.
- Time Zone - Select a time zone for the internal company. To set up time zones, refer to ConnectWise's documentation here.
- Member Name - Enter the member's first and last name.
- System section:
- Role ID - The security Role ID controls the level of access to the ConnectWise Manage application by limiting access to functionality. Select the new security role that you created in Step 1 (e.g. IT Glue API Integration).
- Location* - Select the default location for the company. Any new record created by the member will default to the location set here.
- Level - Select the level of access that the member will have in the application. The member will be able to search for companies at the specified level and the ones below it. The restriction here applies to tickets for companies outside the location, as well as members.
IMPORTANT We strongly recommend that you select the highest level of access (e.g. Level 1) to ensure that all companies will sync to IT Glue without issue. Selecting a lower level of access may result in some companies not syncing to IT Glue.
- Business Unit* - Select the member's business unit.
- Name - This field corresponds to the Level field above. After selecting a Level, select a specific name associated with the structure level. To setup Name, please refer to ConnectWise's documentation here.
- Default Territory* - Select the member's default territory.
* For more information on how to setup Locations, Business Units, and Territories, please refer to ConnectWise's documentation here.
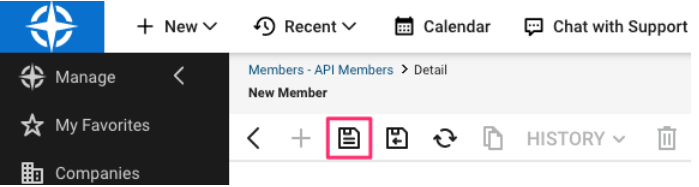
- Profile section:
- In the top menu bar, click the Save icon.
- Click the API Keys tab and then on the plus icon (+).
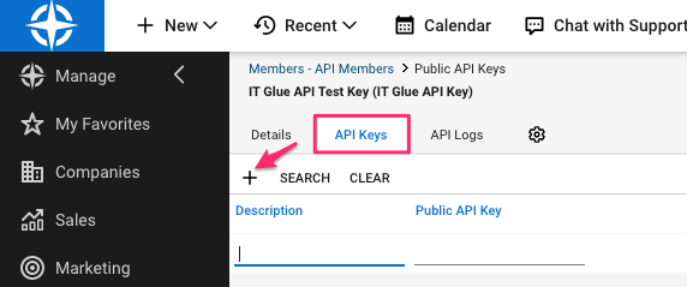
- Enter a description of the key (e.g. IT Glue) and click the Save icon.
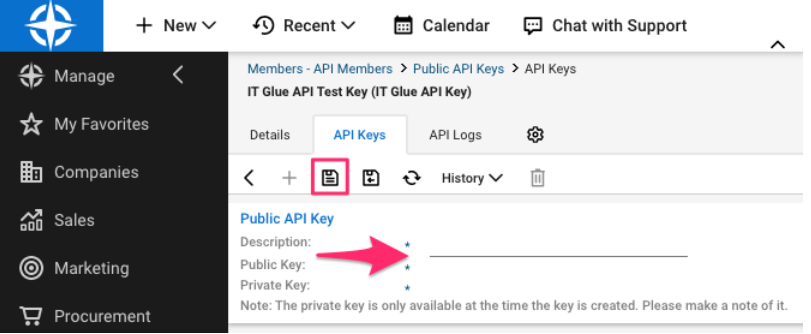
Once saved, the public and private keys will be generated.
IMPORTANT! Keep the private key in a secure location as it will not be visible again after closing the window.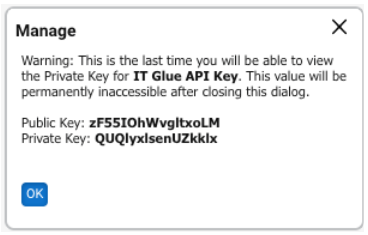
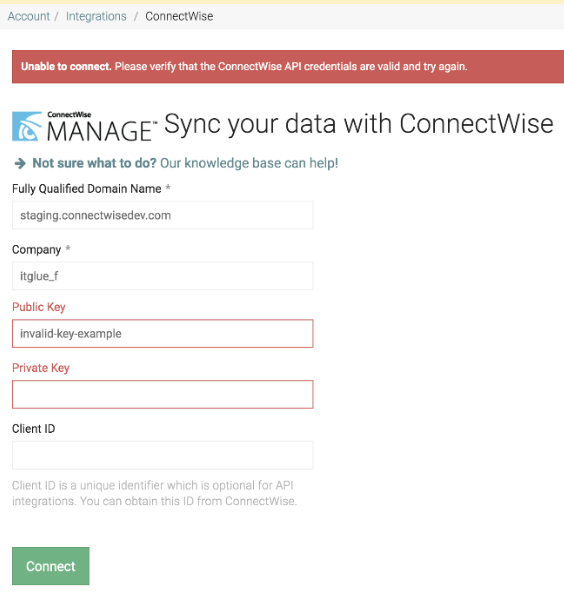
- Then, click Connect. You will be taken directly to the Sync Settings page.
NOTE If your REST API credentials are incorrect, a red notification banner will appear at the top of the screen. Ensure that your credentials have been entered correctly and click Connect again.
- In the Sync Settings tab, tell us how much of your data to sync. By default, recommended options are listed first. As a best practice, we recommend you only select the company types, configuration types and statuses, and ticket boards you actively manage.
IMPORTANT If your ConnectWise companies have multiple types, all types must be checked in IT Glue for these companies to sync. IT Glue will only sync up to 100 Characters for company types.
Optional: In the Sync Mode section, you have the option to “Sync where any company types are checked”. Note that the default option is set to “Sync where all company types are checked”.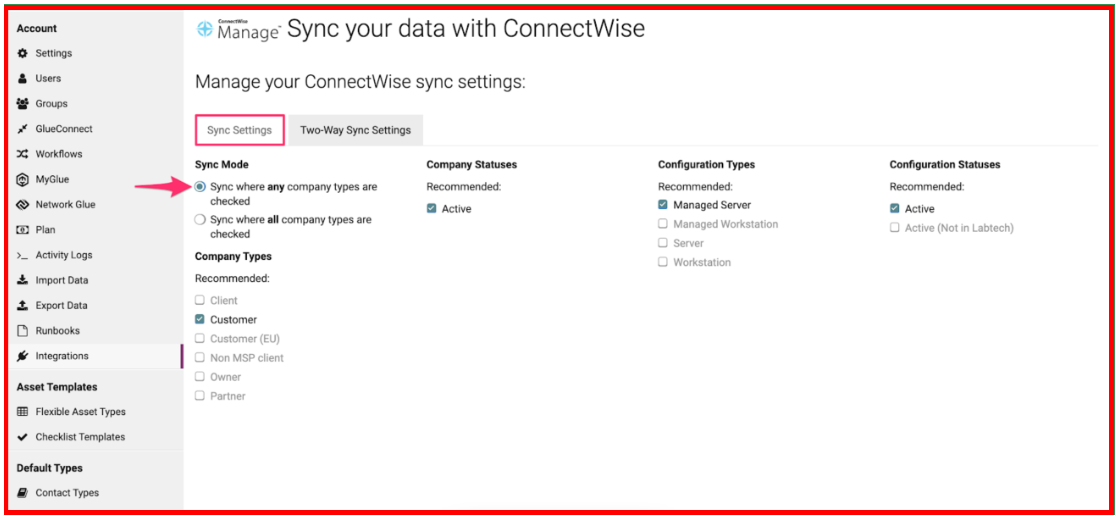
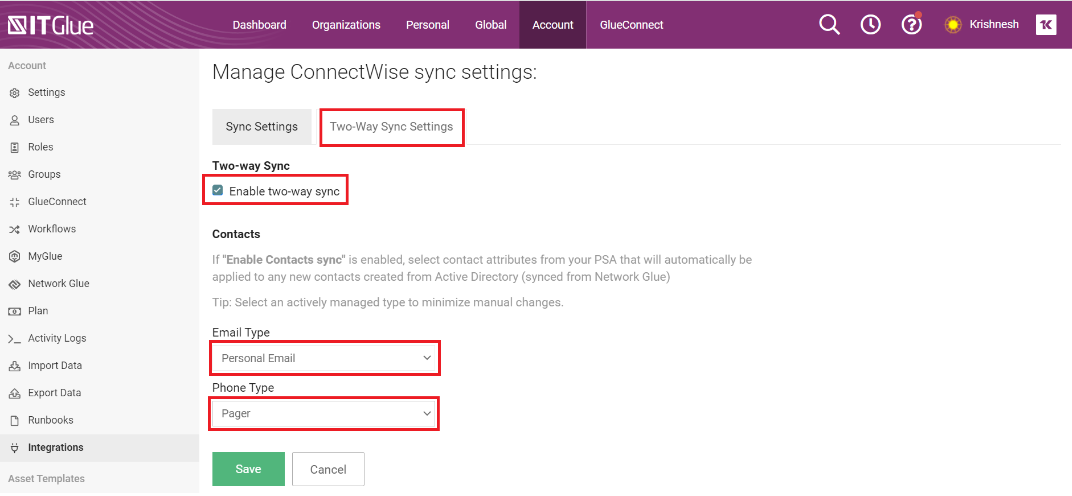
- In the Two-Way Sync Settings tab, review the Enable two-way sync setting. Uncheck this function if desired. For partners with Network Glue and Active Directory enabled, configure your contact attributes so that new contacts created from Active Directory are automatically pushed to your PSA (learn more here).
NOTE If you had existing Organizations, Configurations, Contacts, or Locations populated in ConnectWise that also exist in IT Glue, you must edit and save each asset individually to trigger the two-way sync. Enabling the two-way sync alone will not automatically push these assets.
NOTE If you are switching to ConnectWise or adopting it for the first time, you can complete a one-time push to have all your IT Glue data synced at once. As IT Glue is your single source of truth, this push allows you to quickly sync all your well-documented assets in one go rather than having to manually edit, save, and push each one before completing a sync. Refer to our Pushing all syncable assets to PSA topic for more details.
NOTE With the ConnectWise Manager REST API in place, you can only create configurations in IT Glue and have them sync automatically if the chosen Configuration Type has no required "Questions" set in ConnectWise Manage.
- Click Save. The sync will be automatically queued.
- You can use the manual sync option to prioritize the sync to start sooner. To start a manual sync, navigate to Admin > Integrations, click Actions and Start Manual Sync.
- From the Active Integrations screen, you can see the overall sync status. When the sync is complete, the status column changes from Syncing... to OK.
Note that when you initially set up the integration, you will be shown a list of all licensed user accounts in your PSA on the next screen, so that you can mass invite them to your IT Glue account. We automatically select all PSA users to be invited.
If you don’t yet want to send invitations to everyone, be sure to individually uncheck the boxes next to anyone you plan to invite later or not at all. Next, click the Invite Users button to invite them to join. If you don’t want to invite anyone, you can also skip this step entirely by clicking the Skip link.


