Adding and removing users
Introduction
This topic describes how to add or invite a user to your IT Glue account as well as how to remove them when you no longer want them to have access to IT Glue.
Before you get started, note the following tips:
- User accounts should be created within groups, which are a great way to cut down the work of managing various permissions. For help creating groups, see this article.
- We support inviting multiple users at a time to save you time.
- Each IT Glue user has the potential to be granted access to an unlimited number of organizations, except users with a Lite role who are limited to a maximum of five organizations or sub-organizations.
- Once you’ve invited everyone, you'll have a listing of all your users on the Admin > Users screen, with separate tabs for IT Glue and MyGlue.
Prerequisites
- You must have Manager or Administrator access.
- Managers can create additional user accounts with the same or lower privileges. Only Administrators can create additional Administrator user accounts.
- Want to invite users to MyGlue? See this article instead.
Instructions
Adding and inviting a user
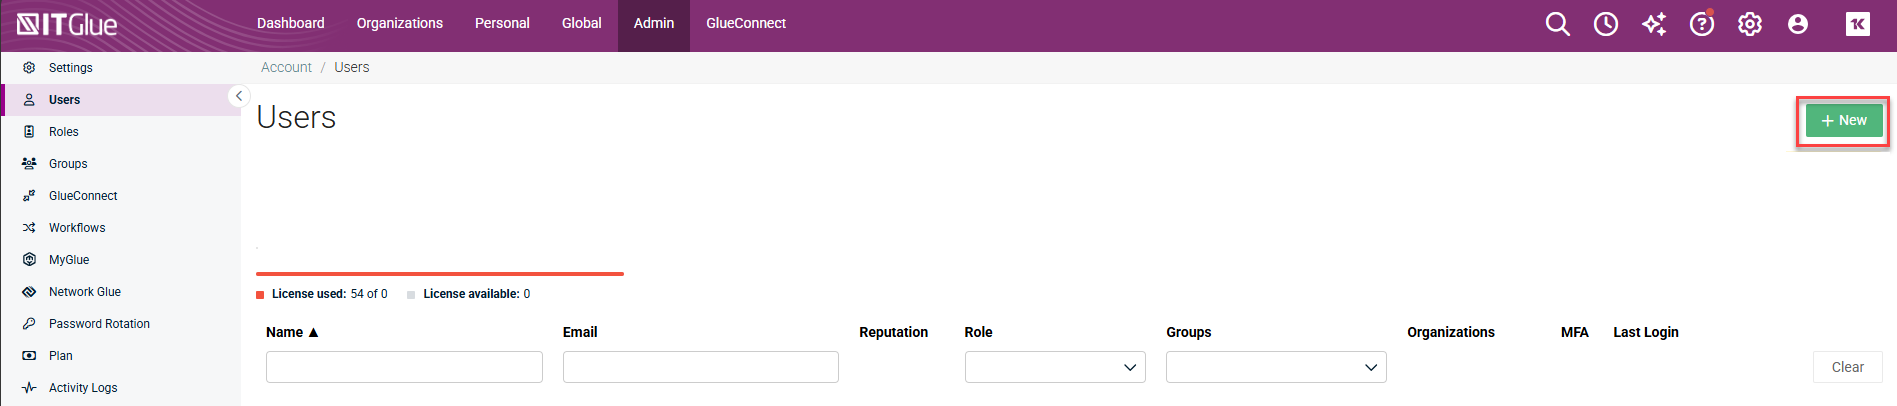
- Navigate to Admin > Users. Click + New in the top-right corner.
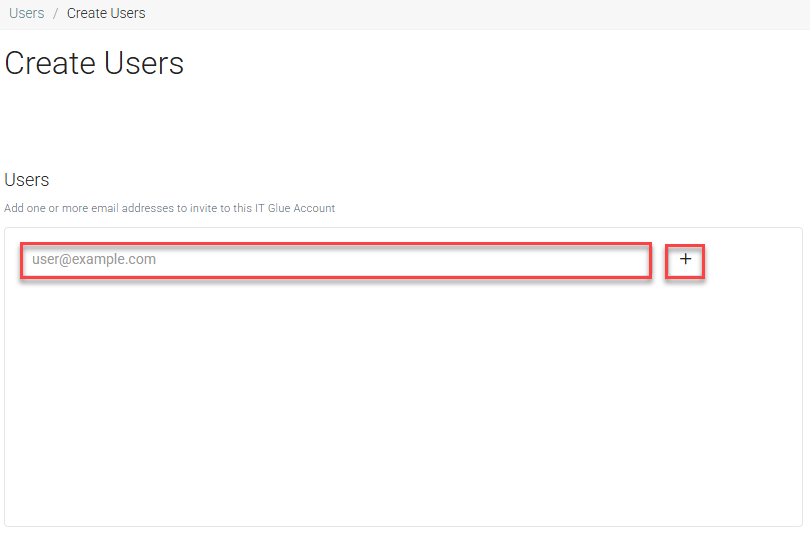
- On the next screen, enter the user's preferred email address and then click the plus sign to add it. To invite more than one person, enter as many email addresses as you want, clicking the plus sign or pressing enter after each one.
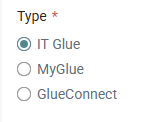
- Leave the Type set to IT Glue.
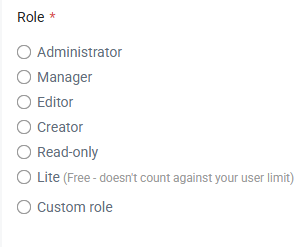
- Choose a role to define the actions the user is permitted to perform.
- Administrator
- Manager
- Editor
- Creator
- Read-only
- Lite (Free - doesn't count against your user limit)
- Custom role
-
Select the IT Glue groups the user will be a member of and the organizations they can access, if not already populated by a group. Organization names populated by a group are grayed out because the permissions are inherited.

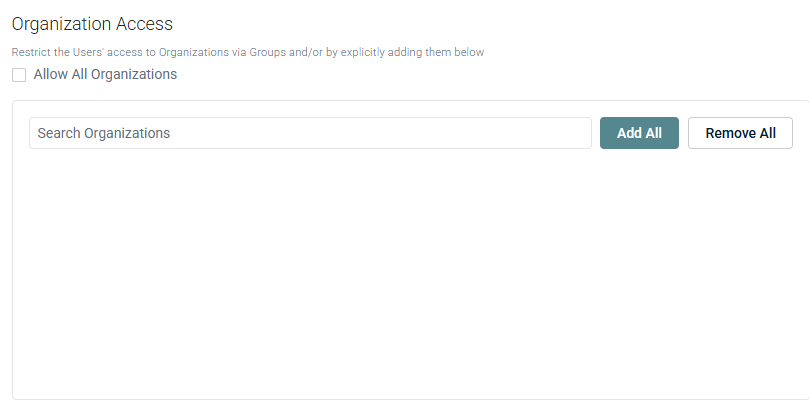
IMPORTANT Each user must have access to at least one organization. Select the Allow All Organizations check box if you want to give the user access to all current and future organizations.
- Click Save.
After you click Save, the user will get an email invitation with a preloaded invitation message. If an invitation link expires, you can resend the invitation.
The new user will be listed in the Admin > Users list by email address. Users with pending invitations display "Invited User" as their username. The Resend Invitation (envelope) icon is also shown. When the user accepts the invitation, "Invited User" is replaced with the user's name and the Resend Invitation icon disappears.
Removing an IT Glue user
- Navigate to Admin > Users > IT Glue.
- Click Delete (trash can icon) in the list view.
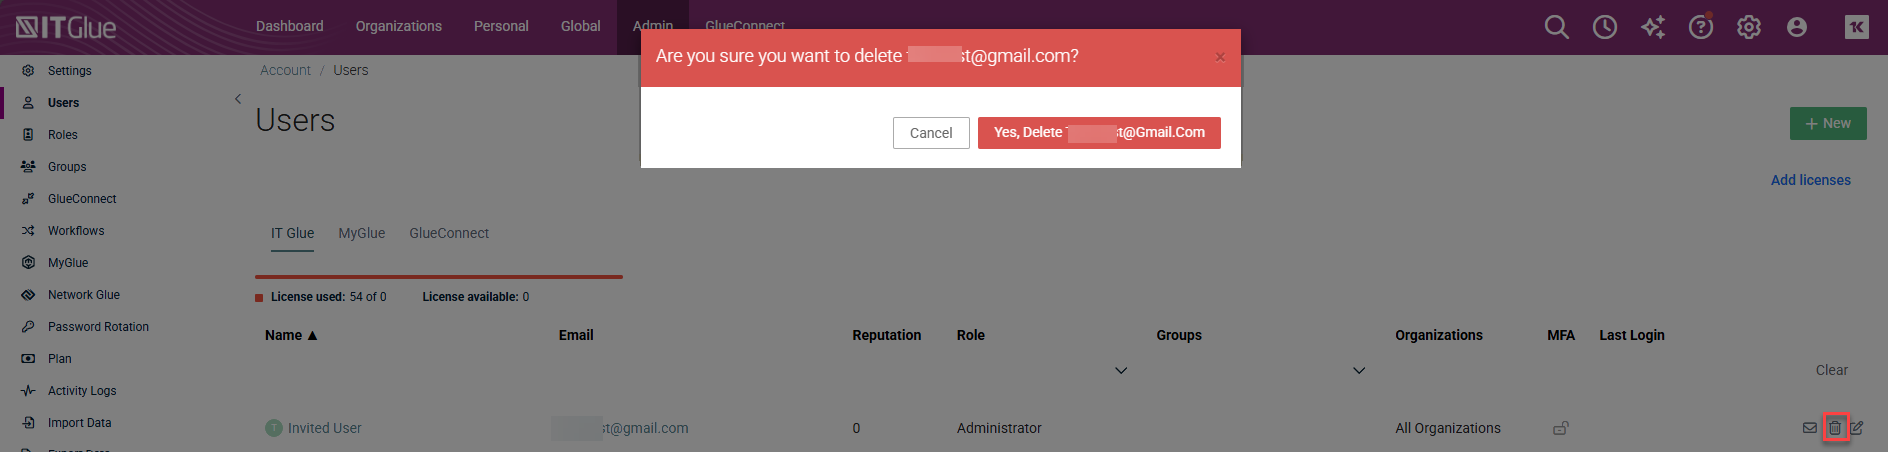
After you click Delete, the user will not be able to log in. Although the user account is deleted, you can still find a record of the user's actions in activity logs.
IMPORTANT If a user can access the Vault and has stored passwords within it, you will need to revoke their access rights before you can delete them post-departure. Refer to our Vault topic for instructions on revoking access. If you attempt to delete them while they still have access and stored passwords within the Vault, a "User could not be deleted because it has one or more dependent records" error will appear.


