Account settings for Managers and Administrators
NAVIGATION Fast path: Log in as a Manager or Administrator and go to Admin > Settings.
A number of account-level settings and services are available for configuration only by Managers and Administrators. Many of these settings are configured when you initially implement IT Glue for your organization.
To access any of the settings described below, log in as a Manager or Administrator and click Admin from the top navigation bar. The Settings screen will load in the main pane.
NOTE Administrators have access to all tabs that are available under your plan, but users with a Manager role only have access to the General, Branding, Authentication, Theme, and Cooper Copilot tabs.
There are nine tabs on the Settings screen.
- General
- Branding
- Authentication
- IP Access Control
- API Keys
- Theme
- Vault
- Offline Mode
- Cooper Copilot
Click the General tab to view or adjust the following settings: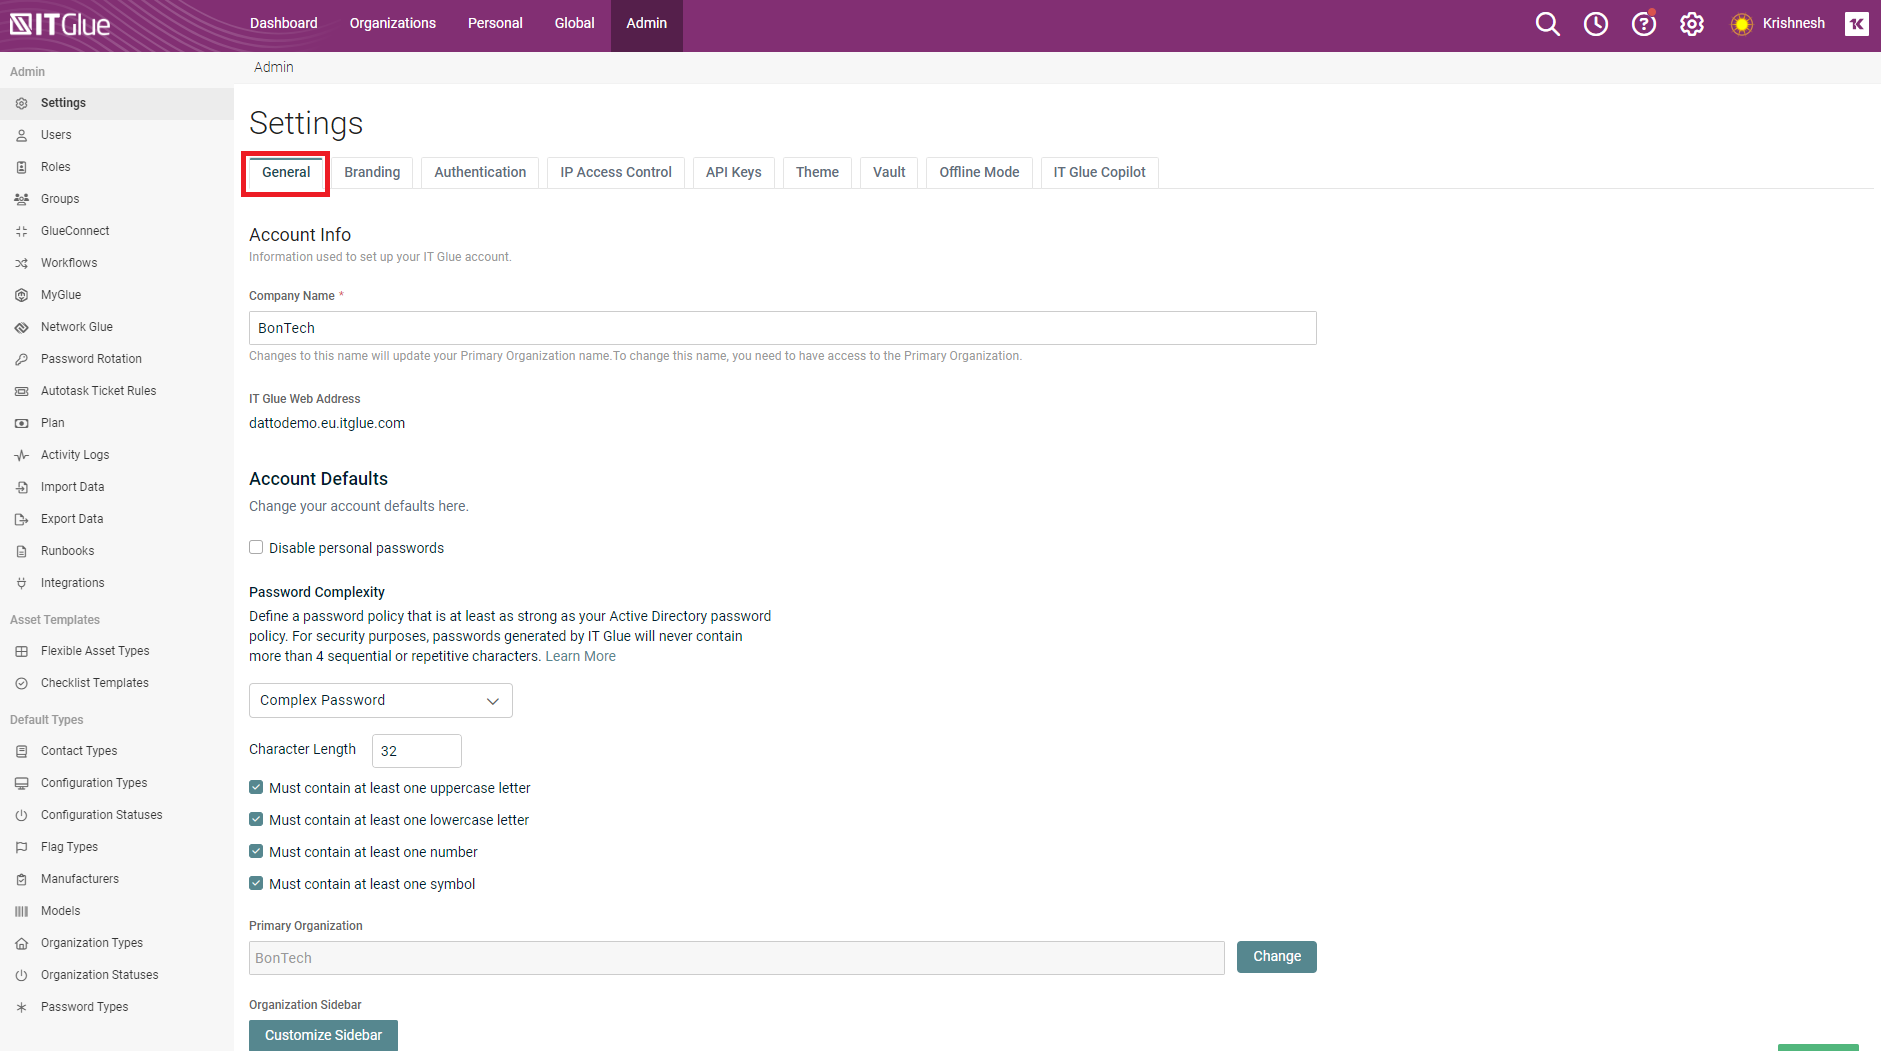
- Use the Company Name field to change how your company name appears in the drop-down menu in the top-right corner of the app and throughout your account.
NOTE Before integrating with a PSA, this name should be entered exactly as it appears in your PSA, so that your company data will sync in to your IT Glue organization. When you sync, a link is created. Afterward, you can change the name in IT Glue.
- The IT Glue Web Address is your account's customized URL ([subdomain].itglue.com). If you need to change your subdomain, submit a support request that includes a time frame for us to make the change for you.
-
Use the Password Complexity section to define the password policy that is equal to or stronger than your Active Directory password policy. For security purposes, passwords generated by IT Glue will never contain more than 4 sequential or repetitive characters. By default you will see Complex Passwords option being selected.
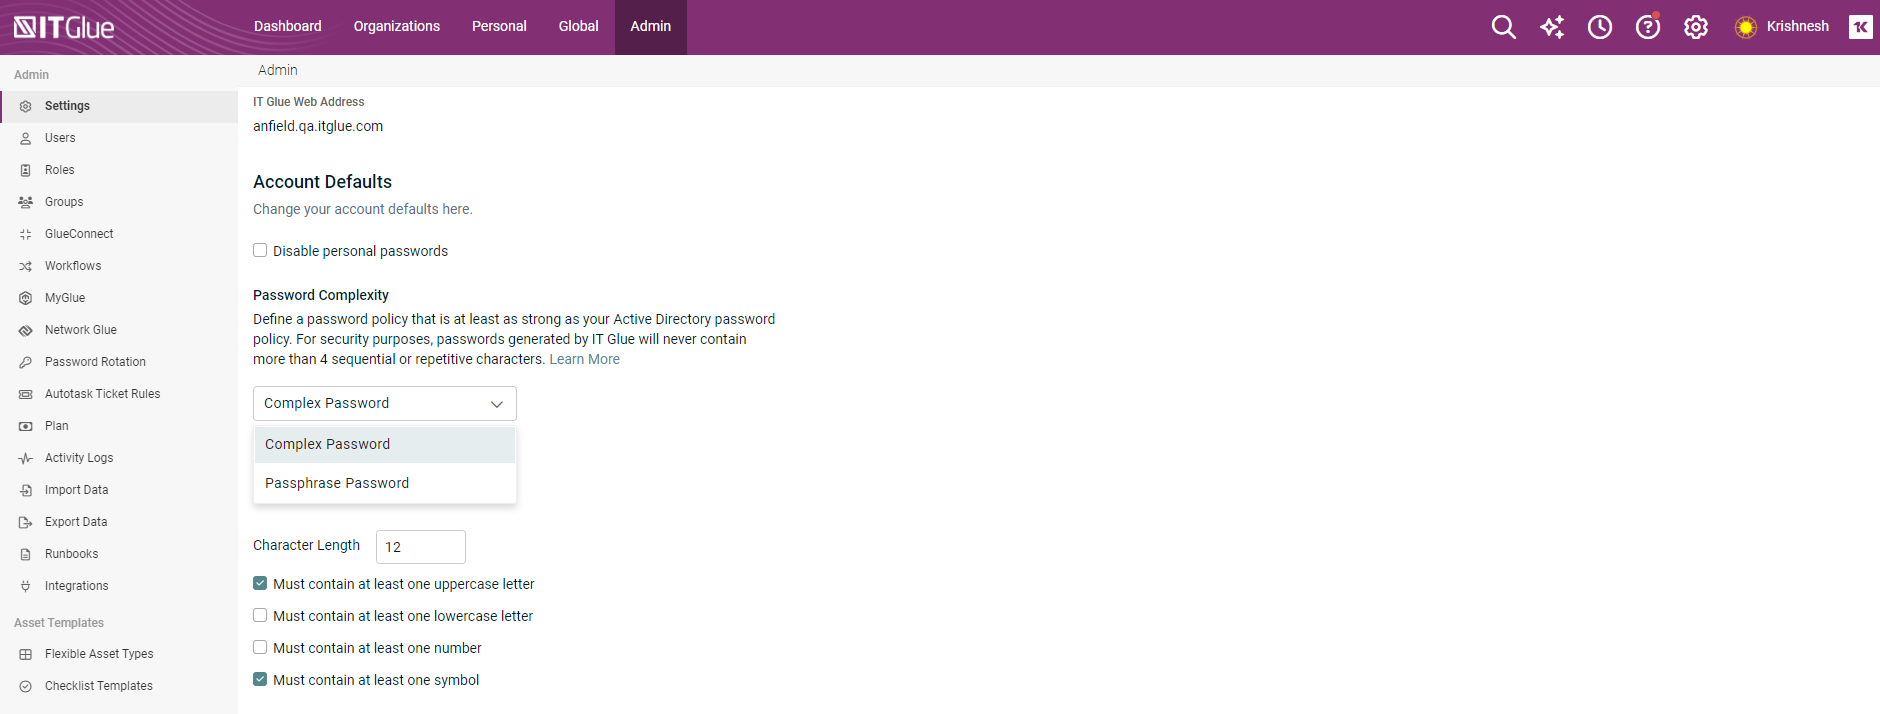
- Specify the minimum character length of a password (between 8 to 256 characters).
- Must contain at least one uppercase letter
- Must contain at least one lowercase letter
- Must contain at least one number
- Must contain at least one symbol
Using Passphrase Passwords
You can also select Passphrase Password from the drop-down menu. When this option is selected, IT Glue administrators will have all 3 “Must contain” settings enabled by default. To reduce password policy complexity, IT Glue administrators or managers can disable any of the three checkboxes as needed.
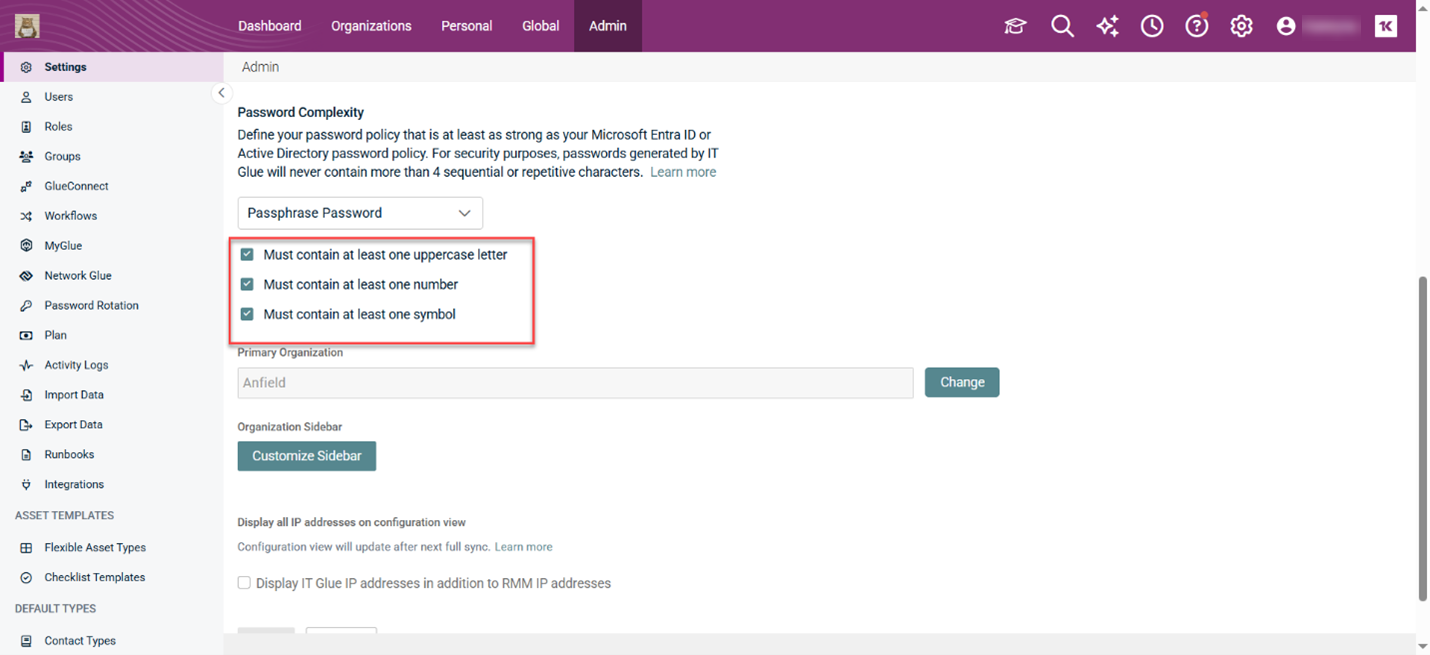
NOTE Once you configure this setting, and click Save, the chosen password policy will apply to all organizations under an administrator’s account.
Changing or editing Passphrase Passwords
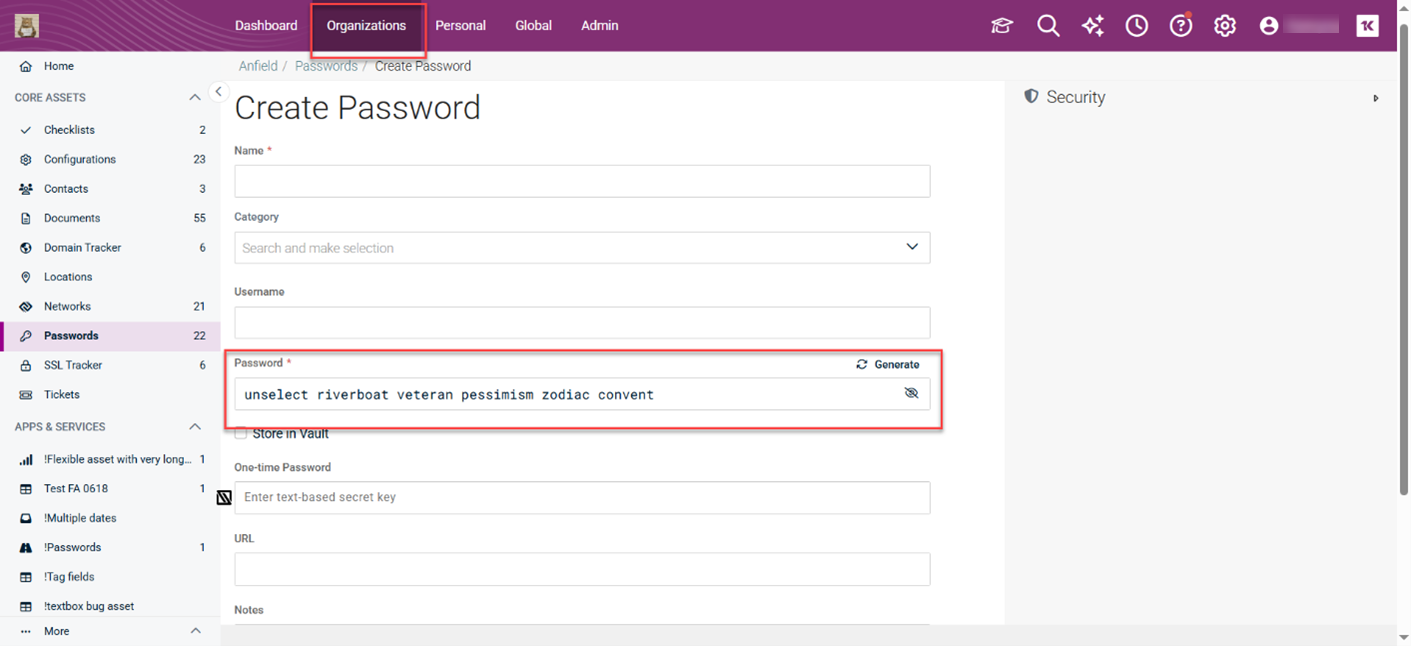
All checkboxes unchecked
If none of the “Must contain” options are selected in the Admin > Passphrase Password settings, IT Glue automatically generates a passphrase consisting of six random lowercase words when you create or edit a password for an organization.
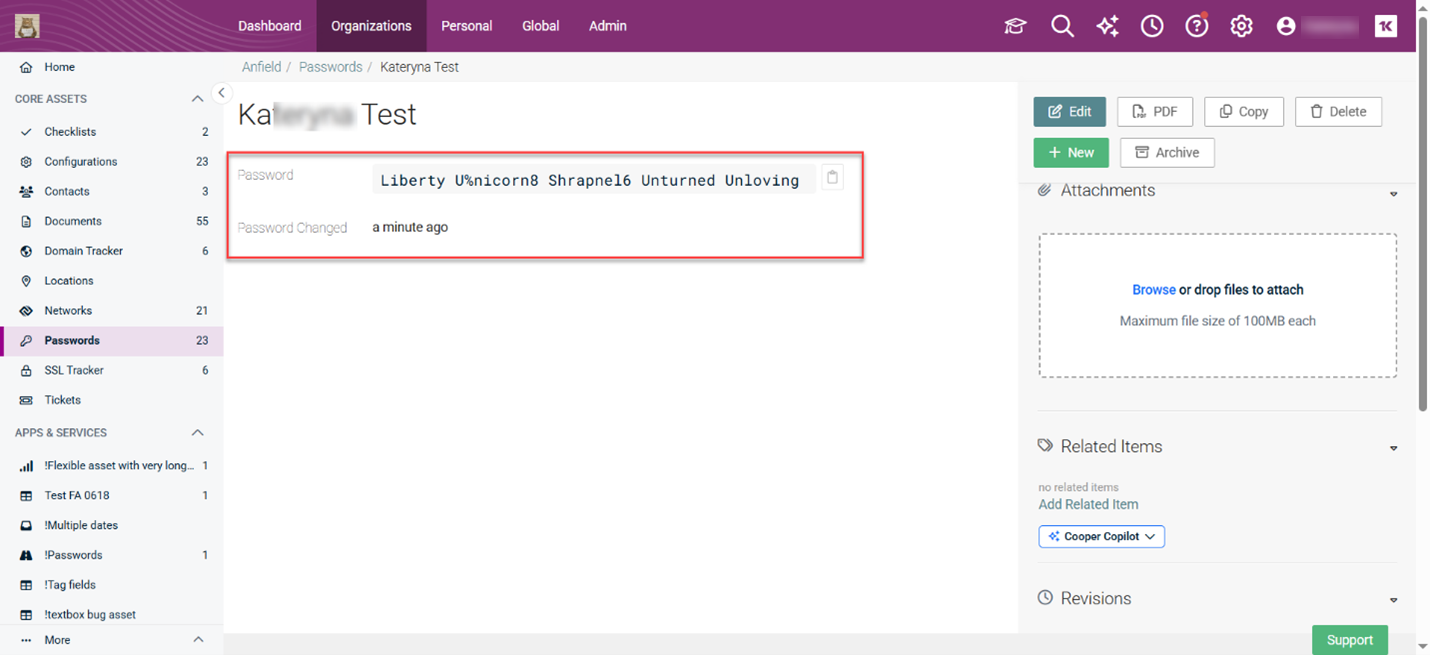
All checkboxes checked
If all “Must contain” options are selected in the Admin > Passphrase Password settings, IT Glue automatically generates a secure passphrase when you create or edit a password for an organization. The passphrase consists of six randomly generated words and includes at least one capital letter, one number, and one special character.
Using Complex Passwords
NOTE Only IT Glue administrators or managers can configure this password type (Complex Passwords or Passphrase Passwords) on Admin > Account Settings. Once any of the options are configured and saved:
- The passwords will be generated according to the administrator’s or manager’s choice when you go to your passwords and hit Generate. So, your password will consist of either six randomly generated words or complex passwords.
- The setting will apply to all your organizations run under this account.
- The password generator options bring levels of entropy that make orders to a great extent more secure than ever before.
NOTE Complex passwords are protected by 96.3 bits of entropy and passphrase passwords are protected by 63.6 bits of entropy.
Note on Complex password default character length
- If an existing customer has more than 15 characters being selected as a password character length, this length will be retained in the security policy.
- If an existing user had less than 15 characters as the length for the password, then they will see 15-character length as the default value when the complex password option is set.
- For new users, the default value is always 15-character length for the password.
- When the complex password option is enabled, but none of the “must contain at least one” options is selected, then such passwords will be generated according to the basic character length and random complexity.
NOTE The Password policy enforcement feature covers all general, embedded, and personal passwords. It also covers My Glue. All MyGlue and IT Glue extensions and IT Glue mobile apps support policy enforcement.
-
The Primary Organization is automatically set based on the company name used to create your account and you shouldn't need to change it.
- In the Organizations Sidebar section, pay special attention to how you configure the sidebar, so that you are helping your team navigate your account to find the information you want them to see.
- You can select the Display IT Glue IP addresses in addition to RMM IP addresses checkbox. If the IP addresses that are in your account are out of date, you may want to leave this box unchecked to show only the IP addresses from your RMM. For more information, see What does the 'Display IT Glue IP addresses...' checkbox do?
This option is only visible on RMM integrated accounts.
For partners subscribed to the current Enterprise plan.
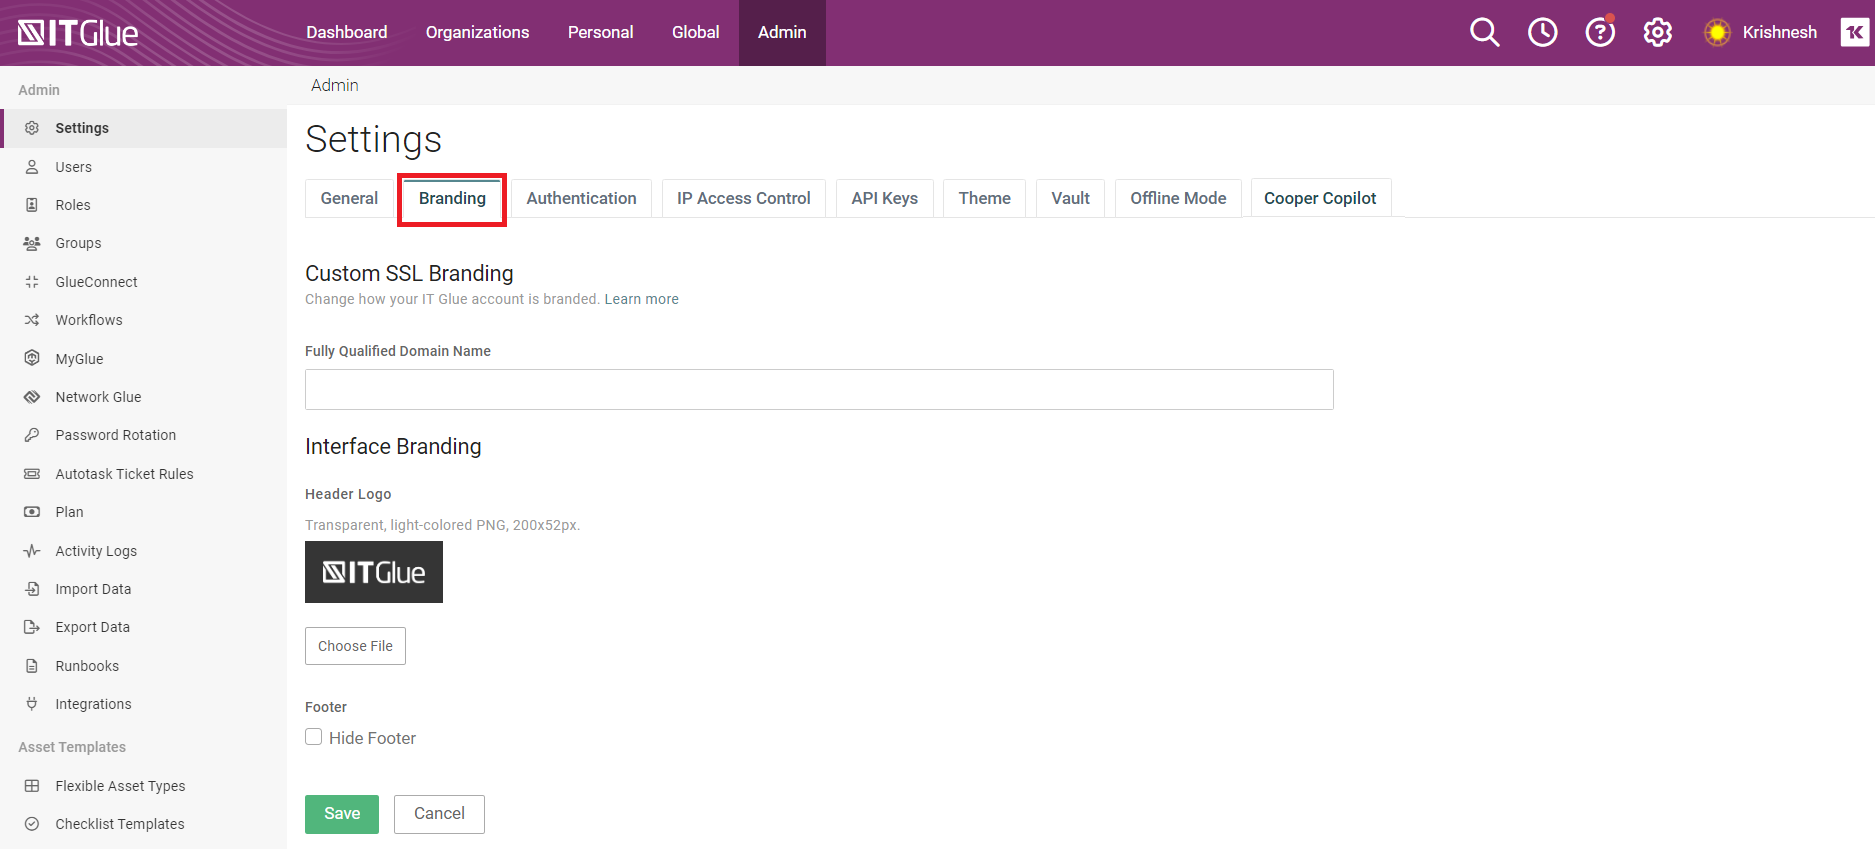
On Enterprise plans, you can configure your own Fully Qualified Domain Name (FQDN) to support Custom SSL branding, add your logo using the Header Logo uploader, and select the Hide Footer checkbox to remove the IT Glue footer that's at the bottom of every screen.
The logo displays at the top-left of each screen and on all public facing documents. To upload your own logo, make sure the logo meets the following requirements:
- PNG format
- Maximum dimensions: 200 x 52 pixels
- Recommended: Light colored logo in a transparent container to preserve the visibility of the logo
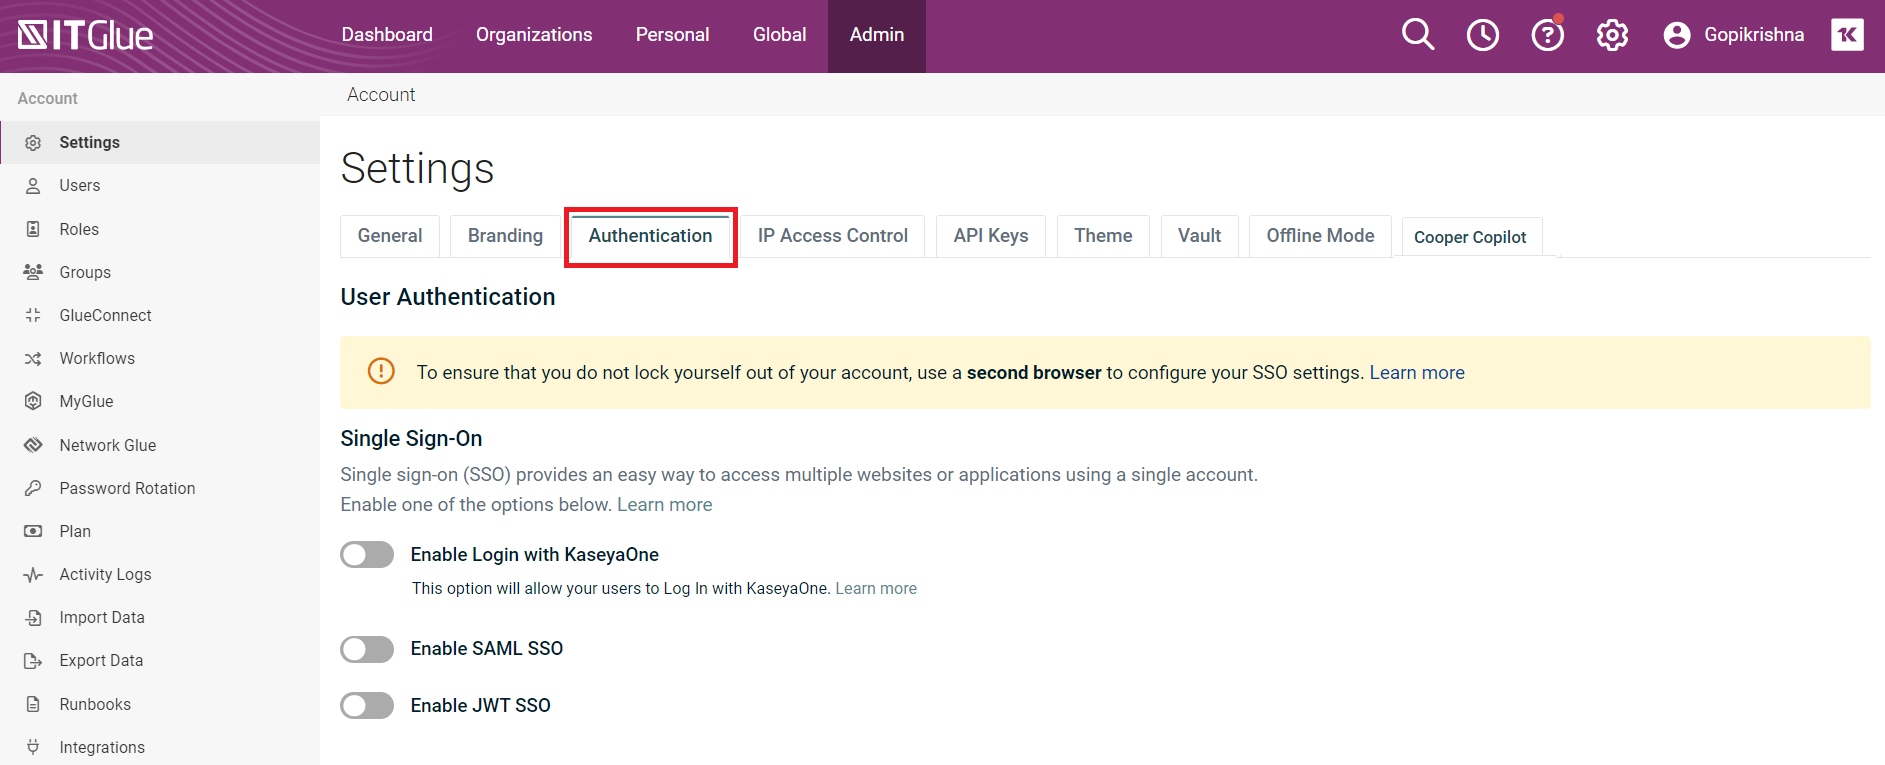
The Authentication tab is where you can make changes to how users authenticate to your account:
- Under Single Sign-On (SSO), you can configure:
- Enable Login with KaseyaOne
- SSO with SAML (Security Assertion Markup Language)
- JWT (JSON Web Tokens).
This option is only available on Enterprise plans.
The IP Access Control tab is where you can create an allow-list.
-
Select Allow specific IP addresses radio button and enter the IP addresses you wish to allow access to your account. You can add individual addresses or IP ranges in CIDR notation.

-
Enter multiple IP addresses or ranges in one go by separating entires with a comma or space:
NOTE At this time we allow a maximum of 200 single IPs or range entries to your allow-list. You will be notified if you attempt to exceed the limit.
For partners subscribed to the current Enterprise plan.
API keys can be managed by end users with an Administrator user role. Two different kinds of API keys can be generated:
1. Warranty Master - To integrate with Warranty Master, see Integrating with Warranty Master.
This option is only available on Enterprise plans.
2. Custom API Keys - You can generate one or more custom API keys for use with the IT Glue API. This provides more control by allowing you to use different keys for different integrations. For security, an optional Password Access setting is provided for each API key. Password values can be accessed from the Passwords API only if this setting is enabled. This option is only available on the current Enterprise plan.
Make sure you keep your API keys as passwords in IT Glue, or another safe location, and revoke them if compromised.
IMPORTANT You cannot view an active key again after it has been generated. Once you leave this screen, the full API Key will not be displayed again.
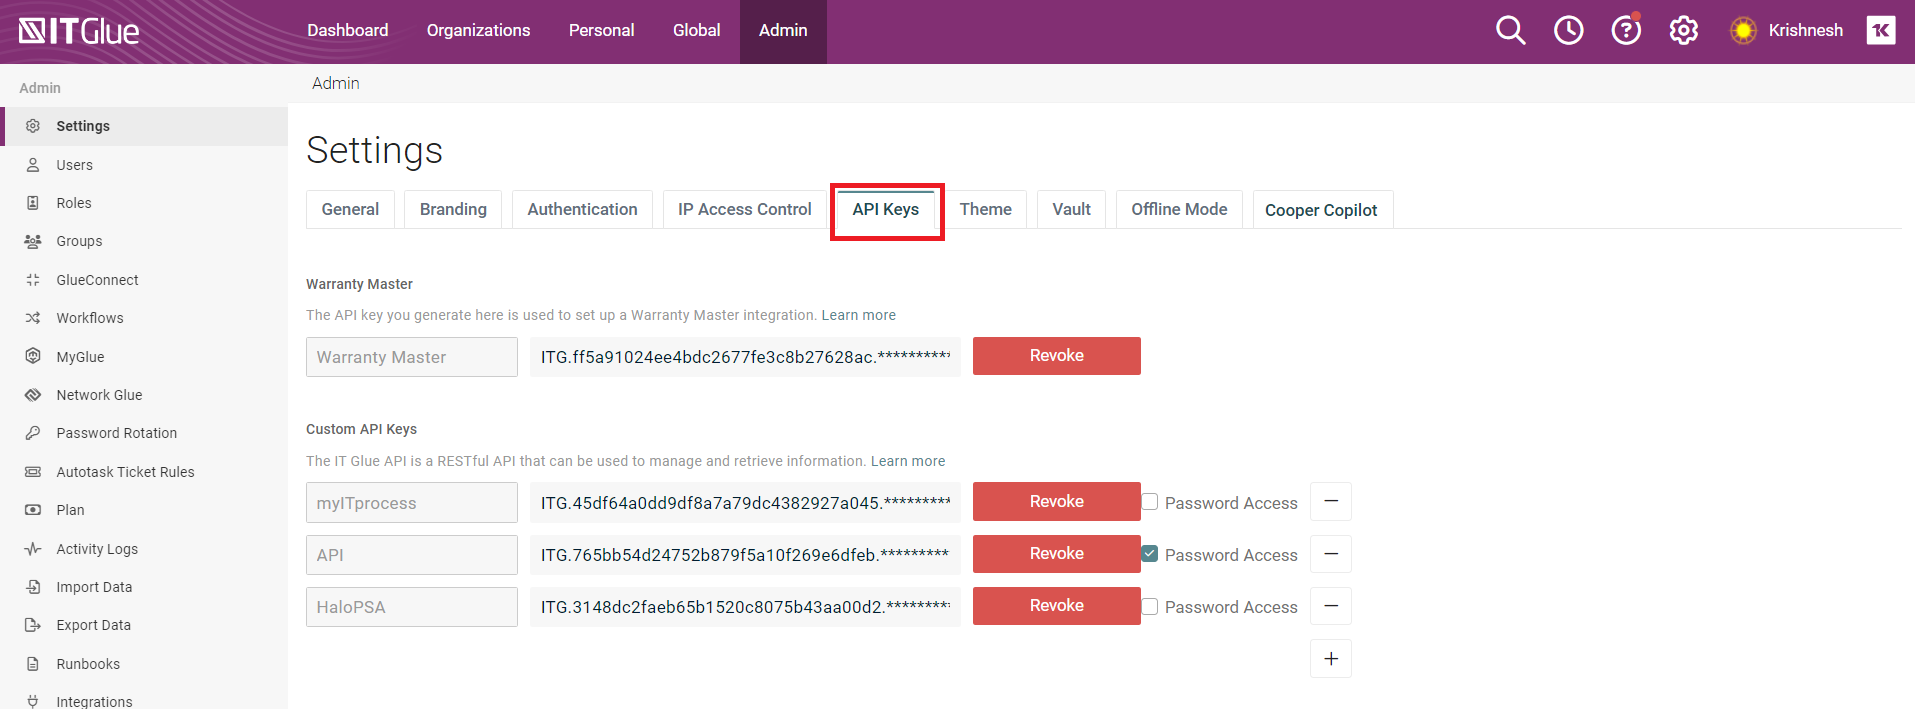
For help using the IT Glue API, see Getting started with the IT Glue API.
New IT Glue partners and partners that are not using interface branding will see a purple-themed navigation bar by default. Partners that are using interface branding will continue to see the Classic theme navigation bar by default.
Both Administrators and Managers can change the color theme of IT Glue. To change themes, simply click the radio button beside the desired option.
IMPORTANT Custom interface branding is not available on the IT Glue log in page if the account-wide theme is set to Default or Dark themes. To ensure that your end users see this branding on the log in page, select the Classic theme by following the steps in this KB article. Then, have your end users follow the steps in our Edit your profile topic to select any theme they wish to apply to their user account.
- Log in to your IT Glue account and navigate to Admin > Settings.
- Click the Theme tab.
- Click the toggle switches to preview the Default, Classic, and Dark themes.
- Click Save to apply your selected theme immediately.
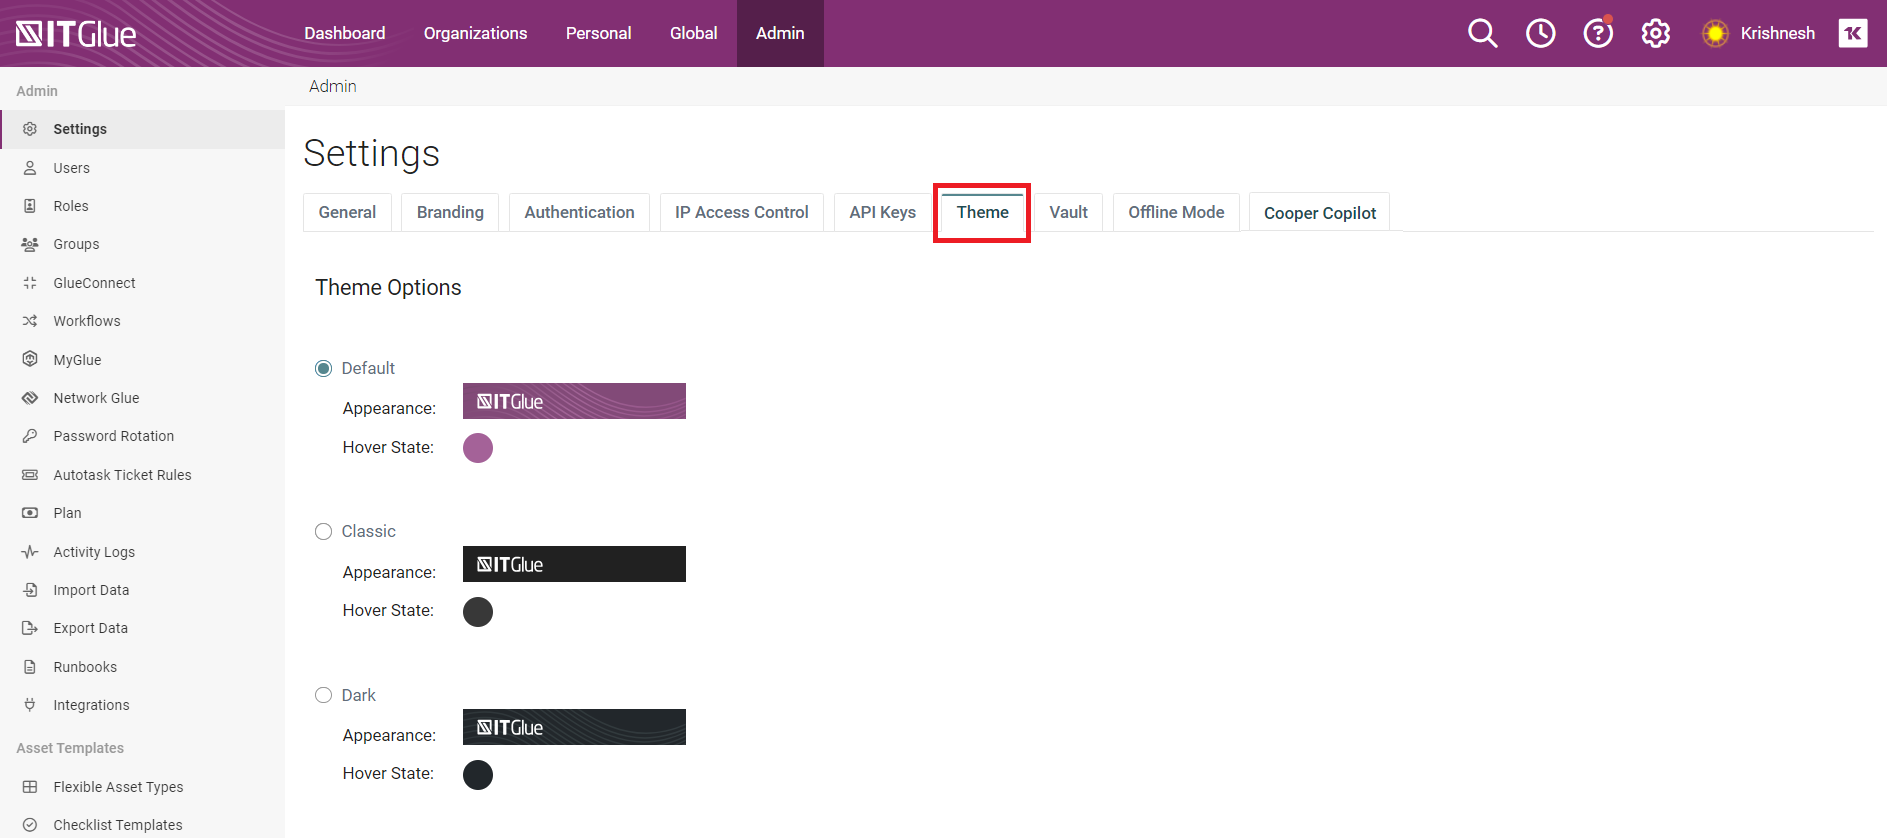
NOTE In the specific IT Glue account you have made changes to, the selected theme will be applied automatically to all users who have chosen the Account theme option in their profile settings. See our Edit your profile topic for more details on how each individual user can select a theme for their user account.
The Vault tab is where you can set and implement an additional layer of security to specific passwords and Organizational quick notes that you deem sensitive. The Vault can help you further protect your data against any malicious intent.
- Log in to your IT Glue account and navigate to Account > Settings.
- Click the Vault tab.
- Enter a unique passphrase.
- Re-enter to confirm your passphrase and click Set Passphrase. Now, all Vault-related functionality will be accessible to you via this unique passphrase.
The Offline Mode tab is where you can set and allow approved users to view data when the IT Glue web application is under maintenance or temporarily unavailable.
- Log in to your IT Glue account and navigate to Account > Settings.
- Click the Offline tab.
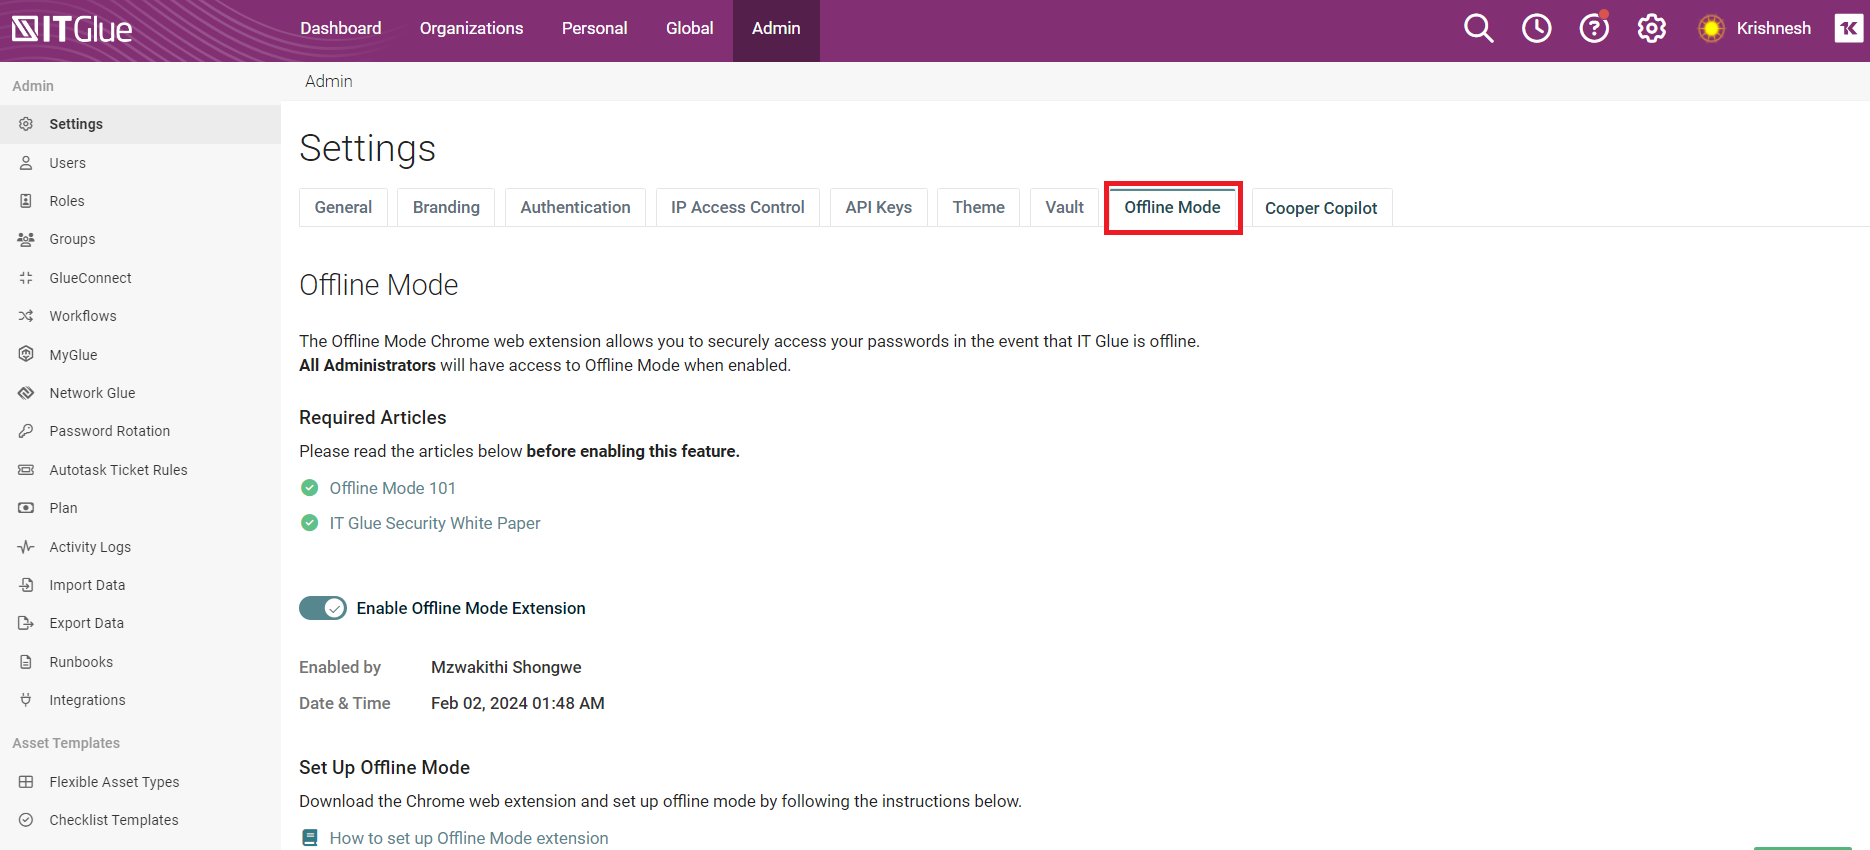
- Open and review the Offline Mode 101 and Security Whitepaper articles. This is a mandatory step to help understand the feature.
-
Toggle the Enable Offline Mode Extension switch to ON.
-
Under Security Settings, enter the following setting values:
-
Specify the number of days the Offline Mode browser extension can be offline before automatically removing offline data from the device and revoking access.
-
Specify the number of days before receiving a warning email about removing data from the device and revoking access. Automated email to be sent to a user letting them know that the extension will be wiped on the Windows device unless turned on within a configured number of days.
-
Specify the length of time that a user can be inactive before they are logged out of the Offline Mode Chrome browser extension.
-
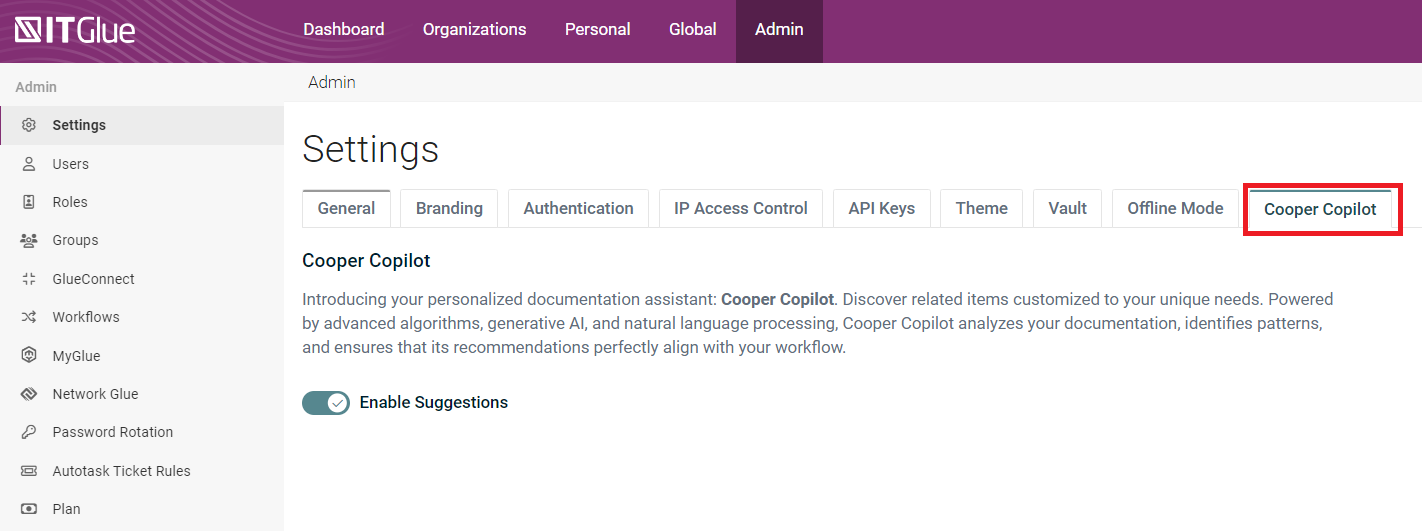
Cooper Copilot enhances the efficiency and effectiveness of IT operations for IT teams. This feature is enabled by default. The Cooper Copilot tab is where you can toggle off Cooper Copilot to disable this feature.
