Create standard operating procedures (SOPs)
Introduction
This article provides instructions on how to create standard operating procedures (SOPs) in IT Glue. An SOP is a set of step-by-step instructions to guide users through performing routine operations. IT Glue provides a standard template to allow you to easily capture your SOPs and illustrate them with screenshots or other reference images.
Instructions
- Navigate to the organization where the SOP will be published. If you are creating this as a generic SOP for your team to use with multiple clients, you will want to create it inside your own organization.
- Click on Documents in the left-hand menu and navigate to the folder (or subfolder) where you want the SOP to appear. Then, click on +New > Document to get started.

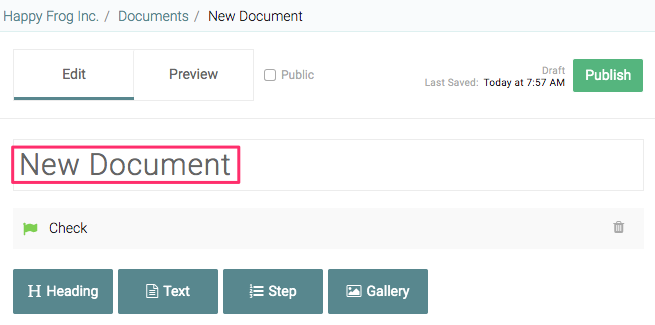
- In the first field, replace the New Document default text with a title of your choosing.
NOTE Tip! A good SOP title will clearly identify the activity/task in the procedure and contain any relevant keywords. This makes searching for the SOP much more efficient.
- Optional: Click Expiration Date in the right side panel and use the calendar picker to select a date that the document will expire. For more details on this feature, refer to our KB article here.
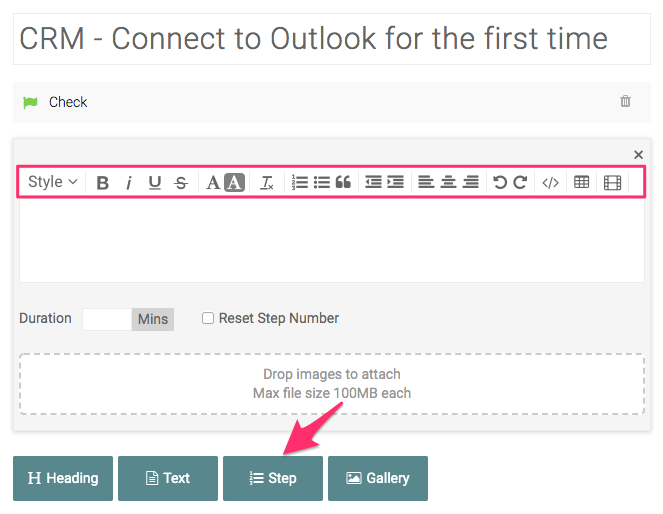
- Click on the Step button to start documenting the procedure. Use the formatting toolbar to adjust your text as needed (e.g. defining the heading style, bolding text, adding bullet points, inserting tables and hyperlinks, etc.)
- Estimate the time needed to complete the step in minutes and enter it into the Duration field.
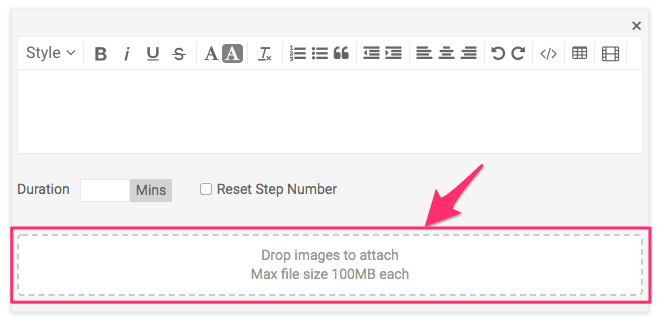
- If needed, drag and drop an image from your computer into the dashed drop zone, or click on the drop zone directly to browse your computer and upload an image. The maximum image size for each screenshot is 100MB.
NOTE Tip! Be mindful of your reader when creating a screenshot. Capturing too little means the reader won't have enough context to understand what they are seeing. Capturing too much means they will need to take more effort to decipher the image. Use tools like crop and callouts to help focus the reader.
- Repeat Steps 4 to 6 above to continue adding steps to the procedure. Add as many steps or images to make the SOP easier to read and follow.
- To preview your work, click on the Preview button at the top of the screen. Click on the Edit button to resume your work.

- Click the green Publish button at the top-right of the screen. Your new SOP will appear in the folder or subfolder that you navigated to in Step 2 above.
Managing steps
The IT Glue template makes it easy to manage the order of your steps. This includes inserting additional steps, reordering existing steps, and deleting unneeded steps. In all these cases, the numbering will take care of itself.
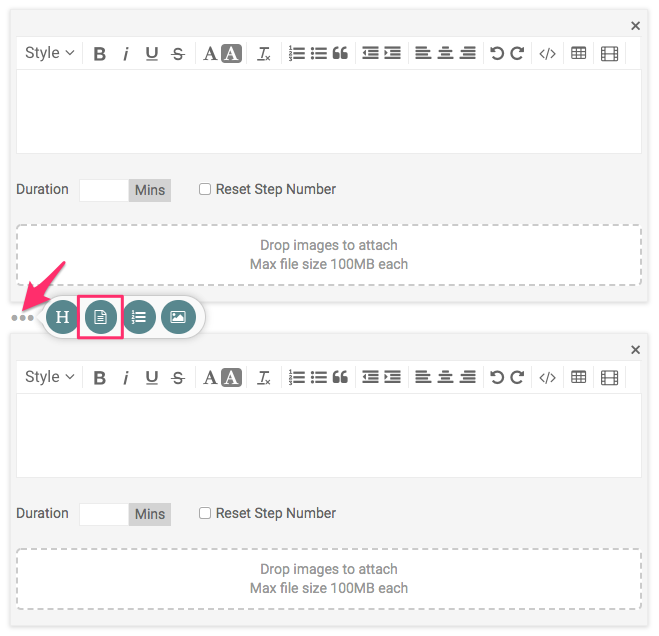
- To insert a step, click on the ellipsis in between two step boxes and then on the Step icon.
- To reorder a step, click on the step and drag it to where it needs to be in the SOP.
- To delete a step completely, click on the x at the top-right corner of the step box.
If you need to break up your instructions into separate sections, click the Reset Step Number checkbox to restart the numbering sequence.
Adding multiple images
To add multiple images to a particular step, drag or upload them directly to the step box. The images will display inline with the associated step.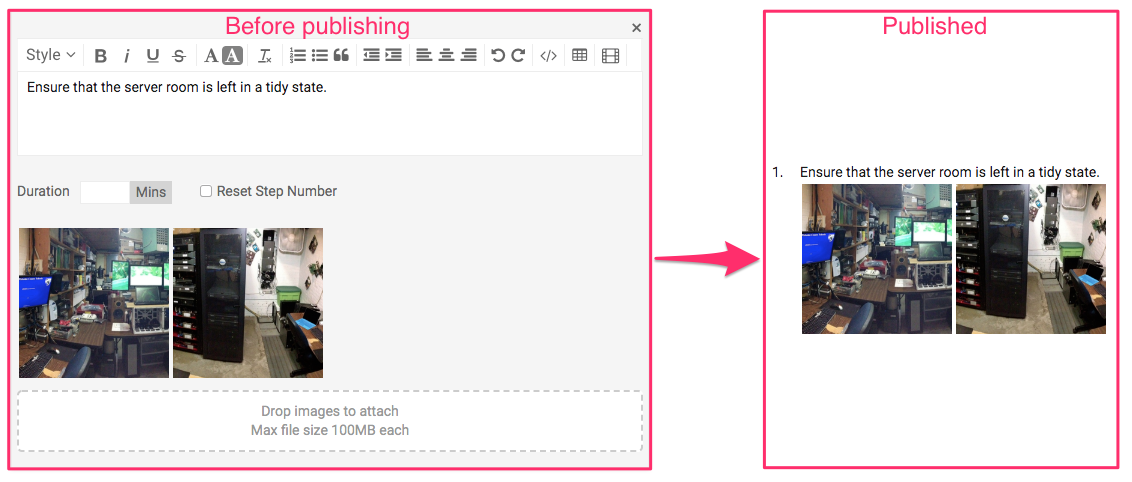
Alternatively, you can add multiple images to a gallery content block to display the images directly below a step.
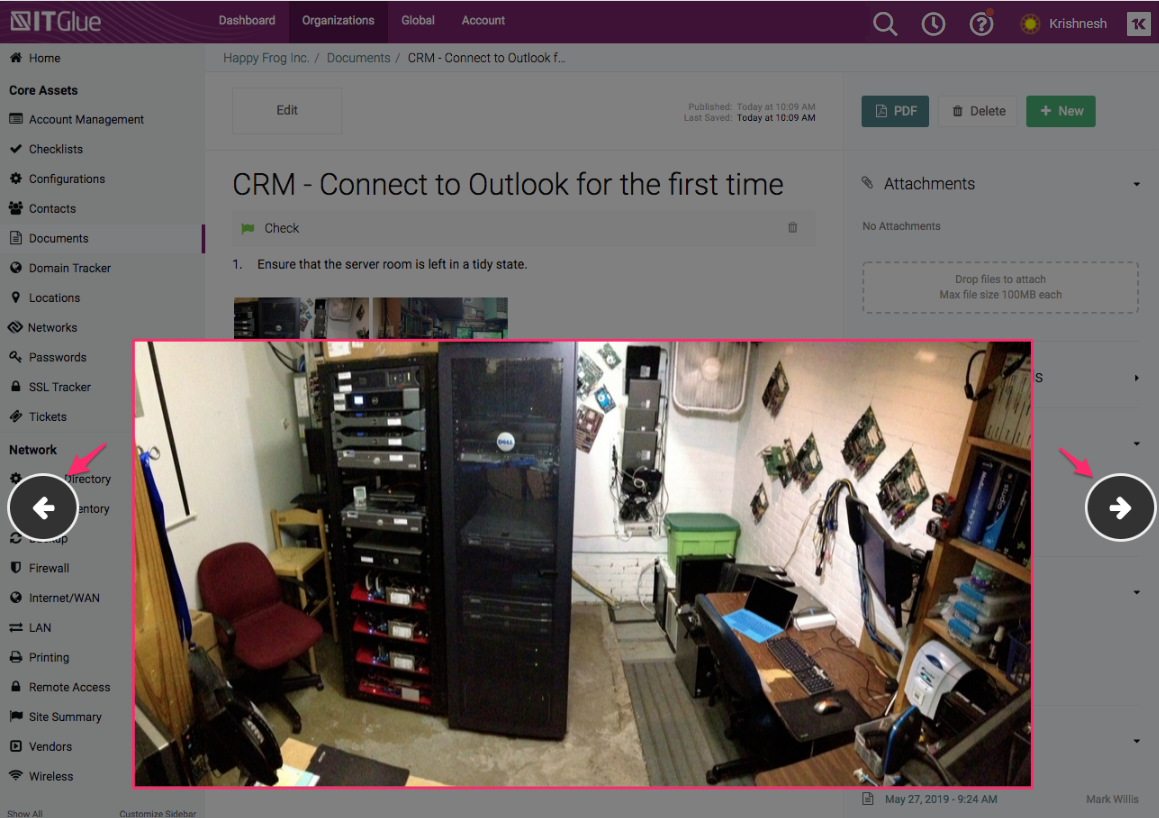
Keep in mind that multiple images within the same step or gallery content block are displayed as thumbnails in the published SOP. Clicking on a thumbnail will open the image in a lightbox layer. A lightbox layer opens the full image and dims out the rest of the screen. Click on the left and right arrow icons to browse the images in order. You can exit the lightbox layer by pressing Escape on your keyboard or anywhere outside the image.
Total duration of the SOP
After you publish the SOP, you'll see a roll-up at the bottom of the SOP that shows how long it takes to complete the procedure based on the times you entered in Step 5 above. The Total Duration can be used as a baseline performance measurement to ensure users are completing routine operations in a timely manner.
Adding SOPs to the MyGlue Help Center
For our partners using MyGlue to connect with clients, you can add read-only versions of your documents to the MyGlue Help Center. Users across your multiple MyGlue accounts can all automatically access the content you choose to publish to the Help Center. Not only is this type of information-sharing easy and direct, it also empowers your users to learn about and/or troubleshoot simple topics based on their specific needs and timelines. They are able to find instructions related to their IT infrastructure without having to wait for their ticket to be answered.
Users with a Creator role and above in IT Glue can perform the following steps:
- Create or open the desired SOP.
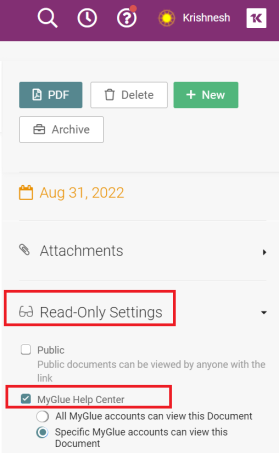
- In the right side panel under Read-only settings, click the MyGlue Help Center checkbox.
- Select if you want the document to be published to all MyGlue accounts, or to specific account(s) only. If publishing to specific account(s), then search and select the account names.
Your selections will take effect immediately. Review our Setting up My Glue Help Center topic for full details and instructions.


