Configuring single sign-on (SSO) with Passly
For partners subscribed to Basic with SSO 2021, Select with SSO 2021, and Enterprise plans.
In this article, you'll learn how to configure single sign-on (SSO) on your IT Glue account using Passly On-Demand (cloud). For AuthAnvil On-Premises, refer to these Adding IT Glue SAML access in SSO.
If you are configuring SSO for MyGlue using Passly, the instructions are the same but you will need to enter different values when configuring Passly and your MyGlue account settings page. Click here to see the different values that you'll need to substitute in at key steps within this KB article.
AuthAnvil (On-Demand) has been rebranded as Passly, but some in-app references and screenshots in IT Glue as well as this article may still refer to the AuthAnvil name. Please note that Passly is the cloud-based software while they also support on-premises under the AuthAnvil name.
Prerequisites
- You must have Administrator level access to IT Glue to configure SSO on your account.
- Ensure your users are provisioned in the identity provider (Passly), with exactly the same email address as their IT Glue account. We don’t create user accounts under SSO.
- Before turning this feature on, log in to your IT Glue account twice - once in a regular browser and once in an incognito/private window. This is to ensure that you are still logged in to your account if you get locked out in the other window. Alternatively, you can also log in to two separate browsers.
- Ensure that the users and groups have been created within IT Glue before starting the instructions for setting up SSO with Passly.
Instructions
Configuring Passly
To configure and manage SSO, you must have a user group that you can associate with the IT Glue SSO configuration. Follow the below instructions to create a group. Alternatively, you may have existing groups in Passly that you can use for the IT Glue SSO integration.
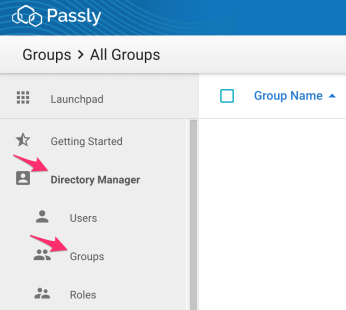
- Log in to Passly and navigate to Directory Manager > Groups in the left-hand menu.
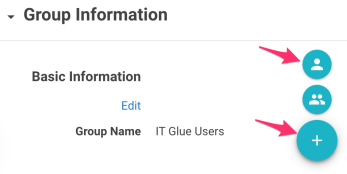
- Click the plus sign icon in the bottom-right corner. A Create New Group column will appear.

- Enter a name for your new group and then click Add Group at the bottom of the column.

- To add users to the group, click the vertical ellipsis beside the newly created group in the main screen and then click Edit.

- Click on the plus sign icon at the bottom-right corner and then on the Add Users icon. Click the checkbox next to the desired user(s) and then click Add Users.
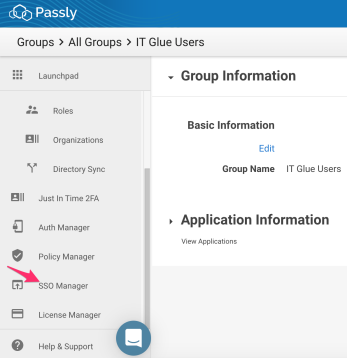
- Click on SSO Manager in the left-hand menu.
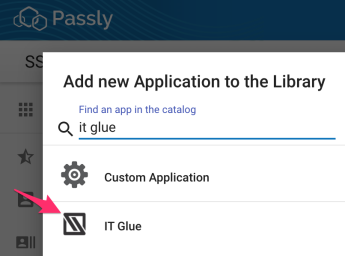
- Click the plus sign icon at the bottom-right corner and then on the Catalogue button. Clicking the Catalogue button will open an Add new Application to the Library window.

- Search for and select IT Glue from the catalog.
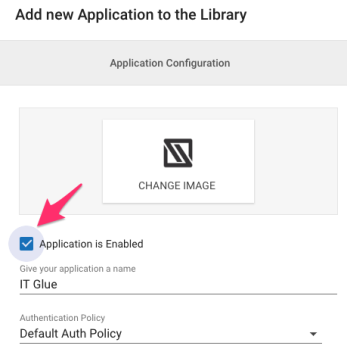
- In the Add new Application to the Library window, click the Application is Enabled checkbox.
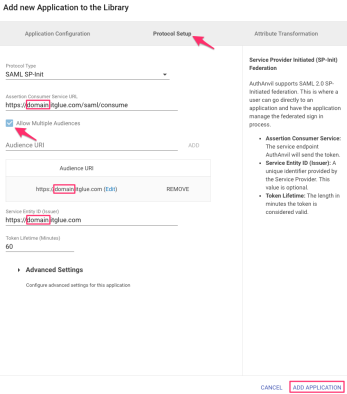
- Next, click Protocol Setup at the top of the screen and update the following three fields in this section by replacing domain with your IT Glue subdomain.
- Assertion Consumer Service URL - https://subdomain.itglue.com/saml/consume
- Audience URI - https://subdomain.itglue.com
- Click on Edit and then on Save Changes to adjust the URI.
- Service Entity ID (Issuer) - https://subdomain.itglue.com
- Select the Allow Multiple Audiences checkbox and click Add Application at the bottom-right of the screen.
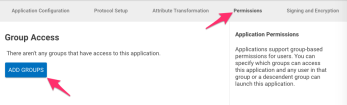
- Now that you have added the application, click Permissions at the top of the screen and then click the Add Groups button.
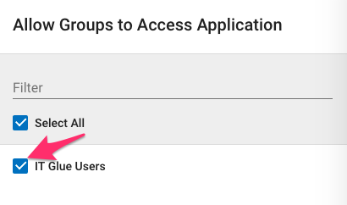
- Select the group(s) you created in Step 3 above and click Add Groups.
- Click the Save Changes button to finish the setup.
Leave the Passly window open as you continue on to configuring IT Glue. You will need to refer to it frequently in the next section of this KB.
Configuring IT Glue
After setting up Passly, you need to configure your IT Glue account to authenticate using SAML. You will need a few pieces of information from Passly to complete this step.
IMPORTANT It's highly recommended that before you begin the below set of instructions, log in to your IT Glue account twice - once in a regular browser and once in an incognito/private window. Alternatively, you can also log in to two separate browsers. This is to ensure that you are still logged in to your account in case you are locked out in the other window.
- Log in to IT Glue and click Account from the top navigation bar.
- Click Settings in the sidebar.
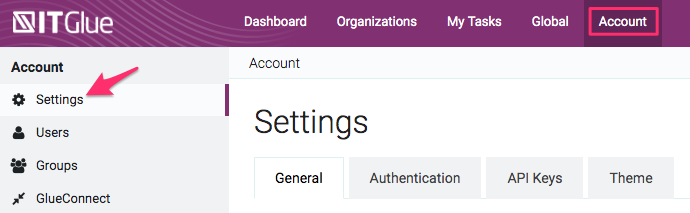
- Click on the Authentication tab and then turn the Enable SAML SSO toggle switch to ON. Once this is turned on, a form will appear. You will need to collect information from Passly and enter it into this form.
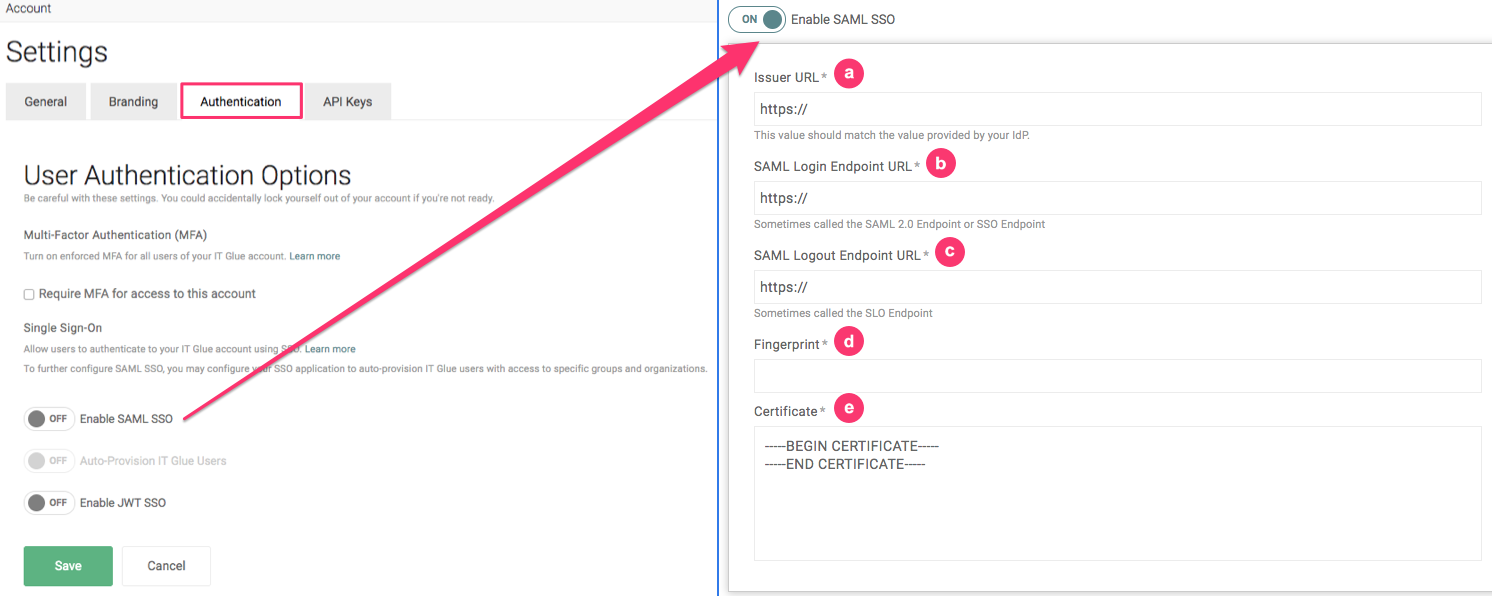
- Issuer URL:
- Navigate to Passly > SSO Manager and open the IT Glue application.
- Click Protocol Setup at the top of the screen.
- Copy the Identify Issuer and paste it into the Issuer URL field in IT Glue.
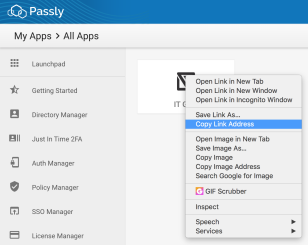
- SAML Login Endpoint URL:
- Navigate to Passly > Launchpad.
- Right-click on the IT Glue text in the logo and click Copy Link Address.
- Paste the link into the SAML Login Endpoint URL field in IT Glue.
- SAML Logout Endpoint URL:
- Enter a URL where IT Glue can redirect users after they log out of IT Glue. Passly does not provide this URL and this value cannot be left empty.
- A recommended value would look something like: https://itgluetest.my.passly.com/apps.
Note: IT Glue does not support SSO logout URLs.
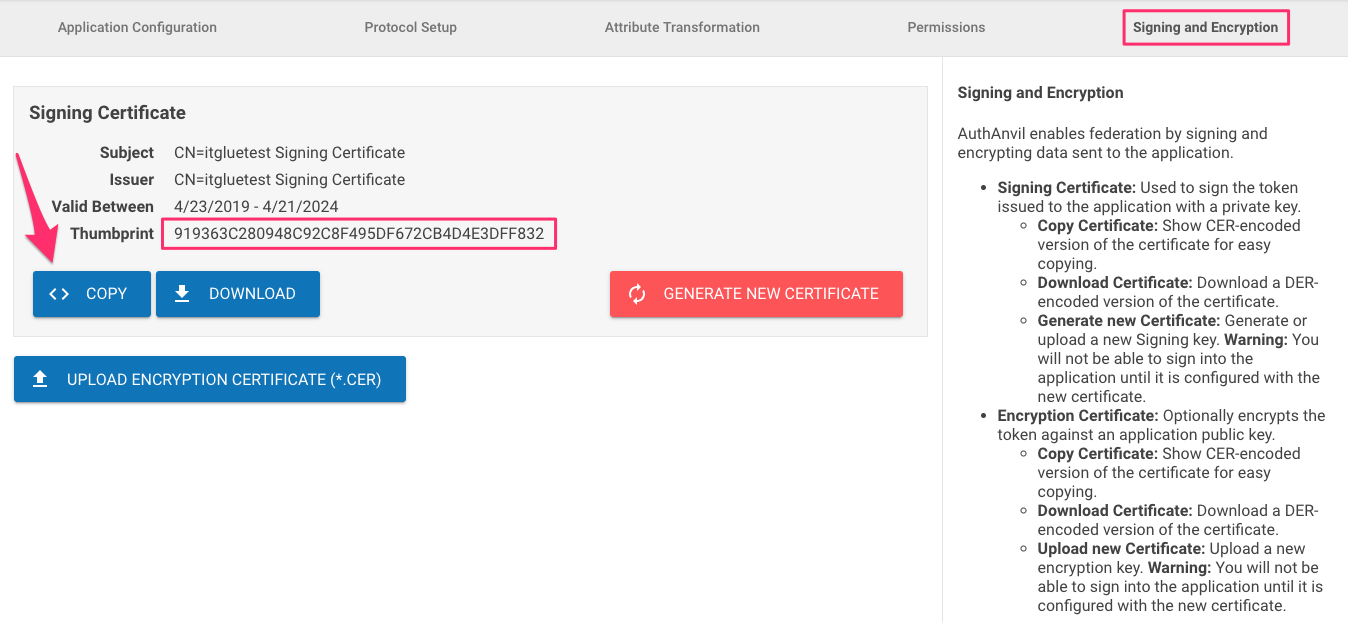
- Fingerprint:
- Navigate to Passly > SSO Manager and open the IT Glue application.
- Click Signing and Encryption at the top of the screen.
- Copy and paste the thumbprint into the Fingerprint field in IT Glue.
- Certificate:
- Navigate to Passly > SSO Manager and open the IT Glue application.
- ClickSigning and Encryption at the top of the screen.
- Click the < > Copy button to get the certificate value.
- Paste the certificate into the Certificate field in IT Glue.
IMPORTANT Ensure there are no extra spaces trailing at the end of the Certificate string (i.e. after -----END CERTIFICATE-----).
- Issuer URL:
- Once all information from Step 3 is copied from Passly and pasted into the SAML SSO from in IT Glue, click Save.
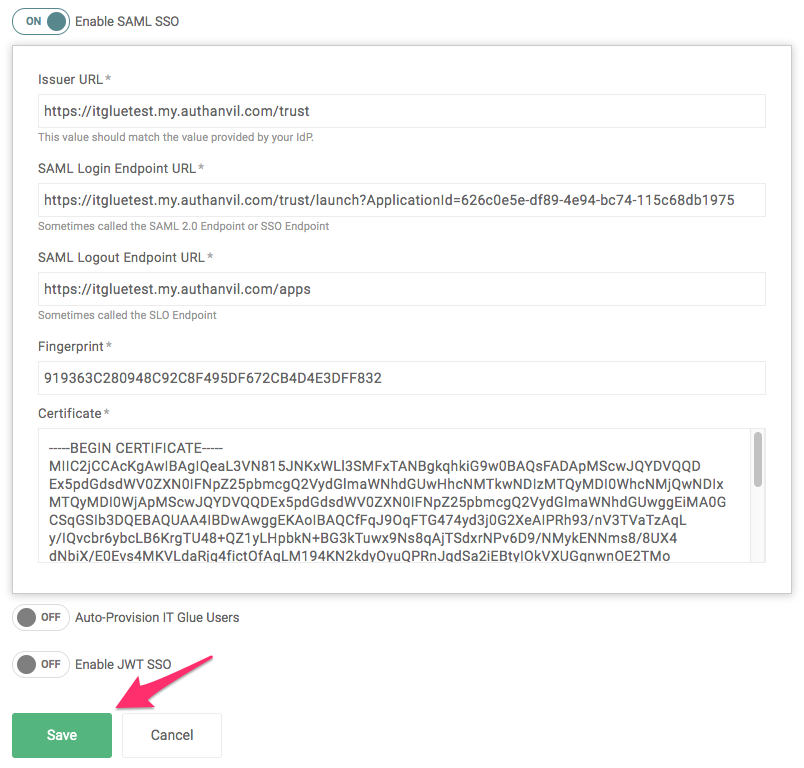
IMPORTANT Click Save only when all information has been entered. If you turn on SSO prematurely, it will break the login experience for all users on your account.
Configuring MyGlue
If you are setting up SSO for MyGlue, complete all steps as instructed in the Configuring Passly section. However, in step 10, you need to substitute different values as follows:
- Assertion Consumer Service URL - https://app.myglue.com/saml/consume
- Audience URL - https://app.myglue.com
- Service Entity ID (Issuer) - https://app.myglue.com
Testing SSO authentication
Before you configured SSO, you should have logged in to IT Glue in two separate browser sessions. If you get locked out, you will be able to use the incognito/private window to turn off SSO and investigate the cause.
To make sure SSO is working, perform these steps:
- Log out of and close any Passly browser sessions you have open.
- Open a new browser session and navigate to your IT Glue account subdomain ([subdomain].itglue.com) directly. This will redirect you to the identity provider.
- Enter your SSO credentials.
After entering your credentials, you should be redirected and logged in to IT Glue.
Setting your authentication policy
Finally, determine whether to set your authentication policy to require the user of MFA via SSO to access IT Glue.
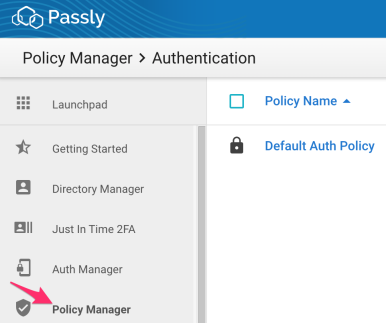
- Passly, click on Policy Manager on the left side of the screen and then on Default Auth Policy.
- In the next screen, make the required changes to your authentication policy by clicking on the + Add Additional Rule button in the top-right corner. An example would look like:
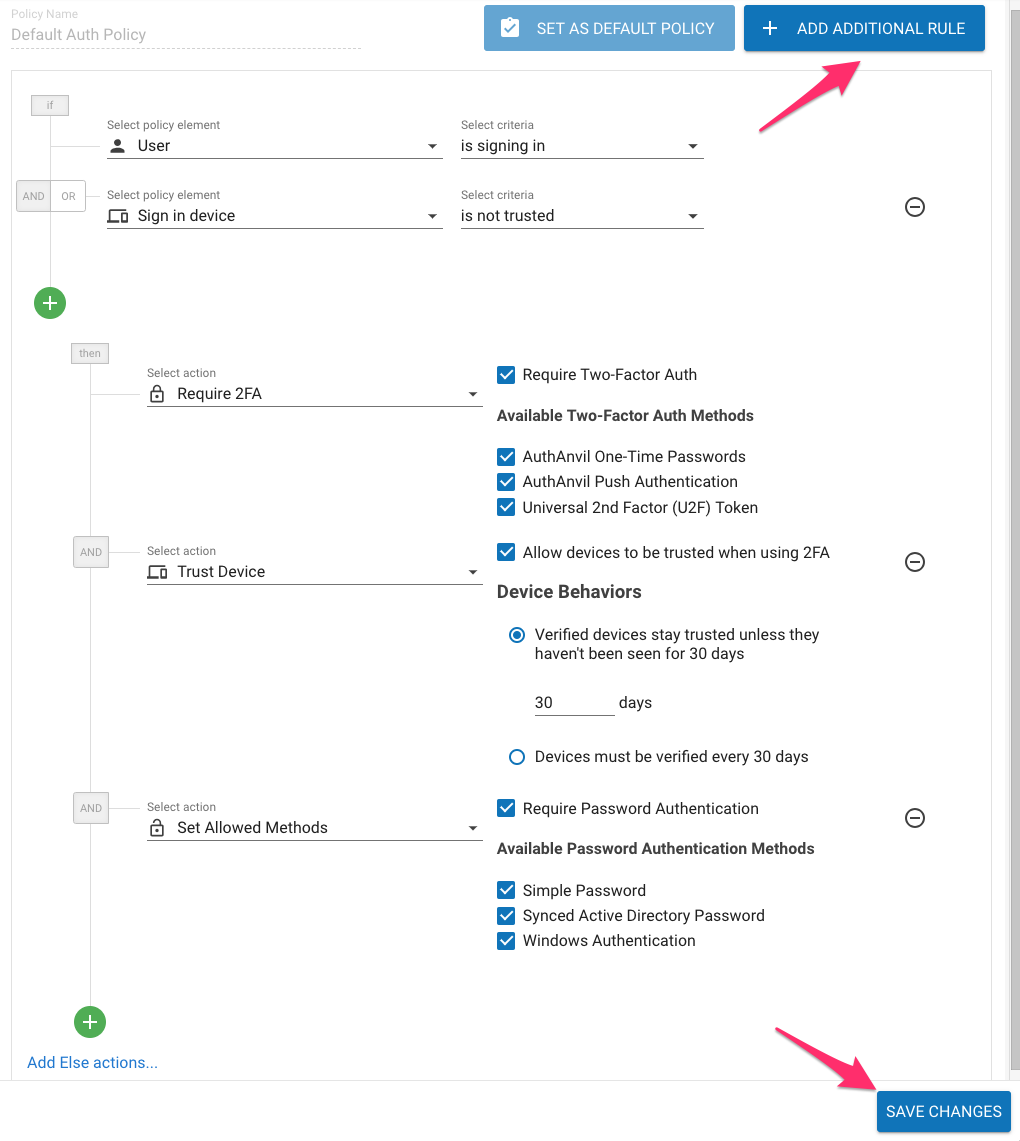
- Click on Save Changes.
Common Questions
When the SSO server is unavailable, how do we access our accounts?
If your SSO provider's service is unavailable, you can still log in using your IT Glue username and password at app.itglue.com.
If your SSO is not working, confirm your provider's service is available. Contact our support team or assistance.
How do we disable SSO for a user?
To disable a user account, an Administrator or a Manager will need to navigate to the Account > Users page in IT Glue. We don’t currently support disabling user accounts through the SSO server.


