Configuring single sign-on (SSO) with ADFS
For partners subscribed to Basic with SSO 2021, Select with SSO 2021, and Enterprise plans.
This article explains how to configure the SSO integration of a self-hosted Active Directory Federation Services (ADFS) server and IT Glue.
If you are configuring SSO for MyGlue using ADFS, the instructions are the same but you will need to enter different values when configuring ADFS and your MyGlue account settings page. Click here to see the different values that you'll need to substitute in at key steps within this KB article.
ADFS is a service provided by Microsoft as a standard role for Windows Server that provides a web login using existing Active Directory credentials. Installing ADFS is beyond the scope of this topic, but is detailed in Configuring single sign-on (SSO) with ADFS. For further help, refer to the main SAML topic. Also, for ADFS-based SSO, it's recommended to always check the ADFS logs in the Windows Event Viewer to locate error details.
Prerequisites
- You must have Administrator level access to IT Glue to configure SSO on your account.
- An Active Directory instance where all of your users under your account in IT Glue have an account, with exactly the same email address. We don’t create user accounts under SSO.
- A server running Microsoft Server 2012 or 2008.
- An SSL certificate to sign your ADFS login page and the fingerprint for that certificate.
- Before turning this feature on, log in to your IT Glue account twice - once in a regular browser and once in an incognito/private window. This is to ensure that you are still logged in to your account if you get locked out in the other window. Alternatively, you can also log in to two separate browsers.
Instructions
Adding a new relying party trust
The connection between ADFS and IT Glue is defined using a relying party trust.
- Log in to the server where ADFS is installed.
- Launch the ADFS Management application (Start > Administrative Tools > ADFS Management) and select the Trust Relationships > Relying Party Trusts node.
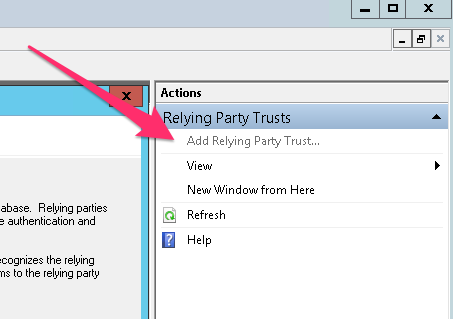
- Click Add Relying Party Trust from the Actions sidebar.
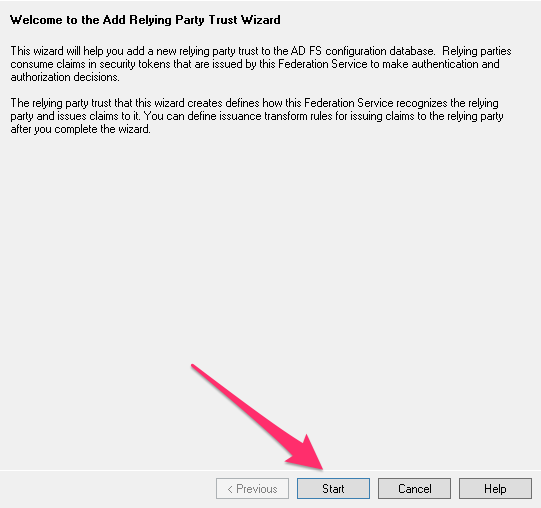
- Click Start on the Add Relying Party Trust wizard.
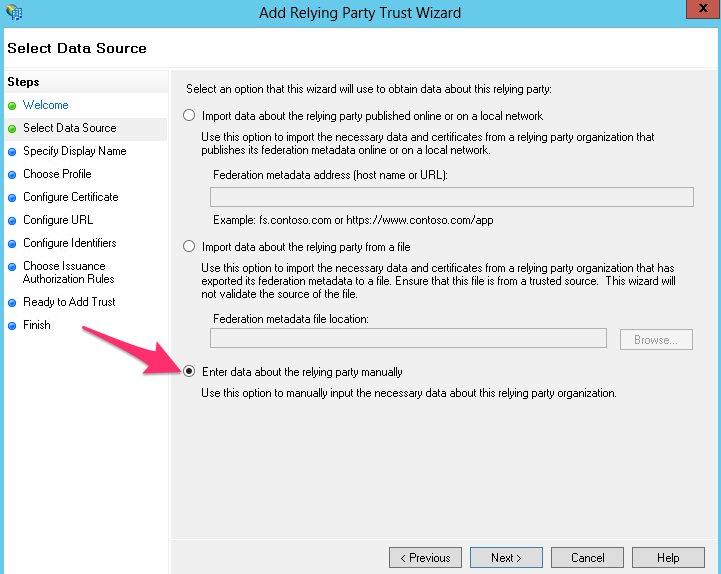
- On the Select Data Source screen, click Enter data about the relying party manually and click Next.
- Provide information for each screen in the Add Relying Party Trust wizard.
- On the Specify Display Name screen, enter a Display name of your choosing and any notes (e.g. IT Glue SSO), select ADFS profile, and then click Next.
- Skip the Configure Certificate screen by clicking Next.
- On the Configure URL, select the box labeled Enable Support for the SAML 2.0 WebSSO protocol. The URL will be https://subdomain.itglue.com/saml/consume, replacing subdomain with your IT Glue subdomain. Note that there's no trailing slash at the end of the URL.
- On the Configure Identifiers screen, enter the Relying party trust identifier. This is the URL of your IT Glue subdomain. The URL will be https://subdomain.itglue.com, click Next.
- Skip the Configure Multi-factor Authentication screen (unless you want to configure this) by clicking Next.
- Skip the Choose Issuance Authorization Rules screen by clicking Next.
- On the Ready to Add Trust screen, review your settings and then click Next.
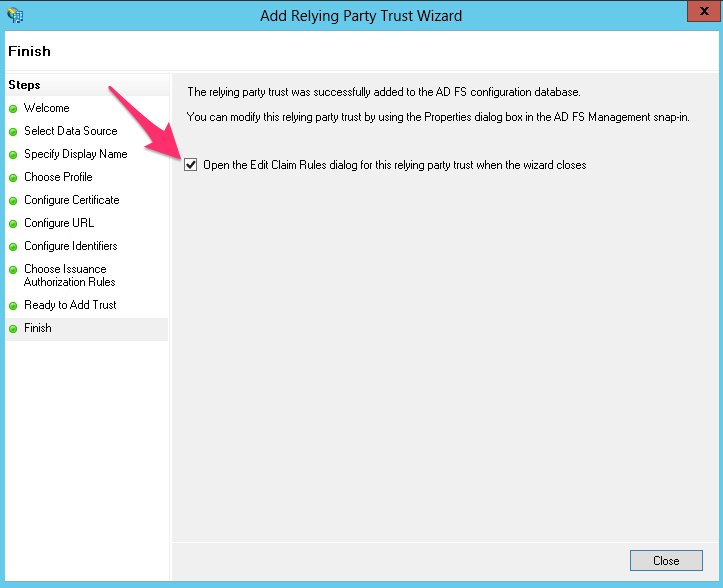
- On the final screen, make sure the Open the Edit Claim Rules dialog for this relying party trust when the wizard closes checkbox is selected and click Finish. This opens the claim rule editor.
Creating claim rules
After you create the relying party trust, you can create the claim rules and make minor changes that aren't set by the wizard.
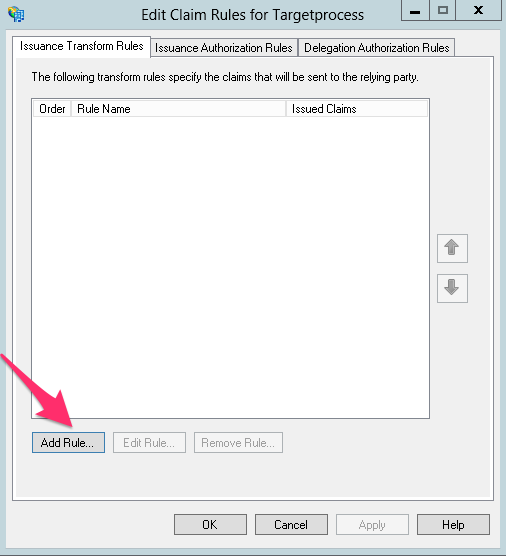
- If the claim rules editor appears, click Add Rule. Otherwise, in the Relying Party Trusts list, right-click the relying party object that you created, click Edit Claims Rules, and then click Add Rule.
- In the Claim rule template list, select the Send LDAP Attributes as Claims template, and then click Next.
- Create the following rule:
- LDAP Attribute: E-Mail-Addresses
- Outgoing Claim Type: E-Mail Address
- Enter a descriptive rule name
- Attribute Store: Active Directory
- Add the following mapping
- Click OK.
- Create another new rule by clicking Add Rule, this time selecting Transform an Incoming Claim as the template.
- On the next screen, create the following rule:
- Enter a descriptive rule name
- Incoming Claim Type: E-Mail Address
- Outgoing Claim Type: Name ID
- Outgoing Name ID Format: Email
- Pass through all claim values (the default)
- Finally, click OK to create the claim rule, and then OK again to finish creating rules.
Adjusting the settings
You still need to adjust a few settings on your relying party trust.
- In the Relying Party Trusts list, double-click the relying party object that you created (or select Actions > Properties while you have the Relying Party Trust selected).
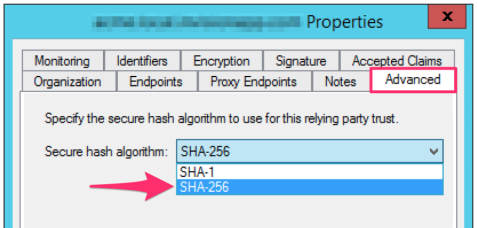
- On the Advanced tab, change the Secure hash algorithm to SHA-256.
- On the Endpoints tab, click on add SAML to add a new endpoint.
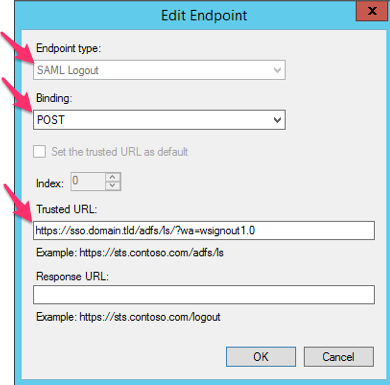
- For the Endpoint type, select SAML Logout.
- For the Binding, choose POST.
- For the Trusted URL, create a URL using:
- The URL of your ADFS server
- The value for the 'SAML 2.0/W-Federation' URL from the ADFS Service > Endpoints node
- The string ?wa=wsignout1.0
- The URL will look something like: https://sso.domain.tld/adfs/ls/?wa=wsignout1.0
- Click OK twice. You should now have a working relying party trust for IT Glue.
Configuring IT Glue
After setting up ADFS, you need to configure your IT Glue account to authenticate using SAML. You will need a few pieces of information from ADFS to complete this step.
IMPORTANT It's highly recommended that before you begin the below set of instructions, log into your IT Glue account twice - once in a regular browser and once in an incognito/private window. Alternatively, you can also log in to two separate browsers. This is to ensure that you are still logged in to your account in case you are locked out in the other window.
- Log in to IT Glue and click Account from the top navigation bar.
- Click Settings in the sidebar.
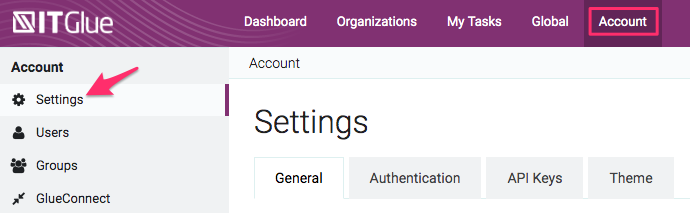
- Click the Authentication tab and then turn the Enable SAML SSO toggle switch to ON. Once this is turned on, a form will appear. You will need to collect information from ADFS and enter it into this form.
- In the ADFS Management application, select the Service node.
- Click Actions > Edit Federation Service Properties.
The ADFS federation service identifier is shown on the General tab. - In the ADFS Management application, select the Service > Endpoints node.
- Scroll down to the endpoint that has SAML 2.0/WS-Federation as the type and note the URL path. This is typically your ADFS public URL with /adfs/ls after the FQDN.
- Open PowerShell on the ADFS server.
- Run Get-ADFSCertificate-CertificateType Token-Signing
- The thumbprint looks something like:
a909502dd82ae41433e6f83886b00d4277a32a7b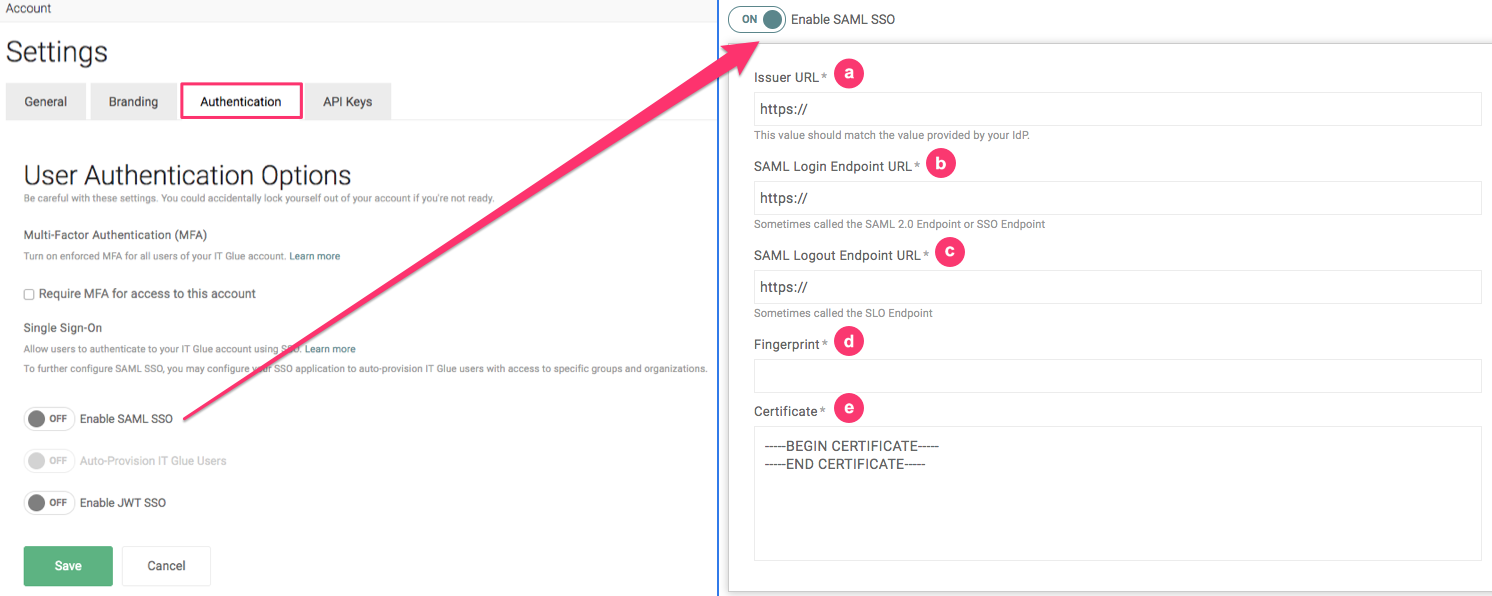
- Issuer URL
- SAML Login Endpoint URL
- SAML Logout Endpoint URL - Enter the logout URL you constructed in previous steps. It should be the same as the login endpoint URL, but with /adfs/ls/?wa=wsignout1.0 after your FQDN.
Note: IT Glue does not support SSO logout URLs. - Fingerprint
- Certificate:
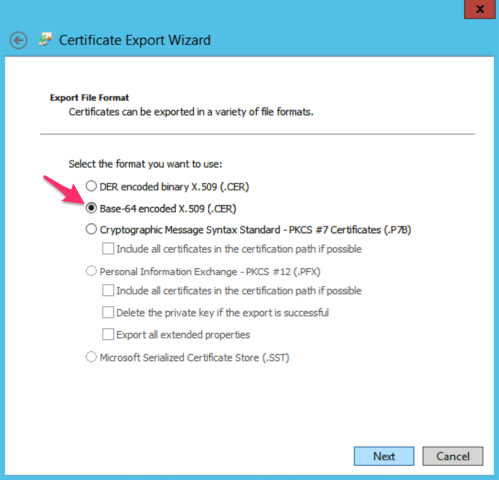
- Export the token-signing certificate with the ADFS Microsoft Management Console.
- When using the certificate exporting wizard, ensure you select Base-64 encoded X.509 (.CER) for the encoding format.
- Open the exported file in a text editor to get the certificate value.
IMPORTANT Ensure there are no extra spaces trailing at the end of the Certificate string (i.e. after -----END CERTIFICATE-----).
- Click Save.
IMPORTANT Warning. Click Save only when all information has been entered. If you turn on SSO prematurely, it will break the login experience for all users on your account.
You should now have a working ADFS SSO implementation for IT Glue, which you can test by going to your subdomain ([subdomain].itglue.com) in a new browser session.
Configuring MyGlue
If you are setting up SSO for MyGlue, complete all steps as instructed in the Adding a new relying party trust section. However, in step 6, you need to substitute different values as follows:
- On the Configure URL, select the box labeled Enable Support for the SAML 2.0 WebSSO protocol. The URL will be https://app.myglue.com/saml/consume. Note that there's no trailing slash at the end of the URL.
- On the Configure Identifiers screen, enter the Relying party trust identifier. The URL will be https://app.myglue.com, click Next.
Troubleshooting
Users cannot log in
In order for ADFS to pass a login through for authentication, a user's email address must be present in the "E-mail" field of the General tab in their AD profile.

SSO FAQ
When the SSO server is unavailable, how do we access our accounts?
If your SSO provider's service is unavailable, you can still log in to IT Glue via app.itglue.com using your username and password.
If your SSO is not working, confirm your provider's service is available and submit a Kaseya Helpdesk request for assistance.
How do we disable SSO for a user?
An IT Glue Administrator or Manager can disable a user account from the Users page. Refer to Adding and removing users. Disabling user accounts through the SSO server is not currently supported.


