Integrating with Datto RMM
Introduction
Use this article as a guide to create and maintain an RMM integration with Datto RMM. This gives you information about CPU, memory, disk usage, last reboot, etc.
To integrate with Autotask PSA, see Integrating with Autotask instead.
IMPORTANT If you are integrating both Datto RMM and Autotask PSA with IT Glue, it is heavily recommended that follow the order of operations in our guide on Integrating IT Glue, Autotask, and Datto RMM to avoid issues.
It should only take about an hour to get up and running with your RMM. This is a rough estimate based on our experience with several partners who integrated with their RMM.
The Datto RMM sync described below will do the following:
- Discovers all Autotask companies or Datto RMM sites (based on your choice below) and devices in Datto RMM
- Matches companies or sites to organizations in IT Glue using the Datto RMM Name field of the Datto RMM company or site
- Suggests organizations based on name and pattern recognition
- Matches devices to configurations in IT Glue using a MAC address or serial number
- Suggests configurations based on exact name
For more information about the device mappings, see RMM Field Mappings.
Prerequisites
- Manager or Administrator level access to IT Glue.
- If you're integrating with a PSA and an RMM, you will want to first sync your RMM to your PSA and your PSA to IT Glue to make sure that the required data is available for matching.
- A Manager role will only be able to see RMM matched/unmatched data for organizations that they have explicit access to. To grant access to RMM data for all organizations, refer to Step 7 of our Adding and removing users topic.
Instructions
Enter your RMM credentials
Dedicated IT Glue API credentials from Datto RMM are required in order to routinely sync data between the systems. To generate your API credentials, refer to Activate the API in the Datto RMM help.
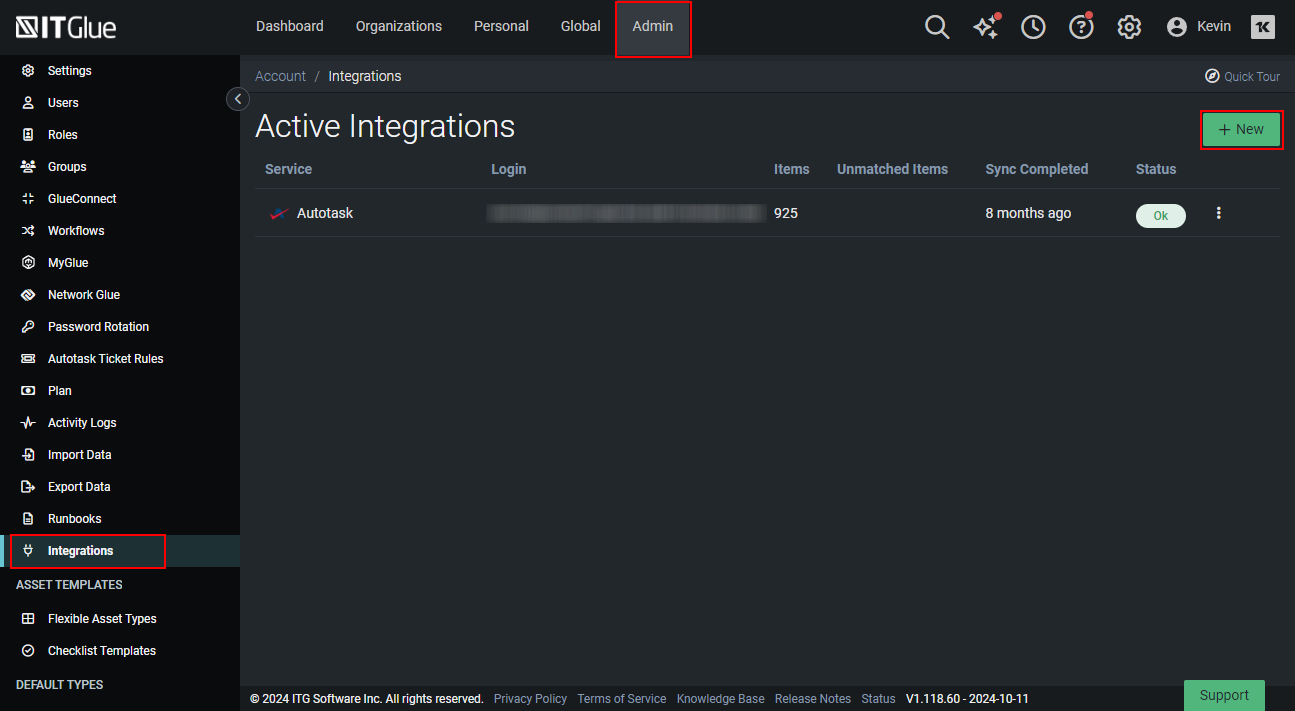
- In IT Glue, click Admin at the top of the page, then click Integrations on the left navigation menu, and click the green New button in the upper right corner.
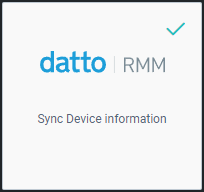
- Under RMM Tools, click Datto RMM.
- On the Sync your data with Datto RMM screen, select your Datto RMM platform, enter in the API Key and API Secret Key that you just created for the user in Datto RMM, and click Connect.
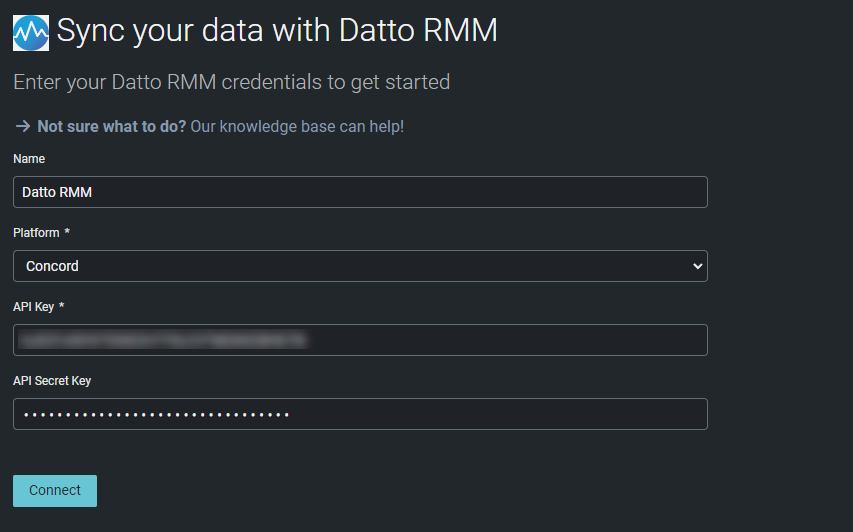
NOTE The platform is found in the Datto RMM API URL. For example, if your API URL value is https://merlot-api.centrastage.net, your platform is Merlot.
- Upon successful connection, you will be asked if you want to match organizations to Autotask companies or Datto RMM sites. If also integrating with Autotask PSA, it is recommended to select the Autotask Companies option. Once configured, click Save.
Datto RMM Smart Create for Software
IMPORTANT Devices in Datto RMM with a device class other than device (desktop, laptop, or server) won't sync software information.
NOTE Software sync settings are not available until after the Datto RMM integration has synced data at least once. Refer to Integrating with Datto RMM.
-
From the Admin > Integrations screen, click Actions > Sync Settings for Datto RMM.
-
You can choose to Sync all software types, however, we recommended to select only the software types you are currently managing, checking them off in the list below.

-
To auto-create the selected software as a Flexible Asset which will automatically be added as a Related Item on the configuration, you will need to check the box under Auto-Create found under your sync settings.
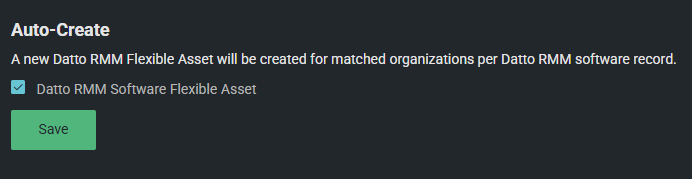
-
When you viewing a configuration where the selected software is in place, you will see the full list of the automatically created flexible asset types.

IMPORTANT If you later decide to turn off the Auto-Create feature, any previously created flexible asset records will be automatically archived under the Datto RMM Software Flexible Asset type.
Sync Data
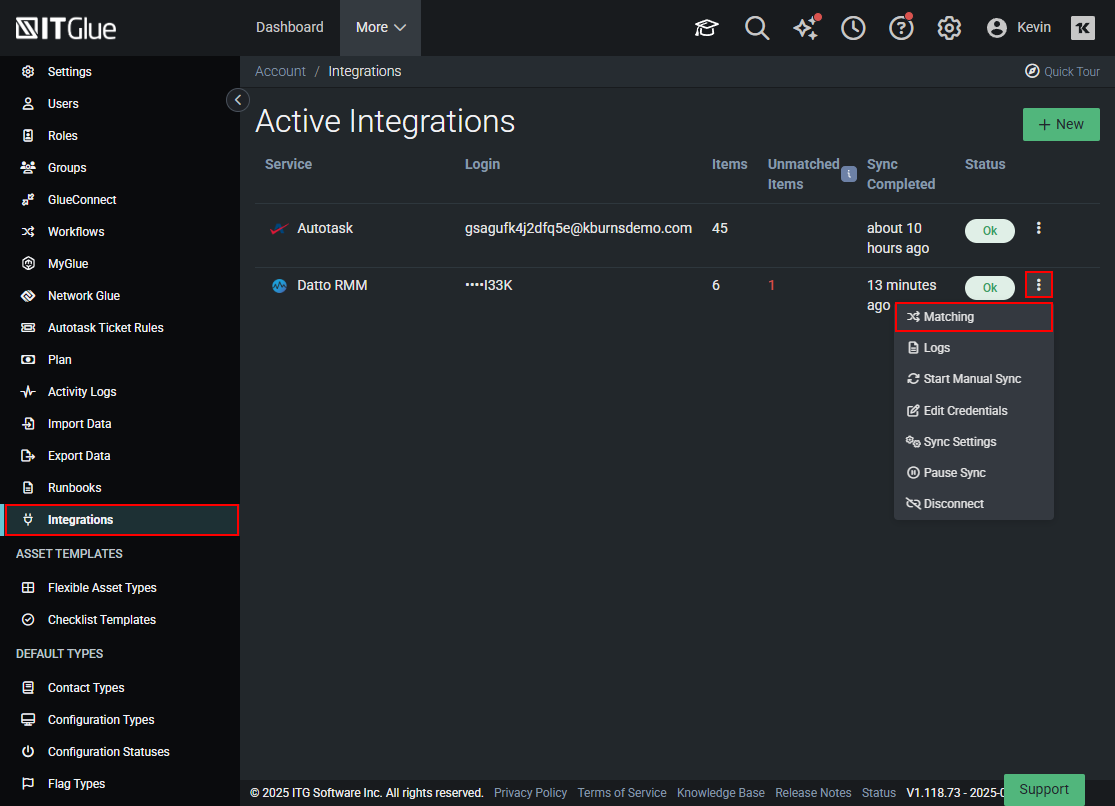
- From the Admin > Integrations screen, click Actions > Start Manual Sync for Datto RMM.

- When the sync is complete, the Status column changes from Syncingto OK.
Organization matching
IT Glue discovers organizations and configurations and tries to match them to data in your account. The matching logic can be found in the Introduction section of this article. Anything that isn't automatically matched will need to be manually actioned.
- From the Admin > Integrations screen, click on Actions > Matching for Datto RMM.
- In the Unmatched tab, review the unmatched organizations.
- If you're happy with a suggested match, click Accept Suggestion to accept it.
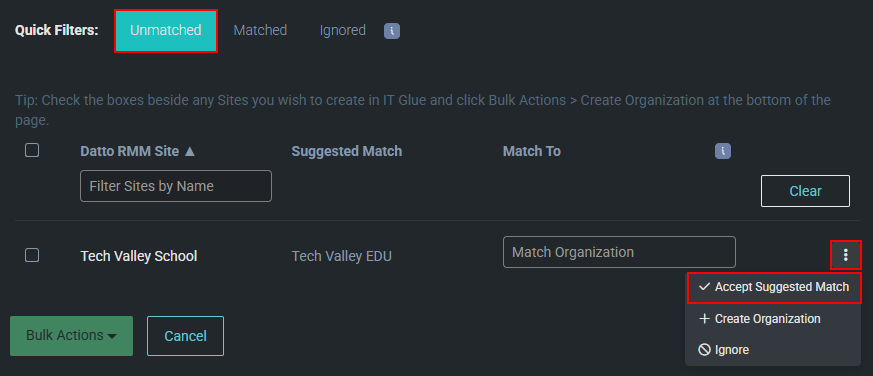
- If there is no suggested match, or it is incorrect, you can search for and choose a different organization using the Match To field.
- If no organization exists in IT Glue, you can choose to create an organization. You can also choose to ignore groups, which means they won't count as unmatched items in subsequent syncs.
IMPORTANT Warning. Before creating an organization from the matching screen, ensure that no corresponding organization already exists, otherwise a duplicate will be created.
- If you're happy with a suggested match, click Accept Suggestion to accept it.
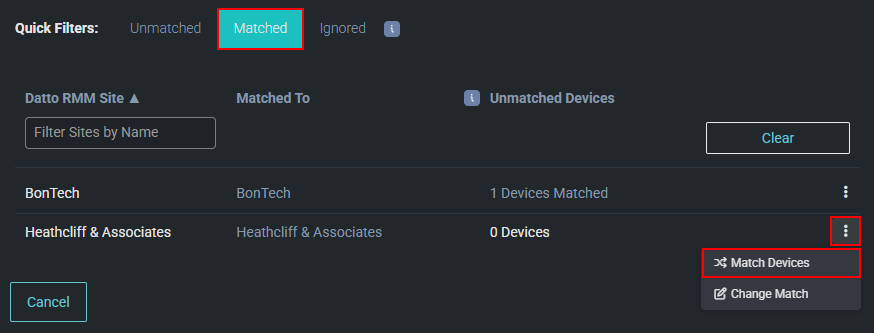
- In the Matched tab, if any matches are incorrect, click on Actions > Change Match and select a different organization to match to.
Configuration matching
Once all organizations have been matched, the same process should be followed for any unmatched configurations.
- From the Matched tab, choose any organization that has unmatched configurations, click the Actions button, and select Match Devices.
- For any unmatched configurations, you can either accept the suggested match, search for an IT Glue configuration by entering the name in the Match To column, or create a new configuration by clicking Actions > Create Configuration.
- Before you create configurations, first match any of the devices based on MAC addresses or serial number, for example, virtual servers. When you're done matching, you can create (in bulk or individually) any of the remaining devices coming in from your RMM.
IMPORTANT We don't recommend that you create configurations from your RMM if you'd like to then have them populate from IT Glue to your PSA. New items created from such data will not sync with your PSA unless you choose to do so manually by editing and saving each and every item. This is absolutely manual and is not recommended.
- Repeat for each organization until all configurations are actioned.
Once everything is matched, the RMM setup is complete. At any time, you can come back to these instructions to discover and match new organizations and configurations from your RMM.
NOTE The configuration details in the RMM setup also includes SNMP information.
RMM logic
Before an organization, site, location, or company in an RMM tool can sync with IT Glue to create an IT Glue organization, you must add at least one configuration to it. If there are none and the organization does not already exist in IT Glue from any other source, then it will not appear in IT Glue. In this case, you will need to create it manually.
NOTE Only RMM companies that have at least one RMM record will sync into IT Glue.


