Setting up Just-in-Time provisioning for SAML SSO
For partners subscribed to Basic with SSO 2021, Select with SSO 2021, and Enterprise plans.
Introduction
If you are using SAML (Security Assertion Markup Language) SSO with an identity provider supporting SAML 2.0, your configuration may be further customized to allow for Just-in-Time provisioning. This allows you to have IT Glue users created automatically the first time they access IT Glue using SSO.
Just-in-Time provisioning works with your SAML identity provider to pass key identifying information to the connected application using SAML 2.0. In IT Glue, this is the email address used to authenticate with the SAML identity provider.
Users provisioned with Just-in-Time (JIT) provisioning through your SAML identity provider will be assigned to groups based on their current group memberships within the identity provider.
NOTE If there is no direct group match, you can manually add JIT-provisioned users to specific IT Glue groups.
Prerequisites
- You must have Administrator level access to IT Glue.
- SAML SSO Provider supporting SAML 2.0
- You must already have single sign-on set up. Please see our Setting up single sign-on (SSO) to IT Glue topic for more details.
Instructions
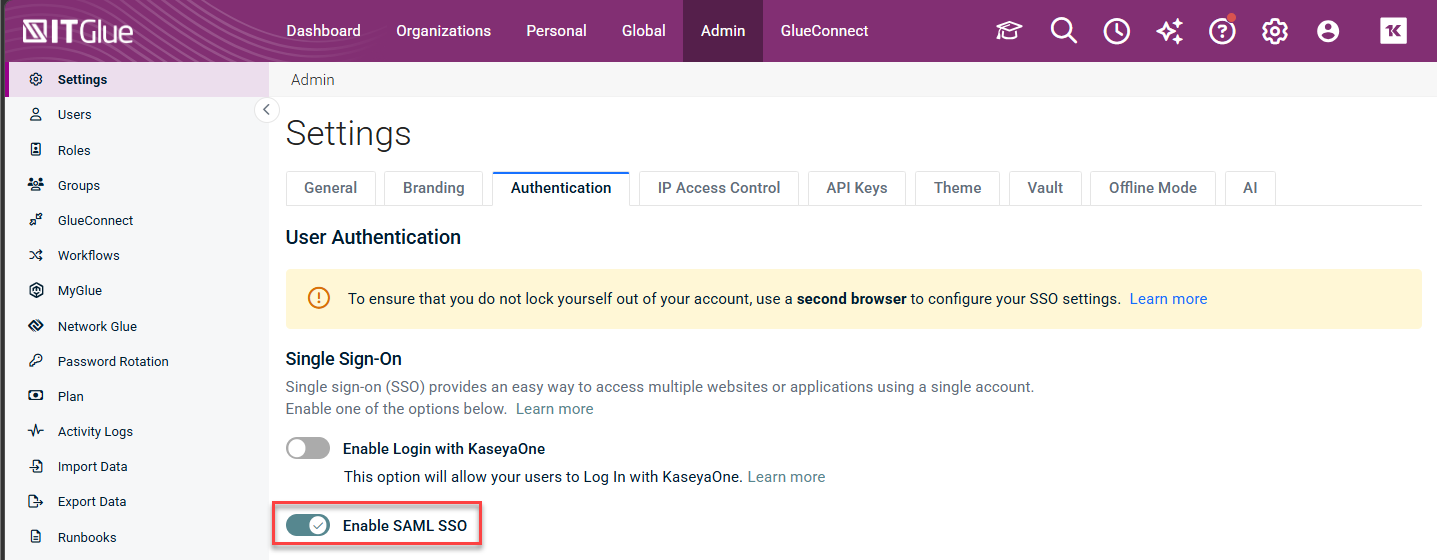
- Navigate to Admin > Authentication then turn on the Enable SAML SSO toggle.
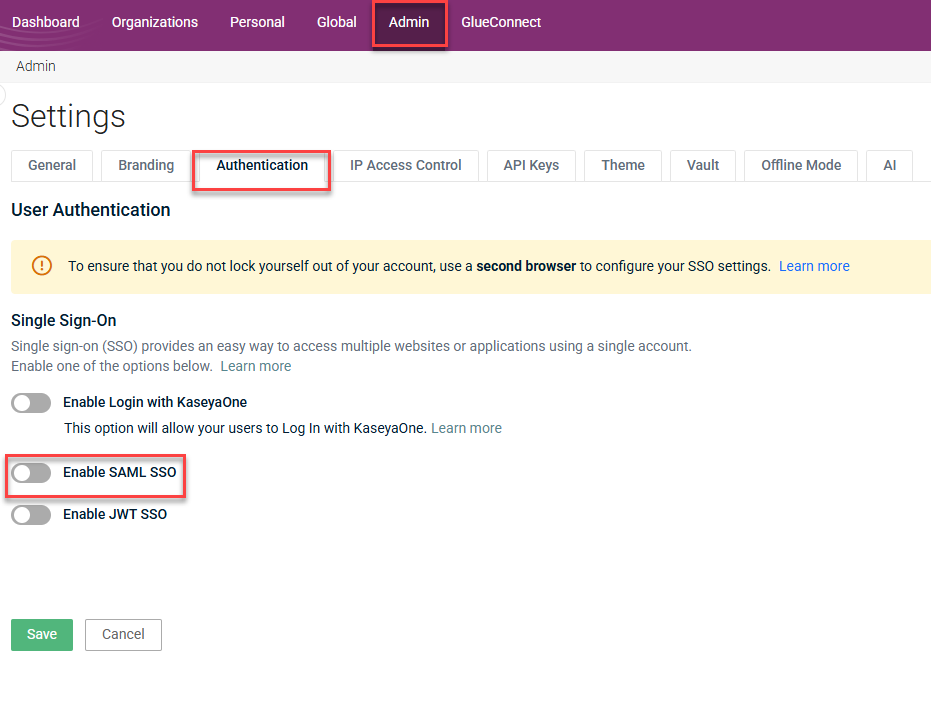
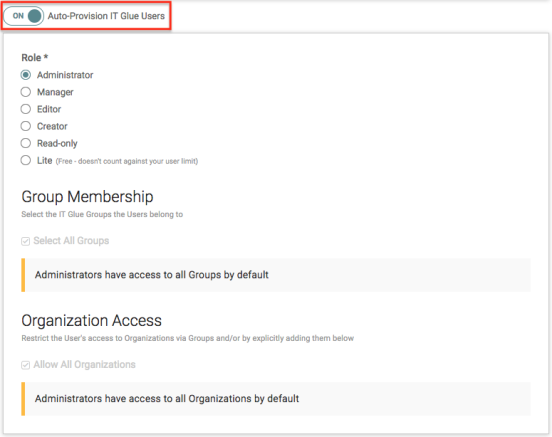
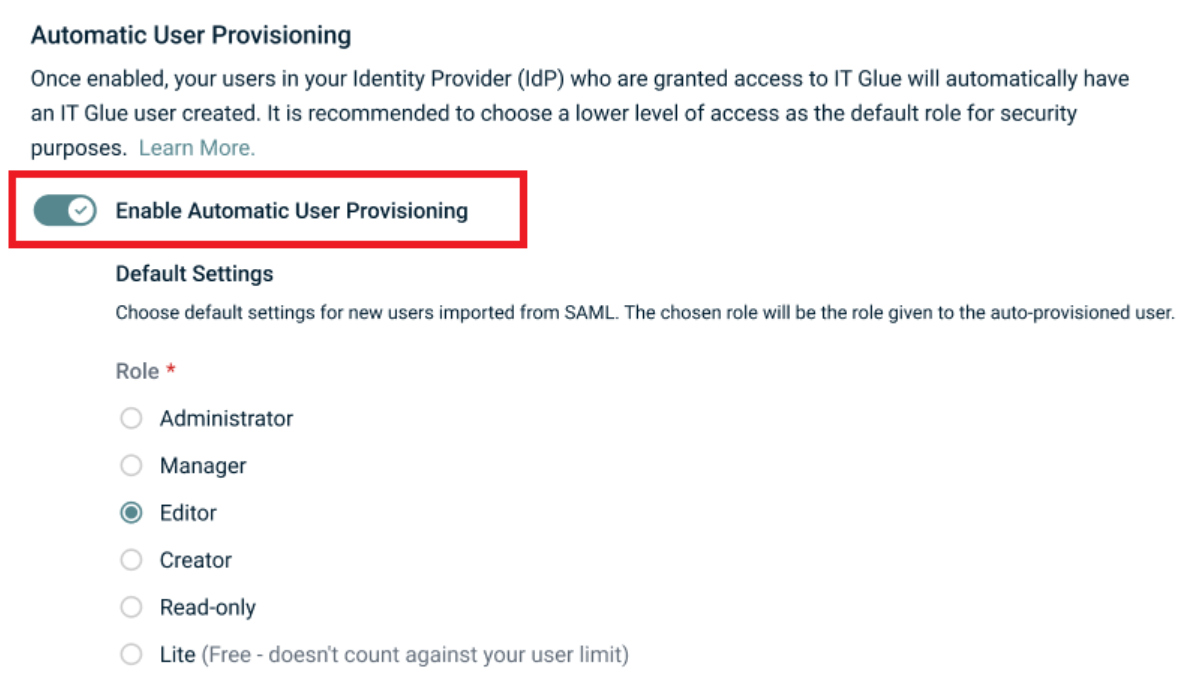
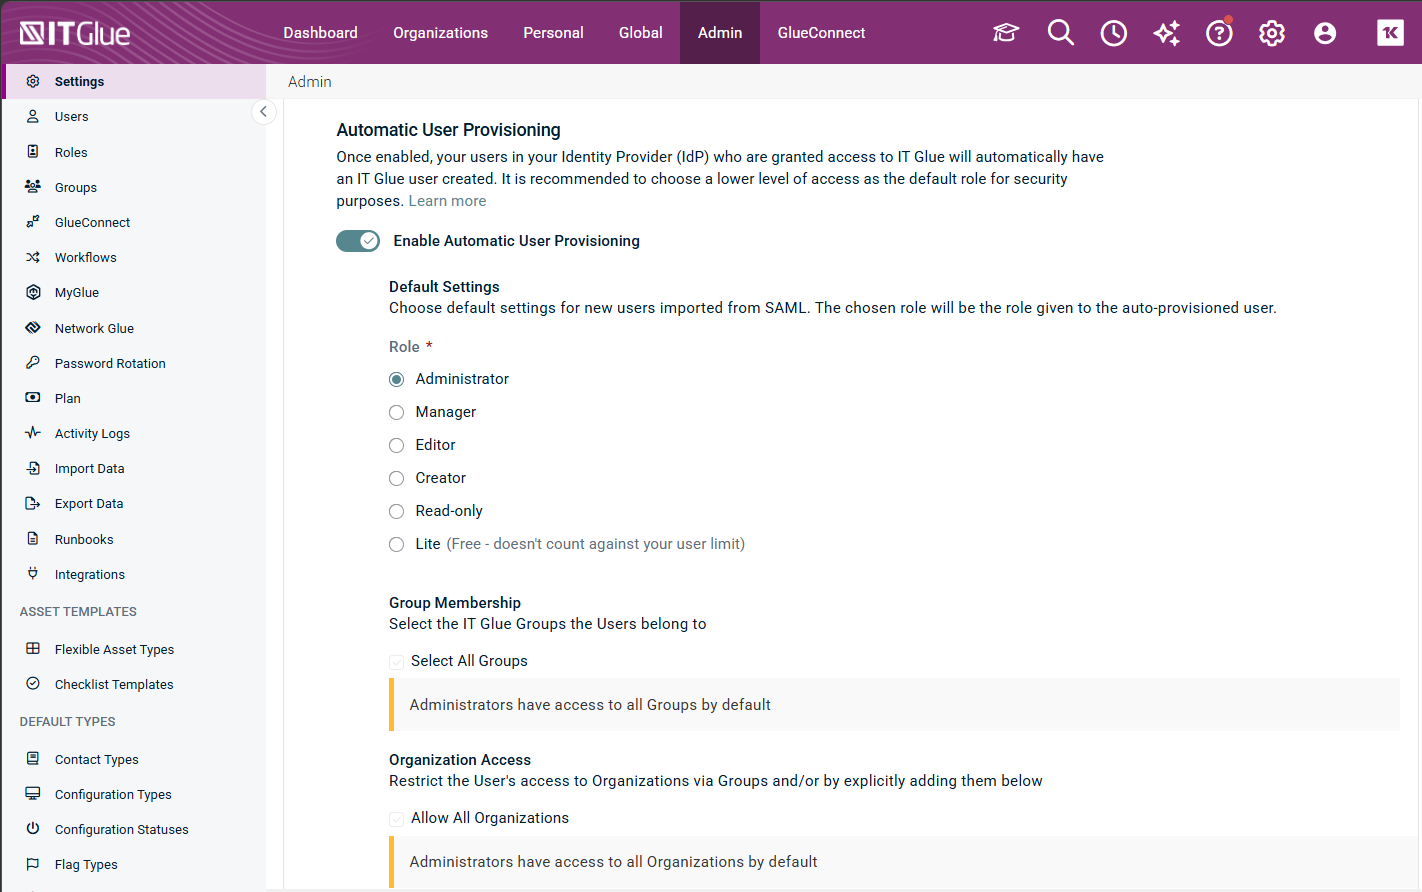
- Under Enable SAML SSO, set Auto-Provision IT Glue Users to On, and choose a Role to be assigned to all new users created through Just-in-Time provisioning. Assign these users to security groups and grant organizational access.
- Click Save to complete the process.
That's it! Now when an user has provisioned IT Glue in their SSO application, clicking through to IT Glue will automatically provision a user for them with your configured default role, group membership, and organization access.
Configuring Group Assignment with Custom SAML Attributes
If your identity provider (e.g. Okta, OneLogin, Microsoft) uses custom attributes to group users, you can automatically add new users to these IT Glue groups using the existing SAML Auto-Provision IT Glue Users feature.
Okta
Prerequisite
- The IDP provider must allow you to specify custom attributes.
Procedure
To add group attribute statements to the SAML assertion from Okta, follow these simple steps:
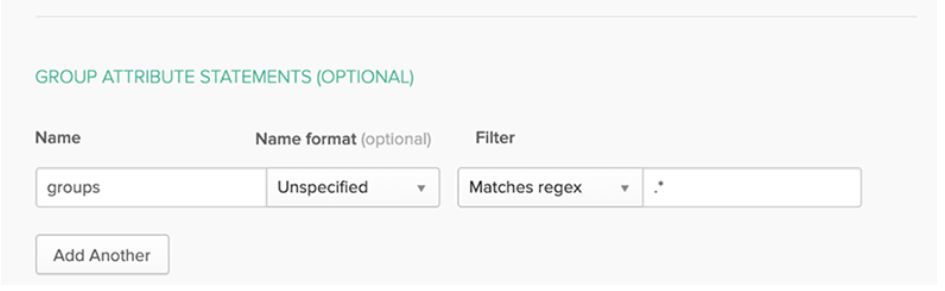
- In the Group Attribute Statements section in Okta:
- Enter the Name of the group attribute in your SAML app.
- Select a Name Format.
- Choose a filtering option for your expression:
- Starts with
- Equals
- Contains
- Matches regex
- Enter the expression that will be used to match against the Okta GroupName values and added to the SAML assertion.
- Click Add Another to add an additional group statement.
- Repeat the steps until you define all necessary groups
The group names will now be passed in Okta SAML assertion. If the spelling for the sent groups matches an IT Glue group in terms of spelling, those groups will be applied during the creation of a new user in IT Glue.
Microsoft Entra ID
Prerequisites
- Access to Entra ID Groups
- Administrator role in IT Glue
Procedure
- Login into your Entra ID Portal.
- Remove the existing additional claims and create a new claim by selecting All groups.
- Set Group ID as a Source attribute.
- Select Customize the name of the group claim checkbox.
- Set the Name as groupId and save the settings.
-
NOTE groupId is case sensitive.
In the sidebar click Groups.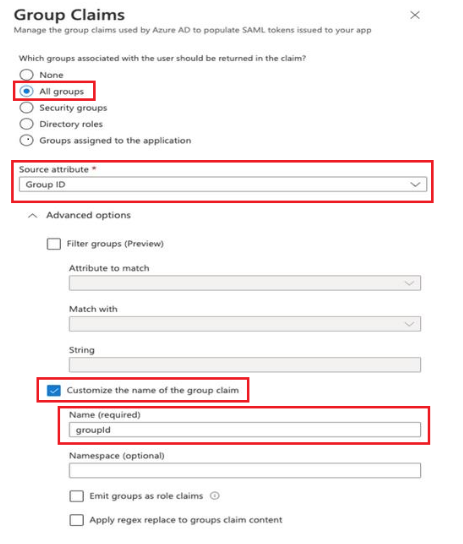
- Click on a group that you wish to use for automatic IT Glue group assignment.
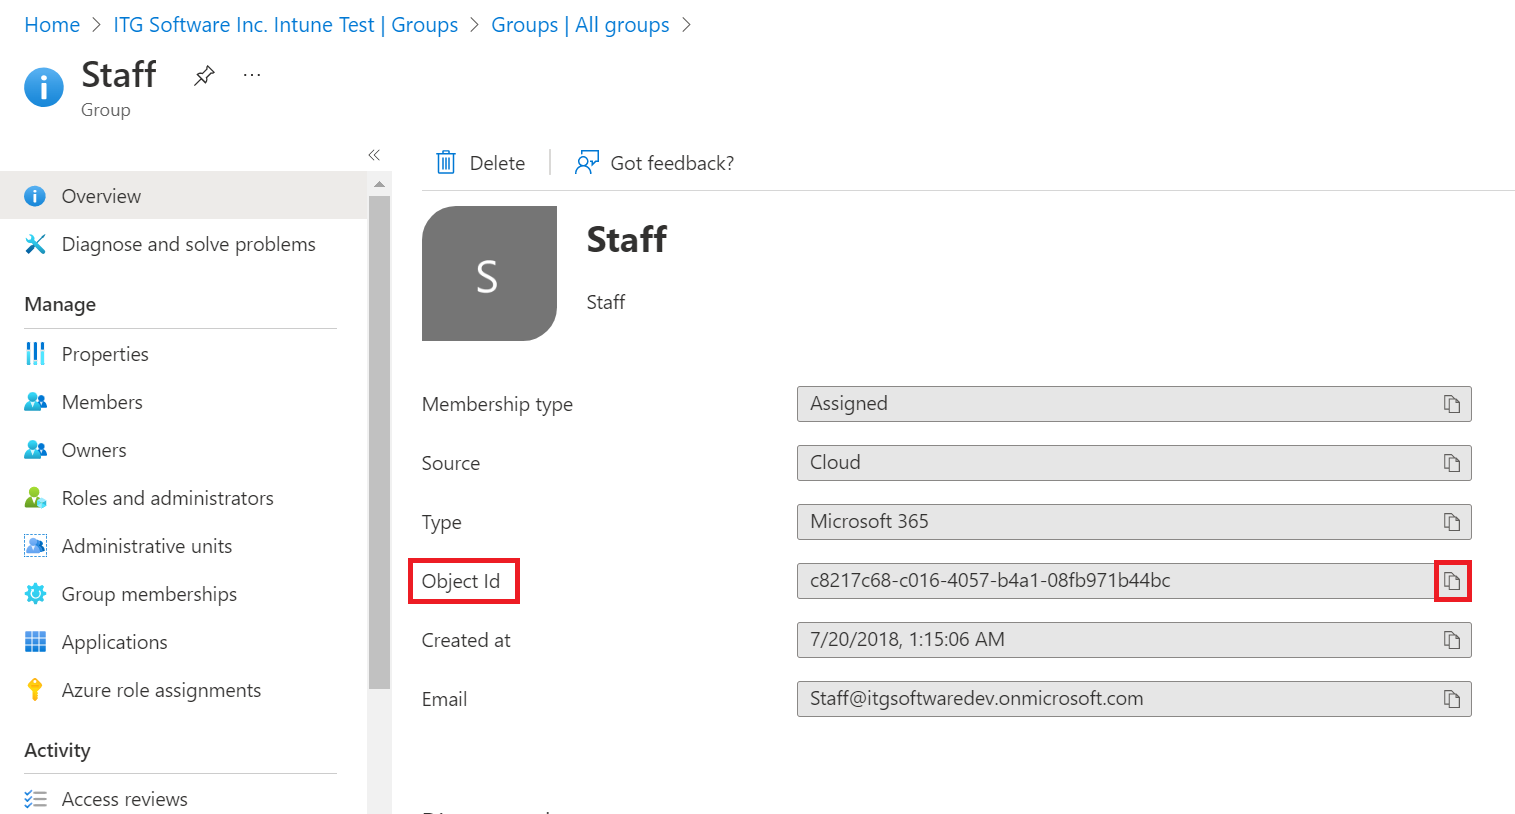
- Click on the Copy icon to copy the value presented in the Object ID row.
- In IT Glue, navigate to Settings > Authenticationand ensure Enable SAML SSO is enabled.
-
Enable the option Enable Automatic User Provisioning.
-
Set the Role (example: Editor)
-
Select at least 2 groups including the exact match group and non-matched group
-
Set organizations and save changes.
-
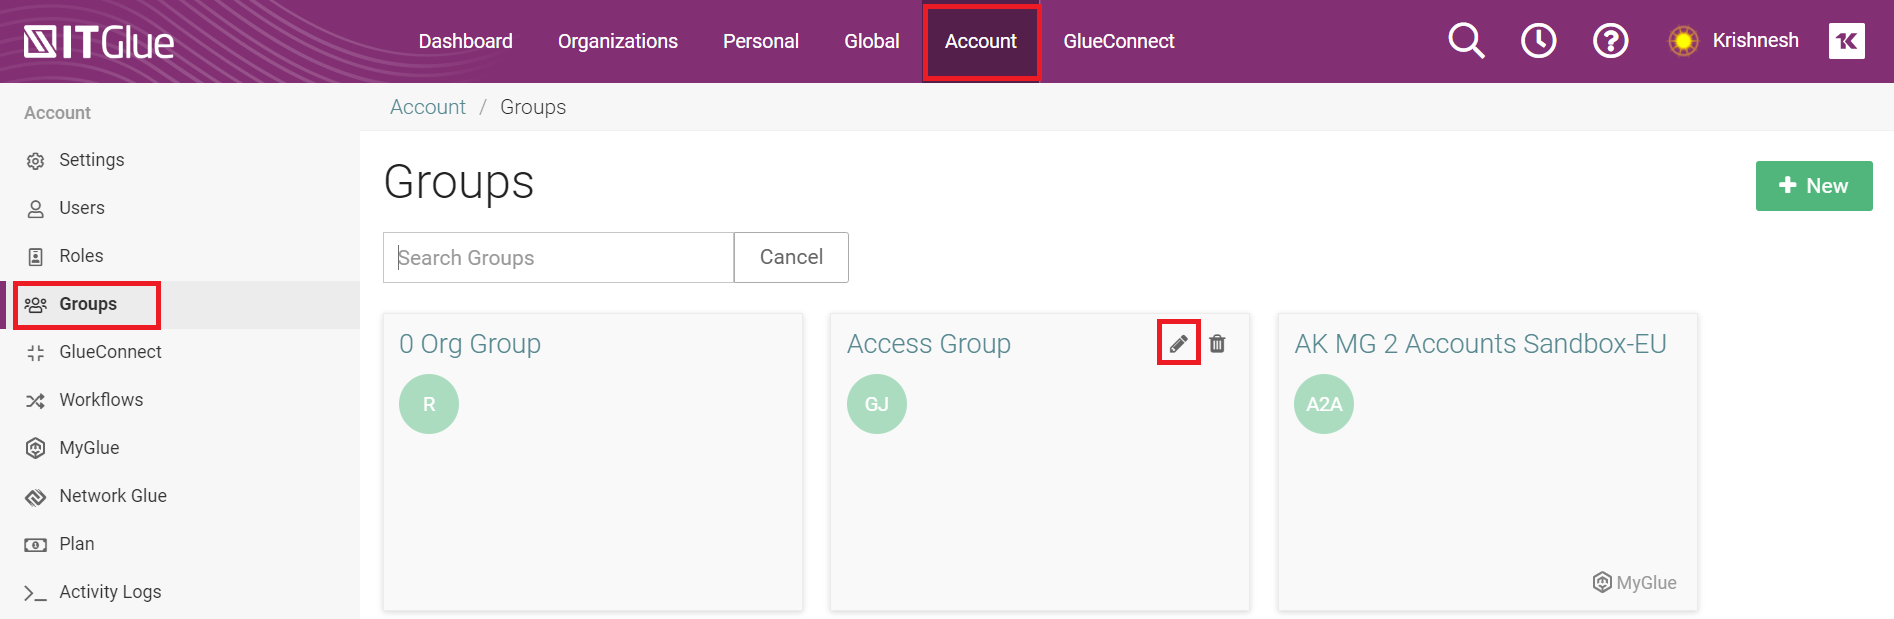
- In IT Glue, navigate to Admin > Groups.
- Enable Auto-Provision IT Glue Users.
- Set the Role (example: Administrator)
- Select at least 2 groups including the exact match group and non-matched group
- Set organizations and save changes.
- Navigate to Admin > Groups.
- Click Edit on a group you wish to use for automatic assignment.
- In the Group Description field, paste the object ID from Microsoft Entra ID with the following format.
<ad-group-id:TENANT_GROUP_ID>
Example:<ad-group-id:c8217c68-c016-4057-b4a1-08fb971b44bc>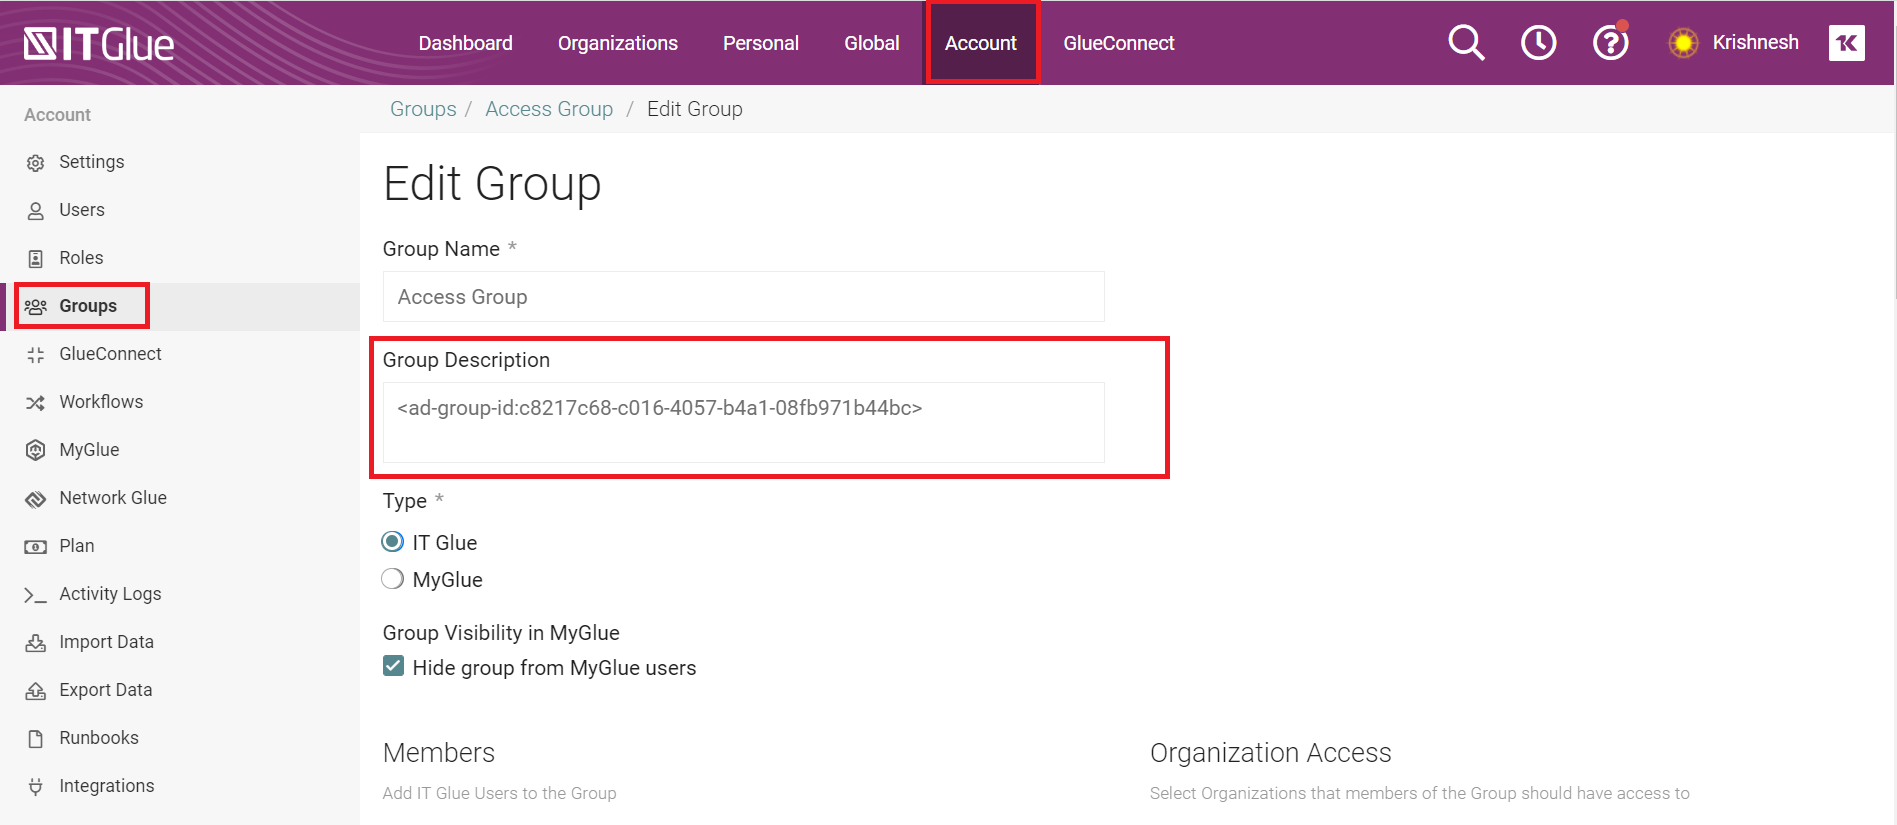
- Save your changes.
OneLogin
Prerequisite
- Access to the OneLogin Administration panel.
Procedure
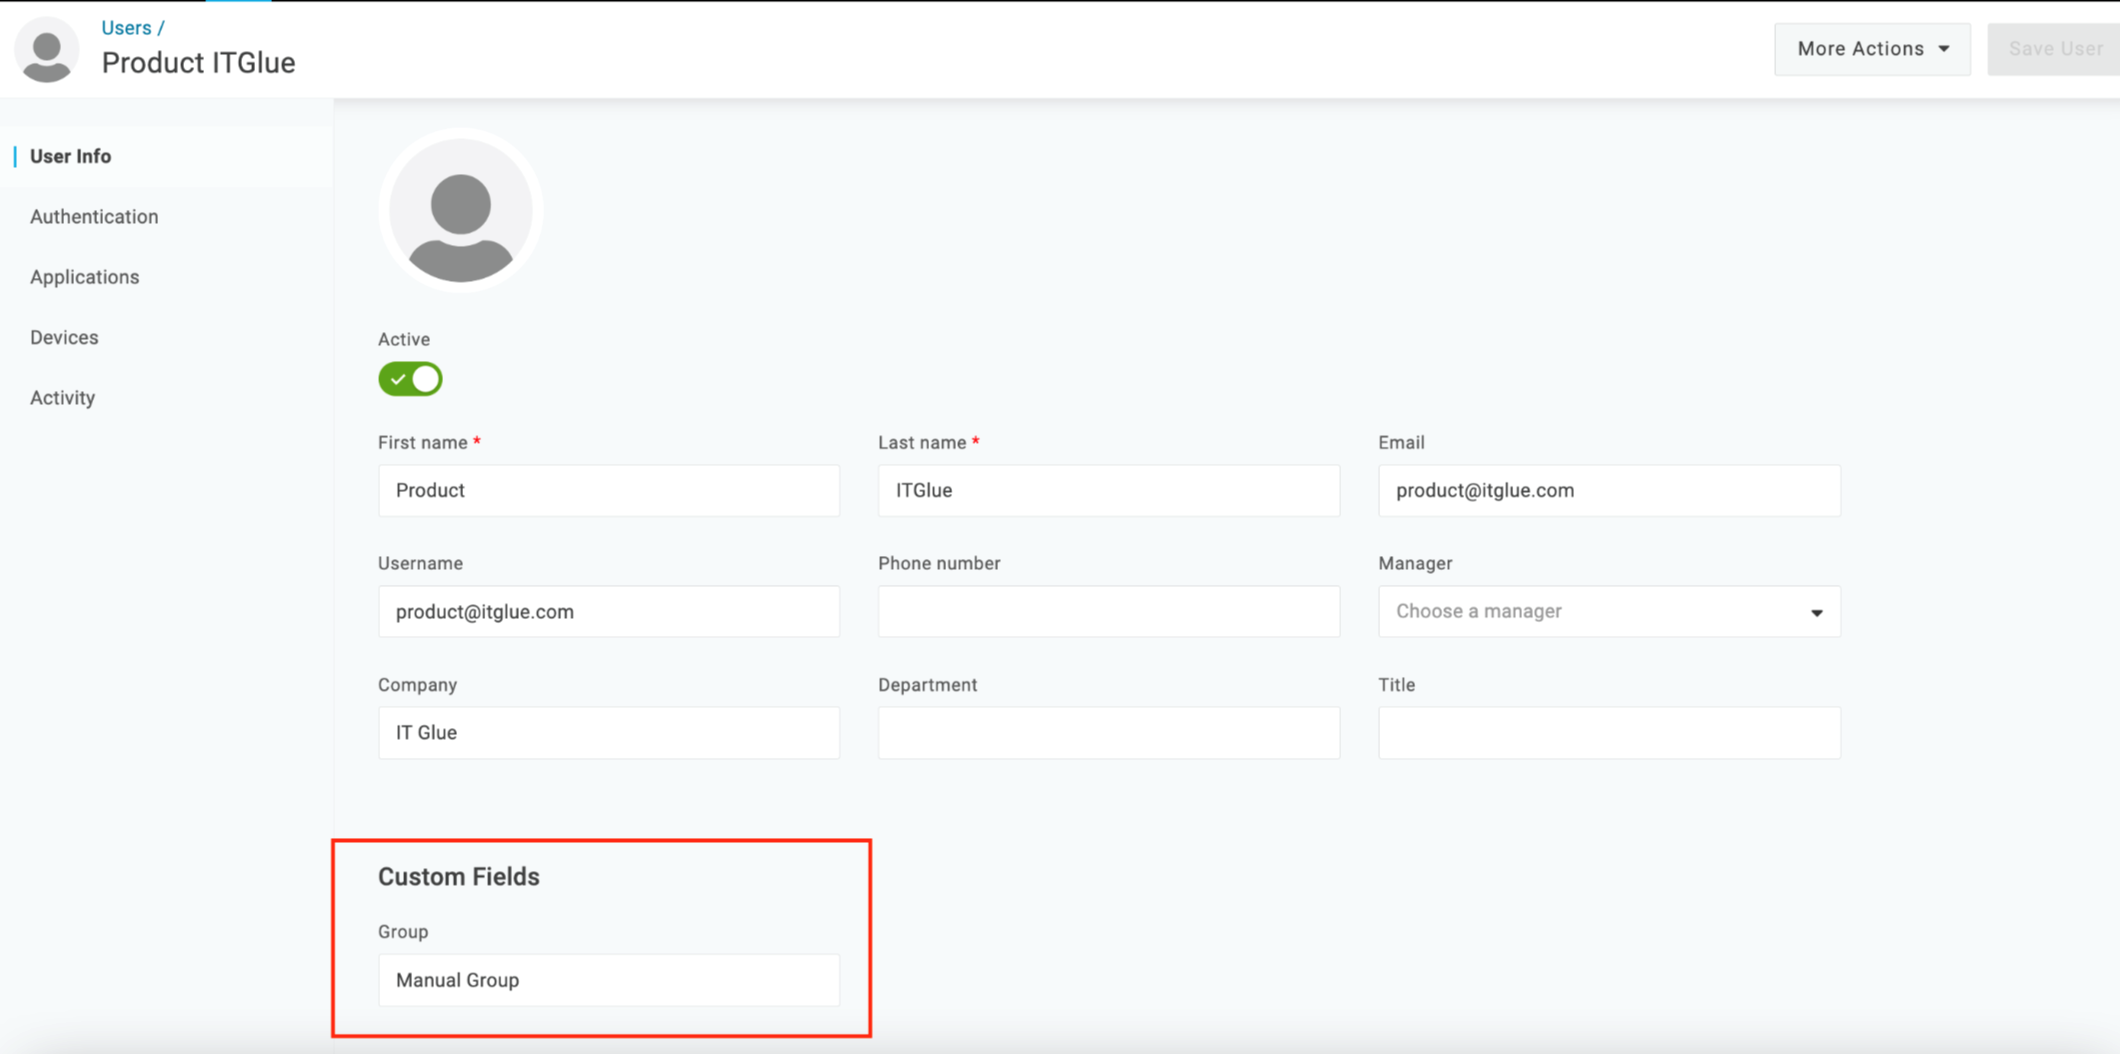
Manually add groups in the custom fields for each user in the OneLogin portal. When added, IT Glue will be able to detect and match the groups for assignment.
- Login into your OneLogin Portal.
- Navigate to Users > Custom User Fields.
- Click New User Field to create the new custom field. Once created, the custom user fields appear on the edit user page below the personal information fields.
Group Matching Logic
The following table describes how the matching logic works between an IDP and IT Glue for various scenarios.
| Scenario | Matching Logic |
|---|---|
|
Some groups from the IDP matches with IT Glue. |
IT Glue applies as many groups that are successfully matched. The unmatched groups are not applied. |
|
No Groups from the IDP match with IT Glue. |
Group Membership section of the Auto-Provision IT Glue Users feature are applied. |
| The IDP does not provide any group to IT Glue. |
Group(s) specified in the Group Membership section of the Auto-Provision IT Glue Users feature are applied. |
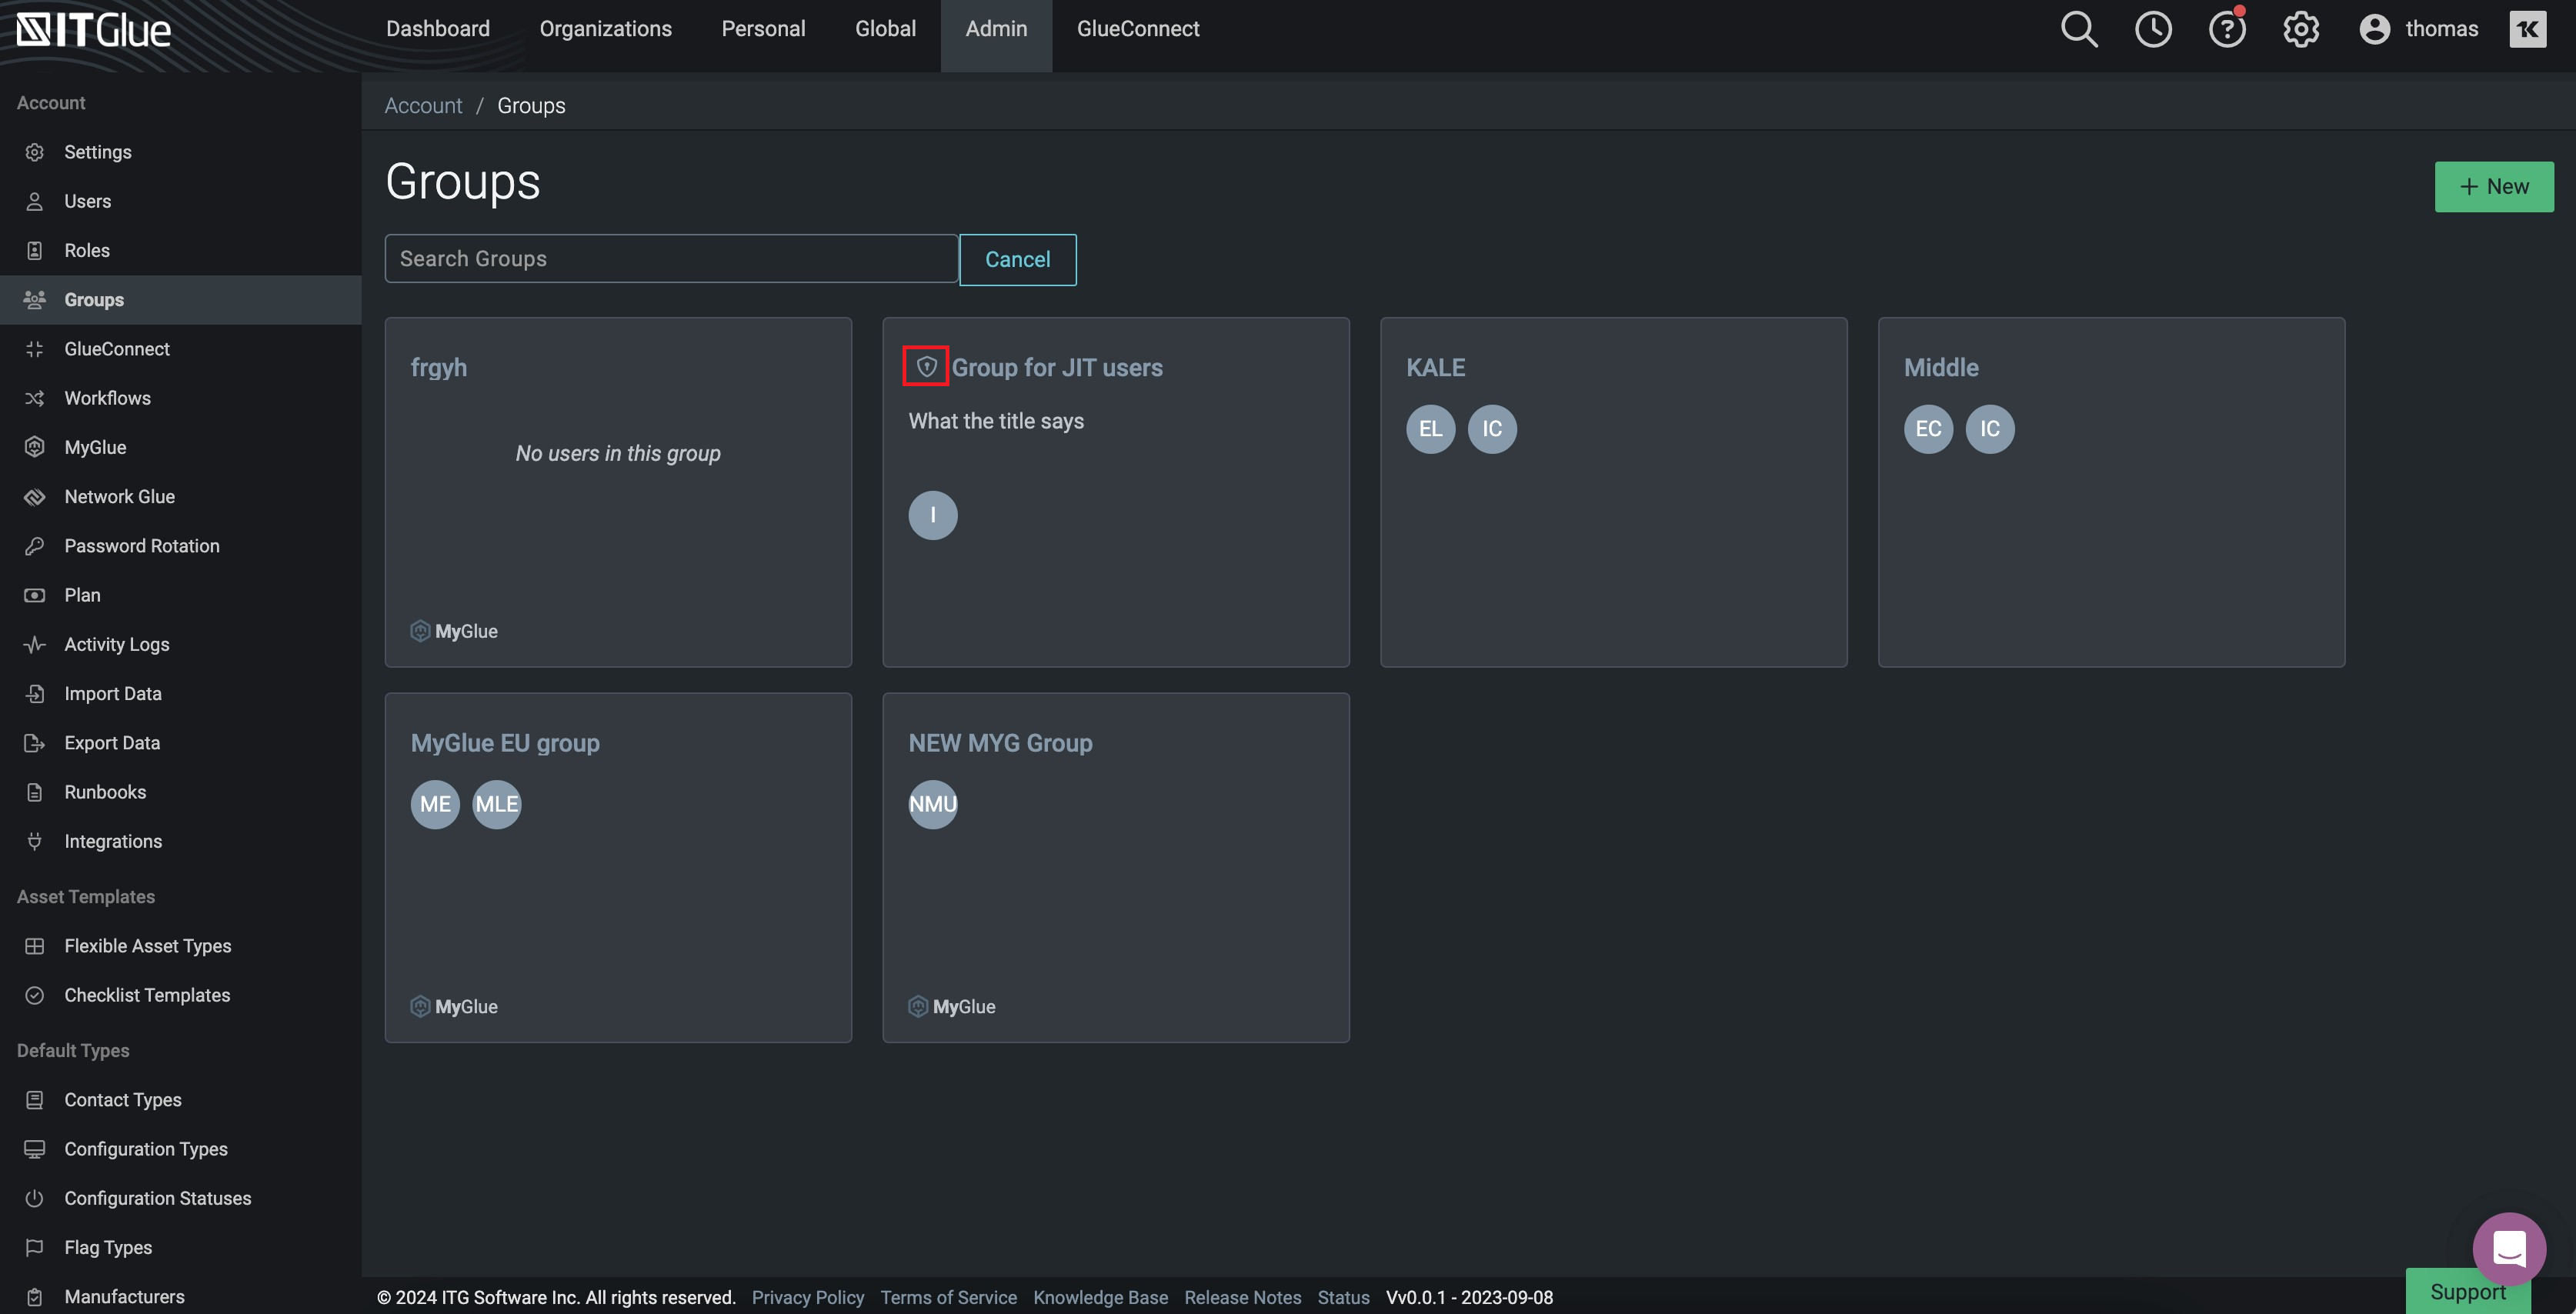
NOTE IT Glue Groups that are matched with IDP groups are indicated by an icon as shown below.
Common Questions
Do automatically provisioned users count towards my license usage?
All non-Lite users provisioned using Just-in-Time provisioning count towards your paid license usage.
Can I de-provision users through my SAML identity provider?
User de-provisioning is not supported through the SAML application. Please see our Adding and removing users topic for more information on managing users.


