Integrating with ServiceNow
Introduction
Use this article as a guide when you integrate with ServiceNow. At any time, you can come back to the Active Integrations screen (Admin > Integrations) to make changes to the integration.
The field mappings are set up automatically when you follow the instructions below. For more information, take a look at Servicenow field mappings.
If you are migrating your PSA or merging to another instance, please contact your Account Manager. Guidance from our team is recommended to ensure this is completed successfully.
Prerequisites
- You must have Manager or Administrator access to IT Glue.
- You must have Administrator access to ServiceNow.
- You will need to have Companies, Contacts and Configuration Items setup in ServiceNow.
- You will need your Domain Name (FQDN).
NOTE Once the integration is set up in IT Glue, you will see Contacts and Configurations belonging to the domains which you have access to. To see the Contacts and Configurations across all your domains in IT Glue, ensure your user belongs to the 'TOP' domain in ServiceNow.
Configuring ServiceNow
-
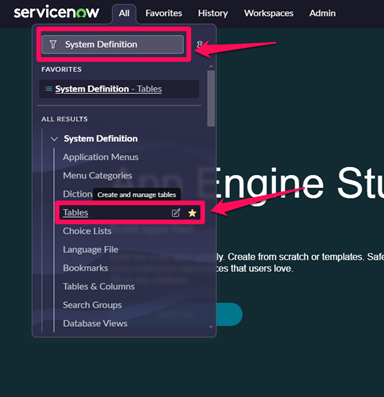
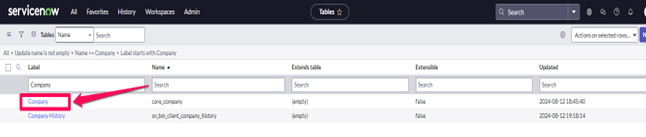
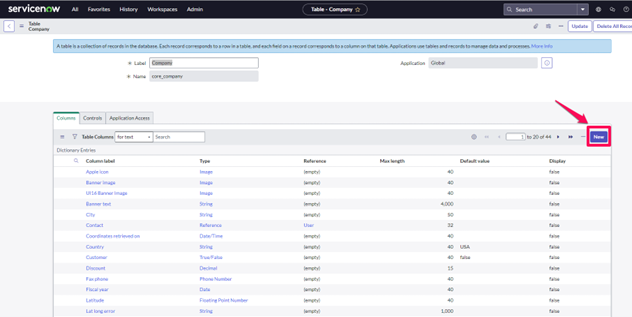
In ServiceNow navigate to tables > Company > New:
-
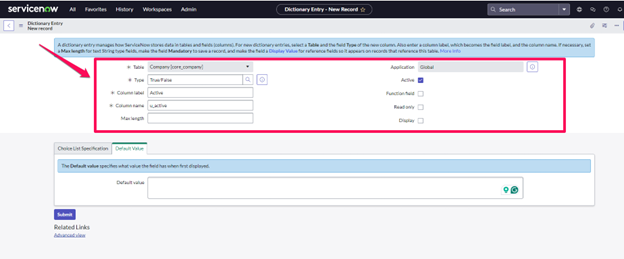
Create a label exactly like shown in the below screenshot, mark active and display:
-
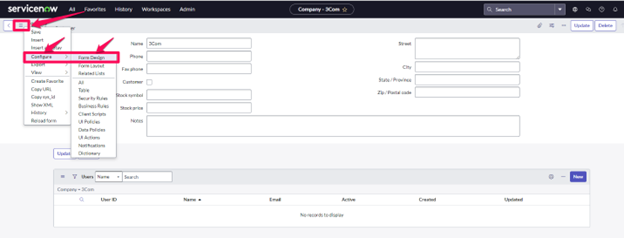
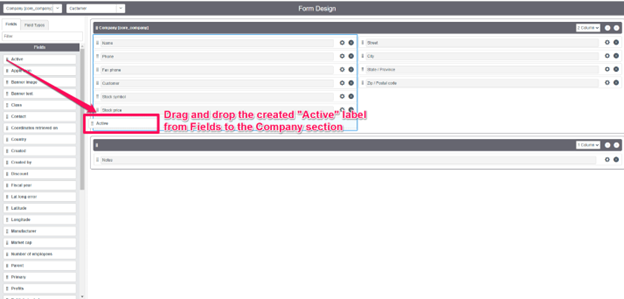
Navigate to Companies > Configure > Form Design and make sure the newly created label is in the list:

-
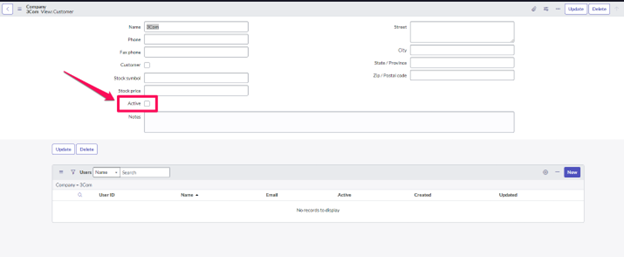
Navigate to your company and make sure to mark this newly created label as marked.
- In IT Glue, navigate to Admin > Integrations and create a new integration using the ServiceNow option.
- Complete the fields in the integration setup screen.
- Username
- Password
- Domain
We recommend you create a special integration user in order to ensure you can continue to audit regular user-activity in your ServiceNow account.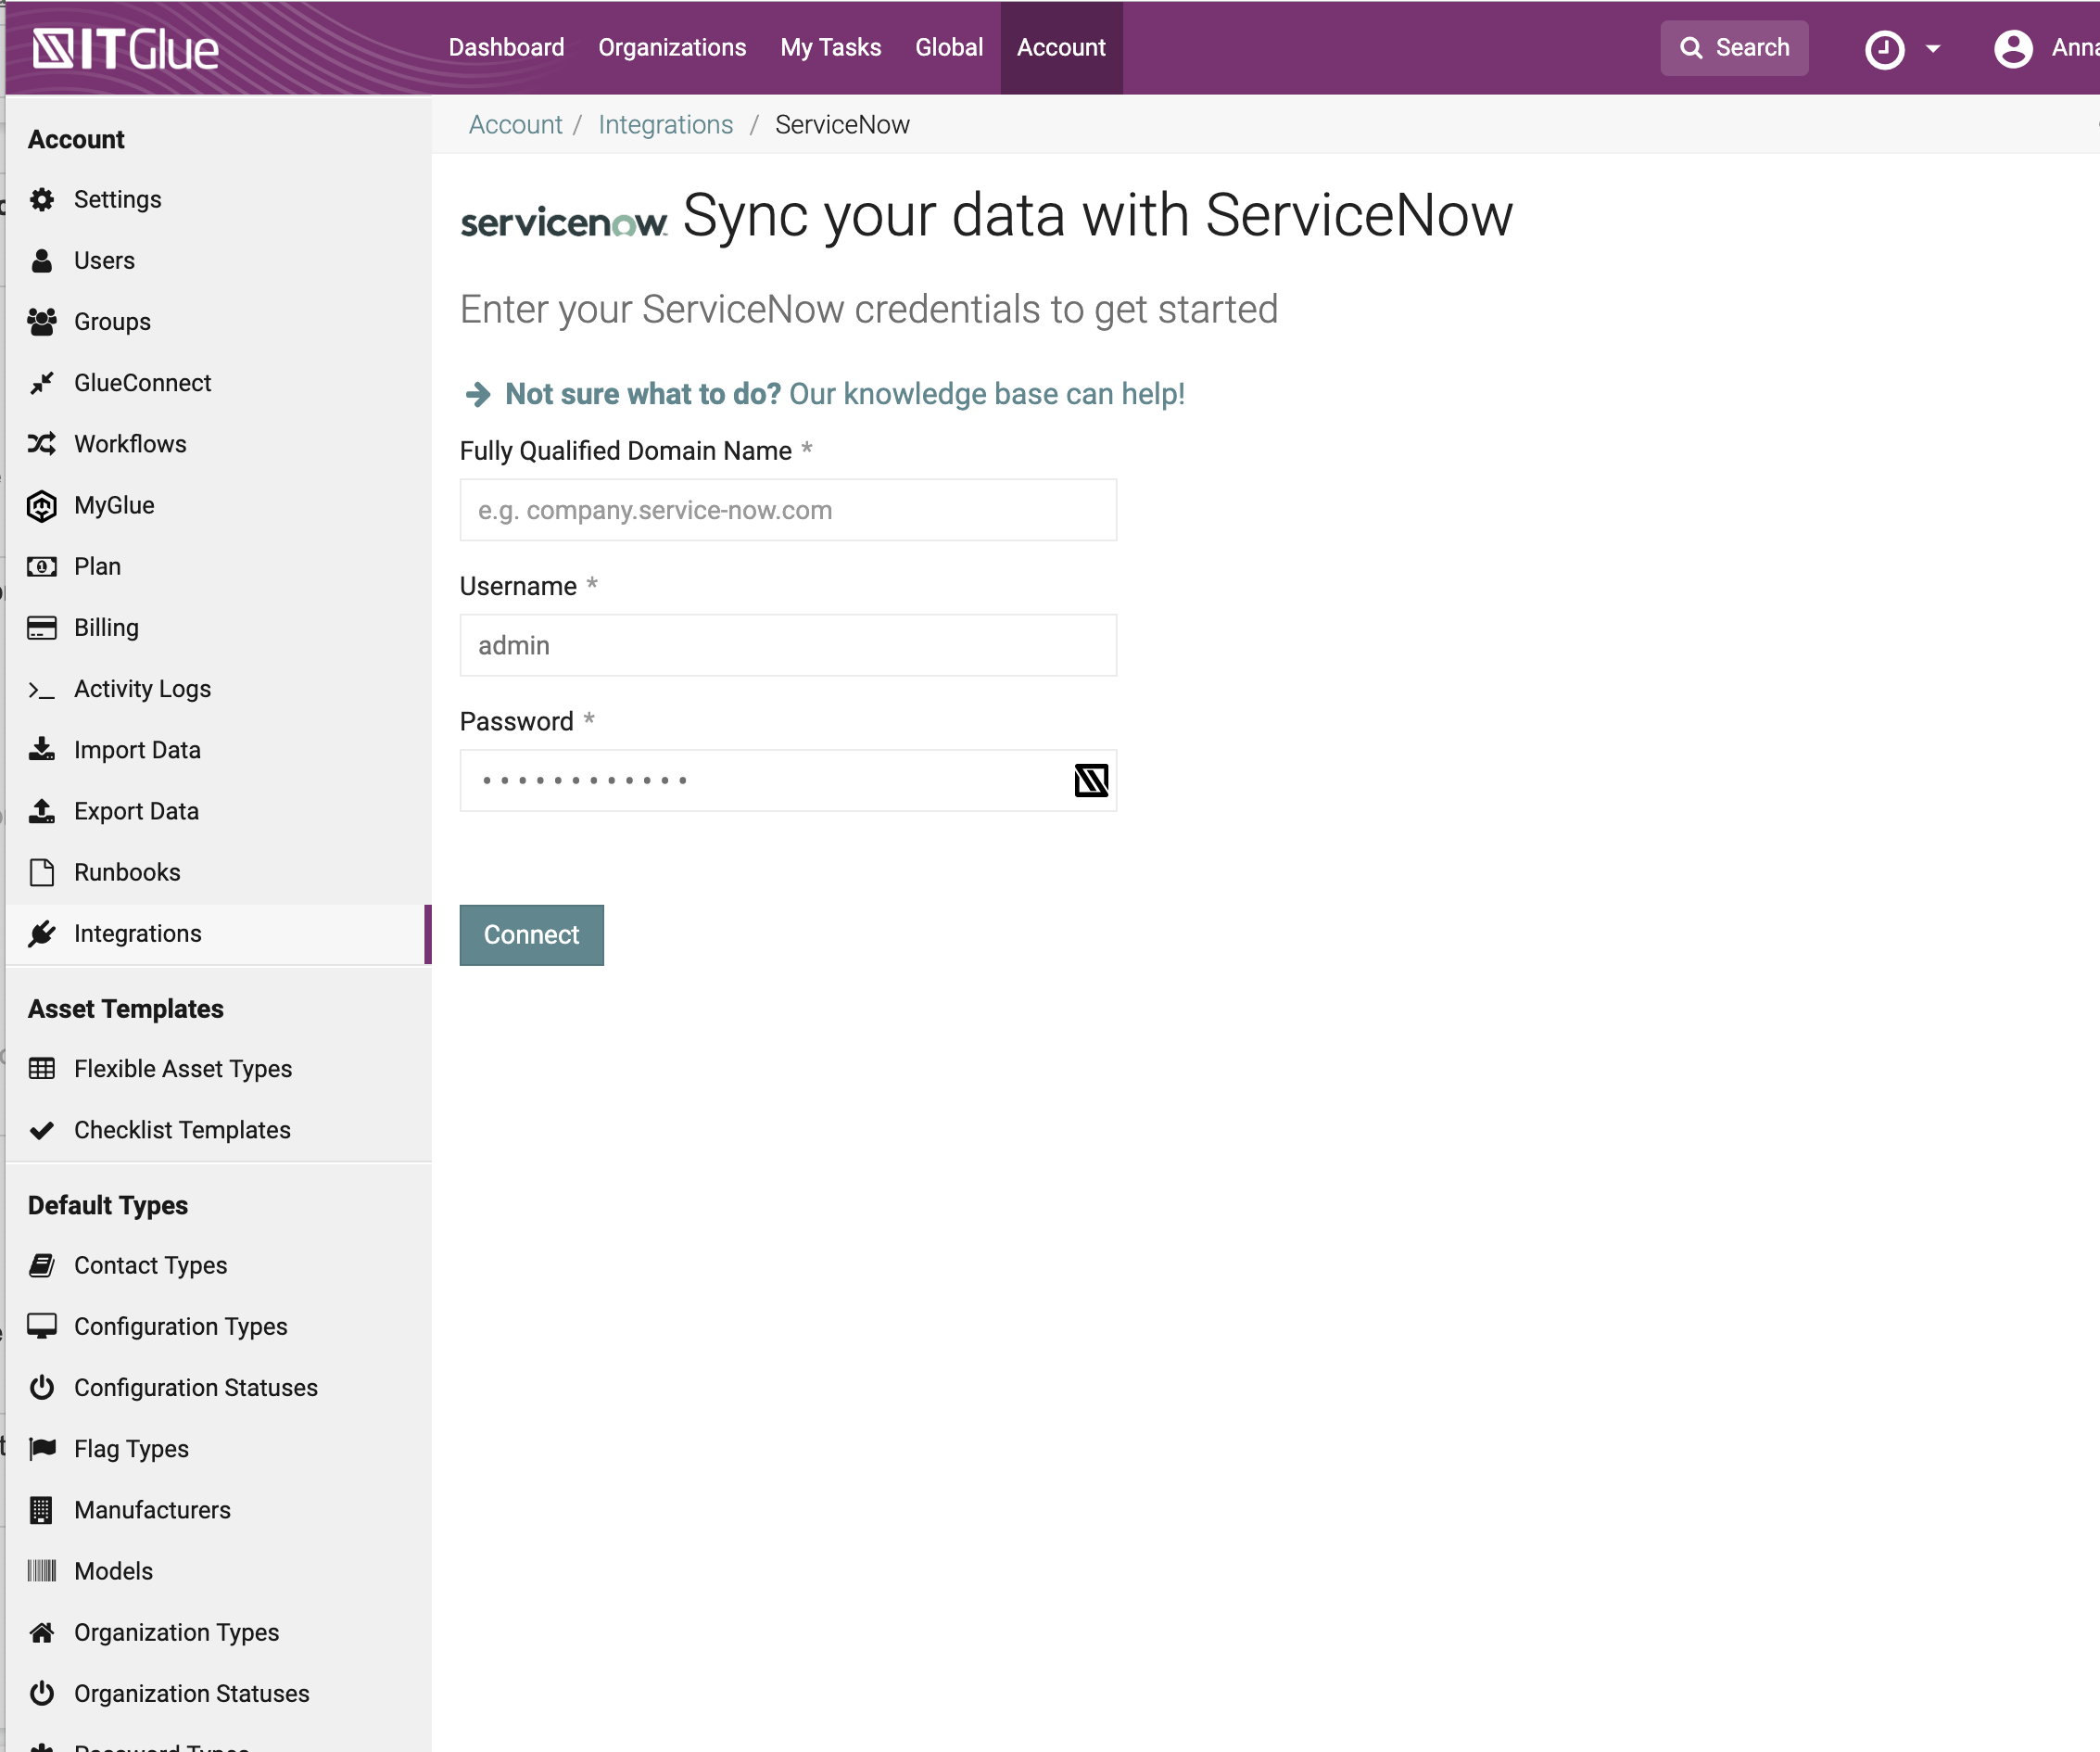
- Then, click Connect. You will be taken directly to the Sync Settings page.
NOTE If your credentials are incorrect, a red notification banner will appear at the top of the screen. Ensure that your credentials have been entered correctly and click Connect again.
- In the Sync Settings tab, tell us how much of your data to sync. By default, recommended options are listed first. As a best practice, we recommend you only select the company types, configuration types and statuses you actively manage.
IMPORTANT If your ServiceNow companies have multiple types, they will be synced into IT Glue if any one of their types is checked off. We offer the following ServiceNow Company Types: Customer (Recommended), Vendor, Other.
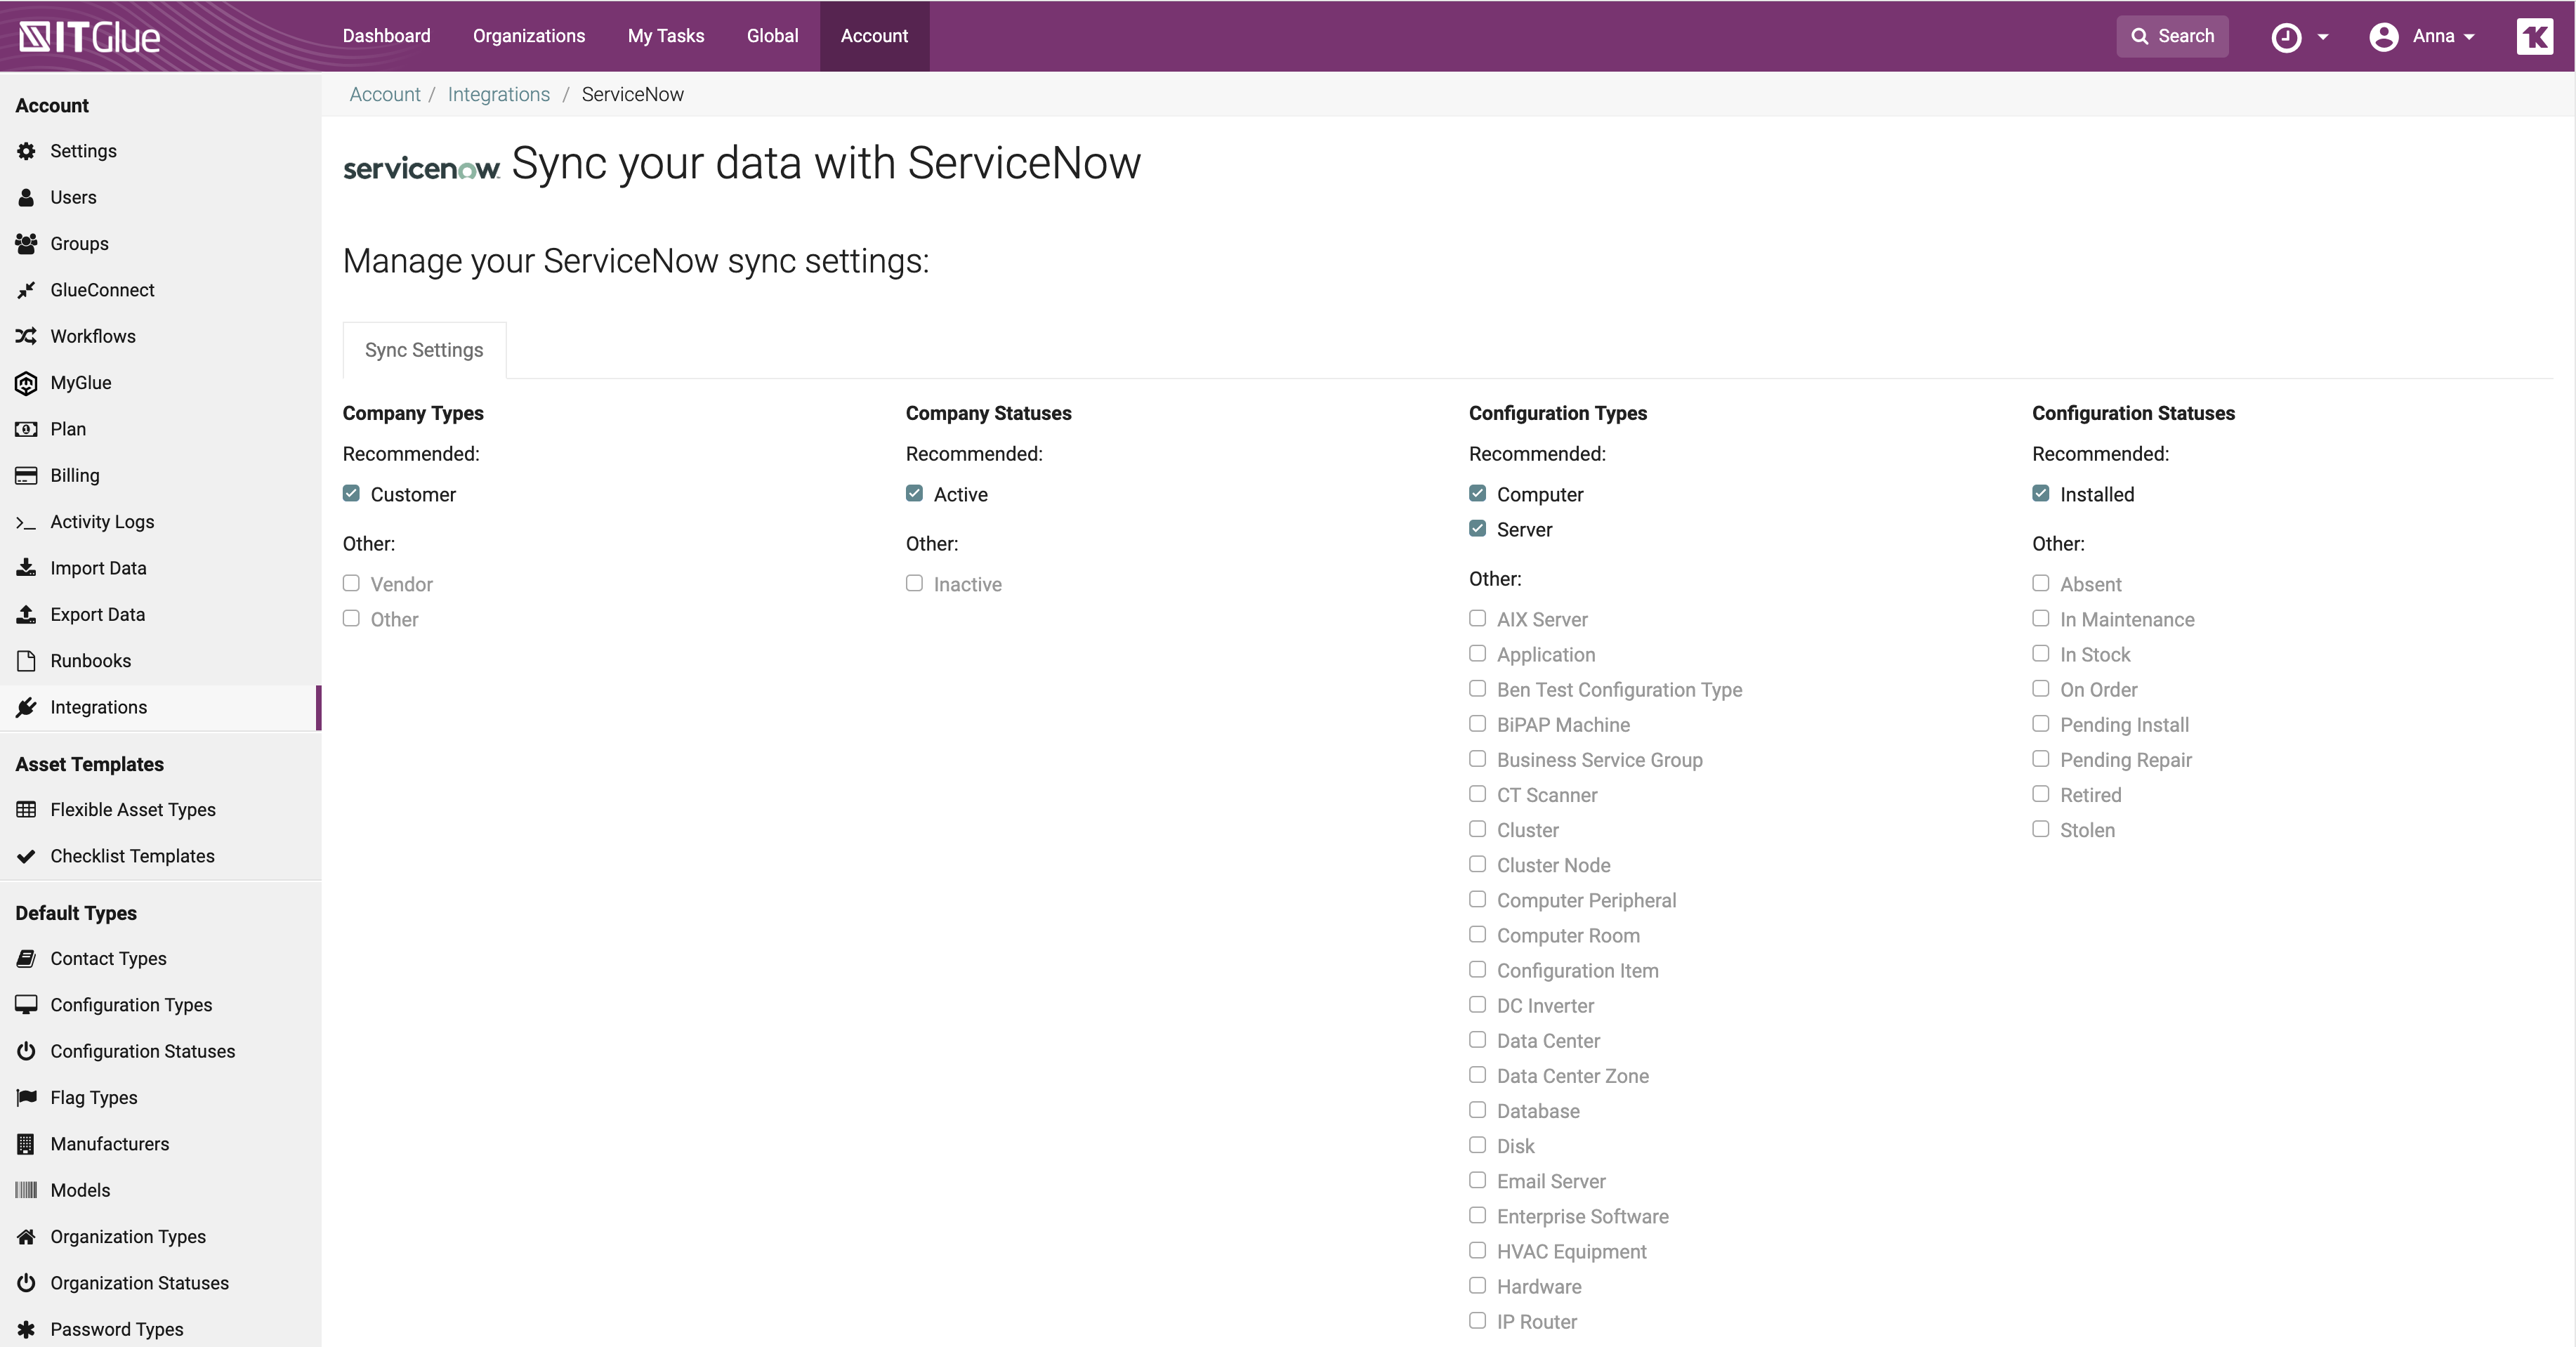
- Click Save. The sync will be automatically queued.
- You can use the manual sync option to prioritize the sync to start sooner. To start a manual sync, navigate to Admin > Integrations, click Actions and Start Manual Sync.
- From the Active Integrations screen, you can see the overall sync status. When the sync is complete, the status column changes from Syncing... to OK.
- Complete the fields in the integration setup screen.
Note that when you initially set up the integration, you will be shown a list of all licensed user accounts in your PSA on the next screen, so that you can mass invite them to your IT Glue account. We automatically select all PSA users to be invited.
If you don’t yet want to send invitations to everyone, be sure to individually uncheck the boxes next to anyone you plan to invite later or not at all. Next, click the Invite Users button to invite them to join. If you don’t want to invite anyone, you can also skip this step entirely by clicking the Skip link.


