Microsoft Integration: Intune
NAVIGATION Admin > Integrations > Microsoft > Intune
PERMISSIONS Manager or Administrator
BEFORE YOU BEGIN To review prerequisites and learn how to fully set up an integration with Microsoft in IT Glue, refer to Microsoft Integration.
Opting to sync Microsoft Intune devices as part of your integration with Microsoft allows Intune device details to sync automatically to IT Glue, ensuring accurate and up-to-date data.
Syncing Intune devices
Refer to Microsoft Integration to learn how to perform the initial data sync. To sync Intune devices, you must select the Sync Intune Devices from the Intune tab in the sync settings.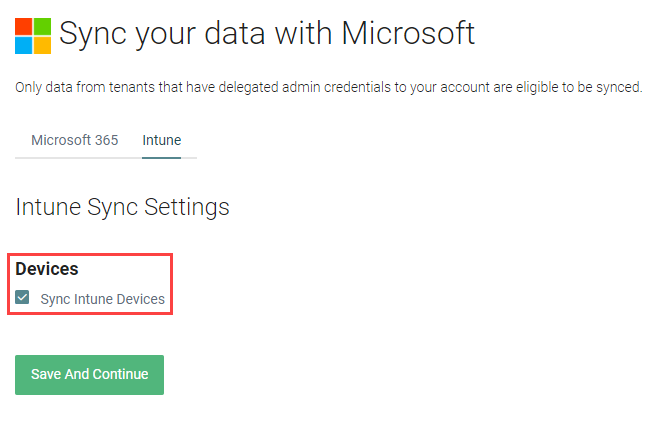
Reviewing sync and matching Microsoft devices to IT Glue configurations
IT Glue discovers tenants and devices and tries to match them to your data in your account based on the following logic:
| Rule | Matches on |
|---|---|
| Organization | Tenant name |
| Configuration | Intune device name, MAC, Serial |
After matching Microsoft tenants to IT Glue organizations in Review sync and match Microsoft tenants to IT Glue organizations, you can check for and map any unmatched devices as follows:
- From the Microsoft Tenant Matching page, click the Matched filter.
- Any organization displaying a count of matched devices that does not equal the total number of devices in the Unmatched Machines column requires review. From the more menu
 , select Match Devices.
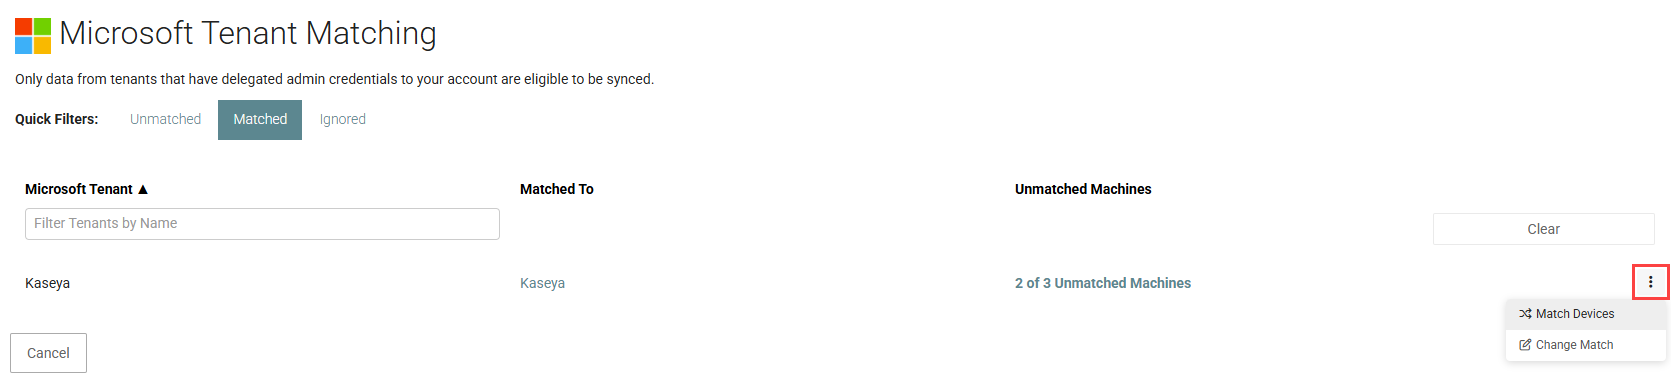
- You'll be redirected to the System Matching page for the selected organization. For each unmatched Microsoft device, you can perform one of the following actions:
- Match to a suggested IT Glue configuration by selecting Accept Suggested Match from the more menu .
- Create a new IT Glue configuration to match to by selecting Create Configuration from the more menu .
- Prevent an item from counting as unmatched in subsequent syncs by selecting Ignore from the more menu . The device will move to the Ignored filter, where you can match it in the future, if desired.
- Search for and select an IT Glue configuration to match to by entering its name in the Match To column.
NOTE Kaseya does not recommend that you create new configurations if your intent is to have them populate from IT Glue to your PSA solution. New items created in this way will not automatically sync with your PSA unless you manually edit and save each item.
IMPORTANT Before creating a configuration, you should first try to match the devices by MAC addresses or serial number. Only after you've verified that the corresponding configurations do not exist in IT Glue should you create them. You can expand a device to view its details.
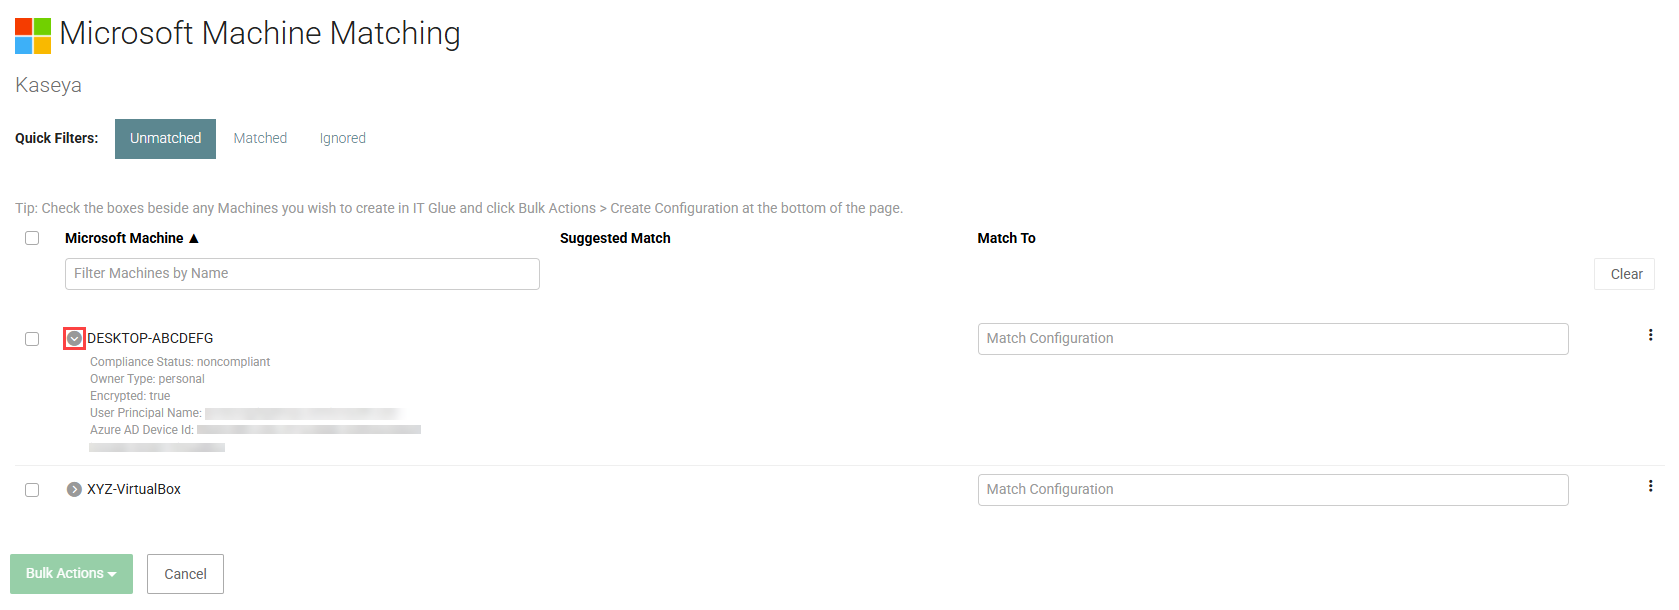
You also have the option to accepted suggested matches for, create configurations for, or ignore multiple devices at once. Select the check boxes next to any number of devices, or select all devices by selecting the check box in the header, and select the applicable action from the Bulk Actions drop-down menu in the lower-left corner of the page.
- Match to a suggested IT Glue configuration by selecting Accept Suggested Match from the more menu
- Repeat this process for each organization until you've matched all unmatched devices. Once you've done so, the integration setup is complete.
Reverting or changing a match
To revert a match, click the Matched filter. From the more menu ![]() for a device, select Revert Match to move it back to the Unmatched filter.
for a device, select Revert Match to move it back to the Unmatched filter.
To change a match, click the Matched filter. From the more menu ![]() for a device, select Change Match, and enter an IT Glue configuration name in the Matched To column.
for a device, select Change Match, and enter an IT Glue configuration name in the Matched To column.


