Changing an existing IT Glue user's access to MyGlue
This article shows how to move an existing IT Glue user to MyGlue.
NOTE When you move someone to MyGlue, you need to replace their IT Glue role and groups with a MyGlue role and groups, plus change the organizations they can access to match what their MyGlue account allows.
Prerequisites
- Looking for information about permissions? Read MyGlue user roles, groups, and permissions to MyGlue permissions.
- You need a Administrator or Manager role in IT Glue.
Instructions
- Log in to your IT Glue account and navigate to Admin > Users.
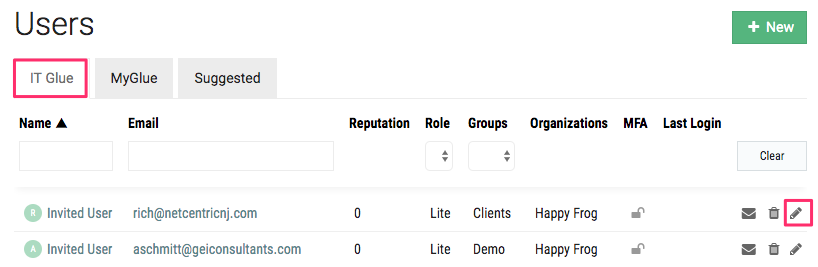
- On the IT Glue tab, find the IT Glue user you want to move. Then, click the pencil icon at the end of the row to edit the user.

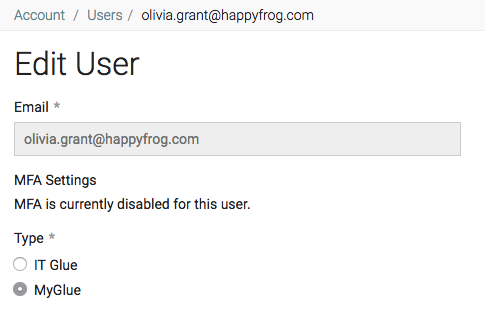
- On the next screen, change the Type to MyGlue.
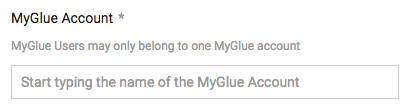
- Search for and select the MyGlue Account the user will belong to.
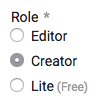
- Choose a role to define the actions the user is permitted to perform: Editor, Creator, or Lite.
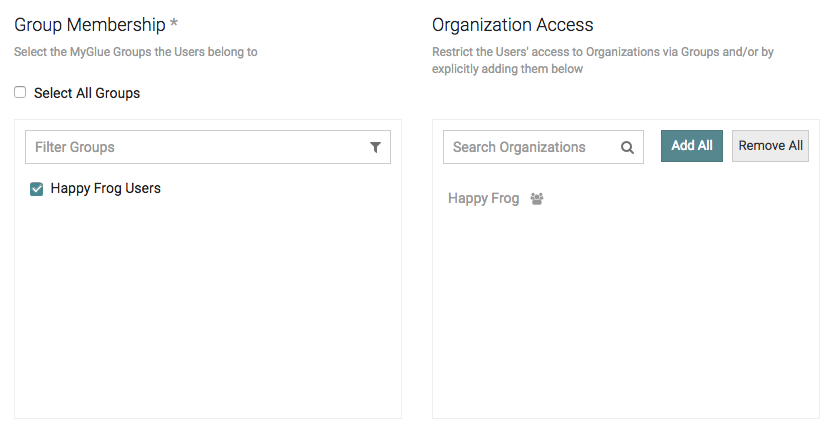
- Select the groups the user will be a member of and the organizations they can access, if not already populated by a group. Organization names populated by a group are grayed out because the permissions are inherited.
- Click Save.
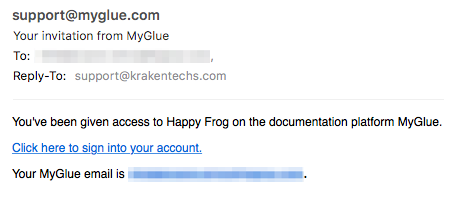
After saving these changes, the user will get a notification by email, and they will no longer be able to sign in to your IT Glue subdomain.
Email the user receives after you move their account to MyGlue:
Additional Notes
- By moving the user, you'll find that any explicitly set asset-level permissions the user had in IT Glue (not inherited through a group) will follow them to MyGlue.
- If you make a mistake, it is possible to move the person back to IT Glue by editing their profile and changing their user account type to IT Glue. Make sure you add them back to the same groups and give them permission to access the same organizations, and they’ll have the same permissions they had before.


