Suggested IT Glue documentation in BMS tickets
Introduction
Take your integration with Kaseya BMS even further. As an IT Glue Administrator or Manager, you can set up ticket settings that will allow for the suggestion of any IT Glue documentation and assets related to the BMS service ticket that your technician is actioning.
Eliminate the time your technicians currently spend on switching between platforms to search for relevant information in IT Glue. By setting up these ticket settings, you can make your ticketing resolution process even more efficient.
Prerequisites
- You must have an Administrator or Manager-level role in IT Glue.
- You must have an active integration setup with Kaseya BMS. For details, refer to our Integrating with Kaseya BMS topic.
- Users must have the necessary access and permissions to view the IT Glue documentation that is suggested in the BMS ticket.
Instructions
Creating new ticket settings
- In IT Glue, navigate to Account > Ticket Settings. Click the green + New button.

- A Ticket Conditions step will display. Complete the following fields and then click Next.
- Name - Give your new ticket setting a short and descriptive name. You can add or edit this name anytime during the ticket setting creation process.
- Condition fields - The attributes of a service ticket that will trigger particular documentation to display under “Related documentation” in BMS.
- Ticket attribute - Drop-down menu includes: Account, Location, Contact, Ticket Title, Ticket Details, Queue, Source, Type, Issue Type, Sub-Issue Type, SLA, HW Asset, SW Asset.
- Operators - Drop-down menu includes:
- Contains - Will only match complete words and match the words in the specified order. It will not match if there are other words interrupting the specified phrase.
- Value - Free text field. Enter only one value per field. Values are not case sensitive.

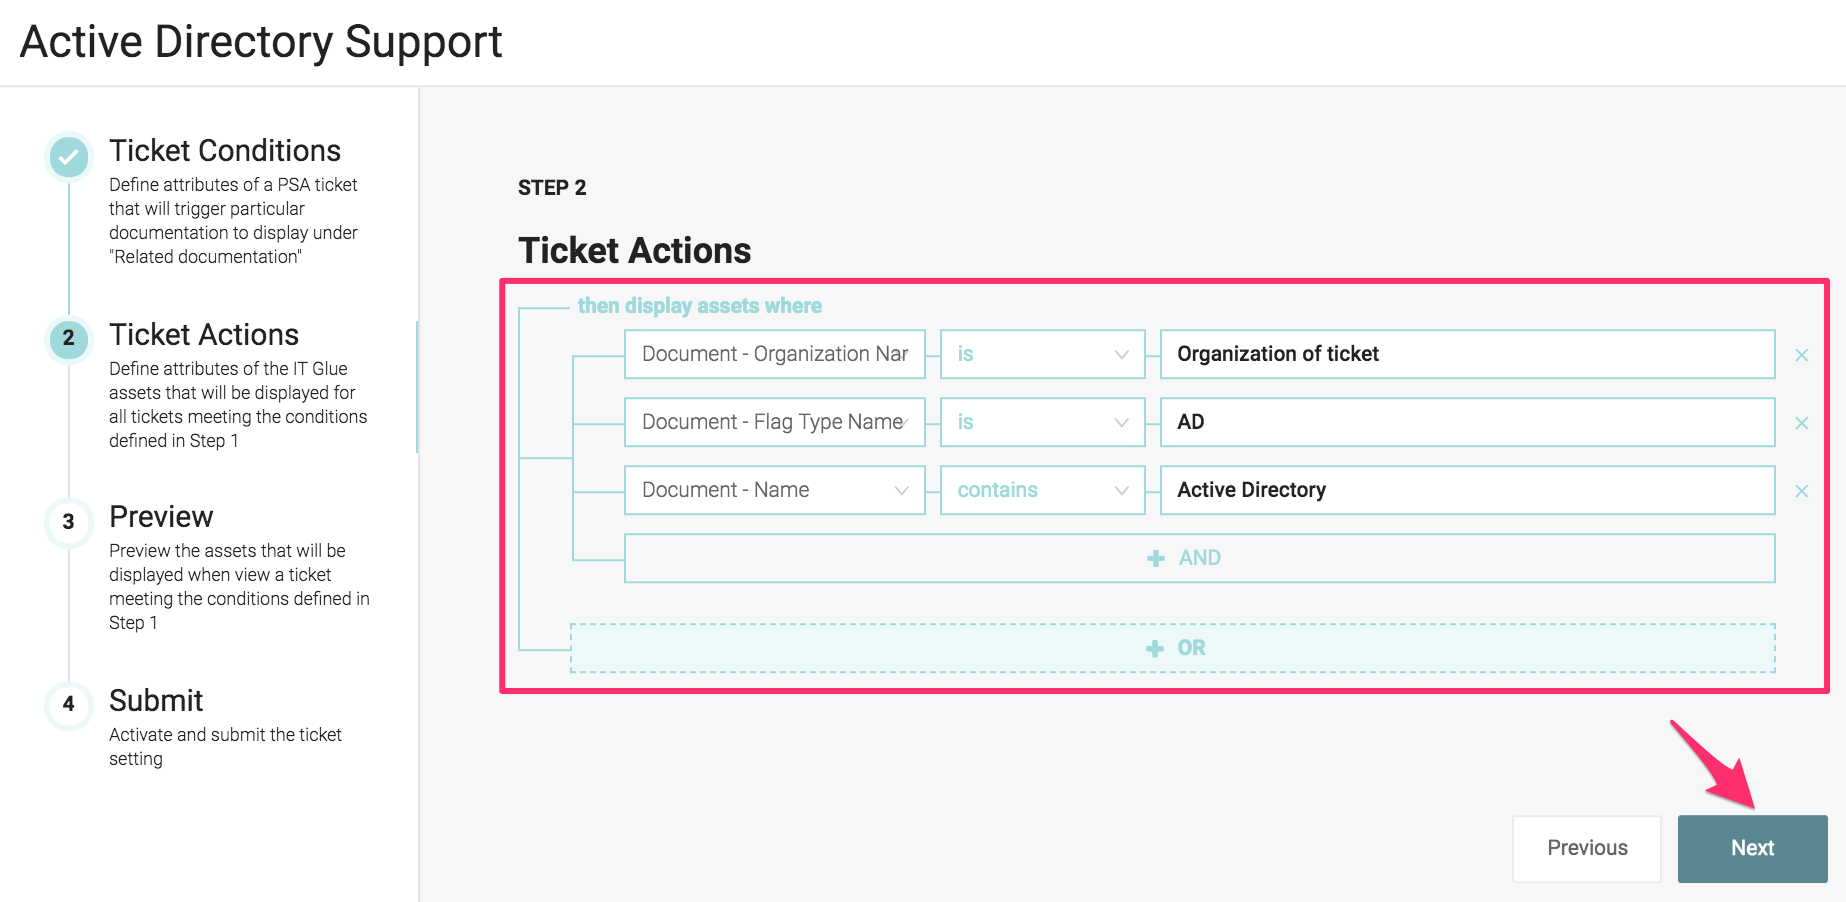
- A Ticket Actions step will display. Complete the following fields and then click Next.
- Action fields - The attributes of the IT Glue assets that will be displayed for all BMS tickets meeting the conditions set in the Ticket Conditions step.
- Asset attribute - Drop-down menu includes: Document name, document organization name, document folder, document flag type, password name, password category, and password organization name. Value matching is performed based on the string value.
- Operators - Drop-down menu includes:
- Contains - Will only match complete words and match the words in the specified order. It will not match if there are other words interrupting the specified phrase.
- Is
- Is not
- Value - Free text field. Enter only one value per field. Values are not case sensitive.
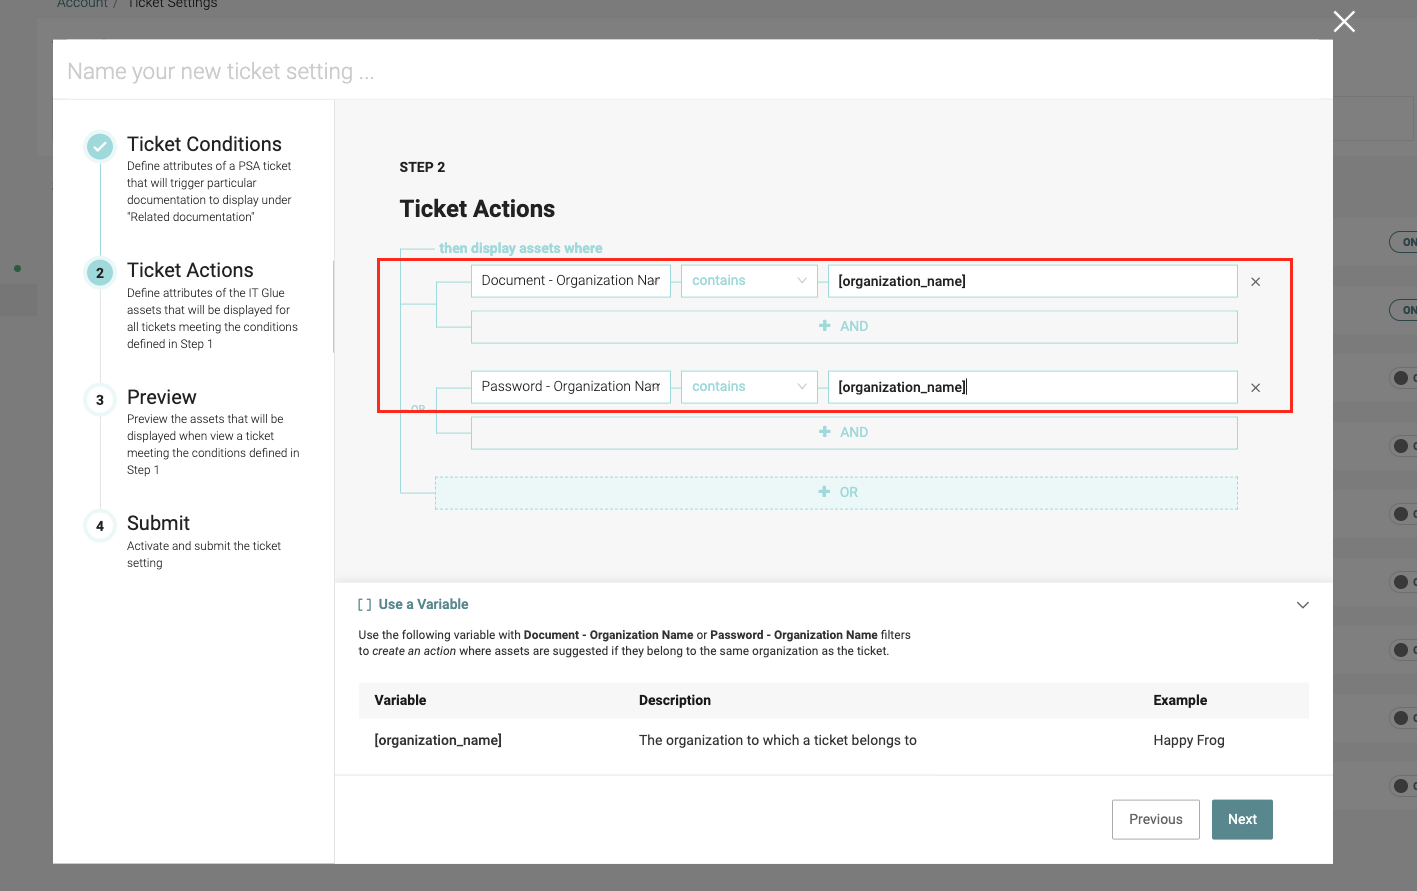
NOTE You can use [organization_name] as a variable to create a single Ticket Action which links documentation from the same organization as the ticket belongs to.
For any ticket conditions, simply add Document - Organization Name - is - [organization_name] OR Password - Organization Name - is - [organization_name] to have documents or passwords from each ticket’s respective organization appended accordingly.
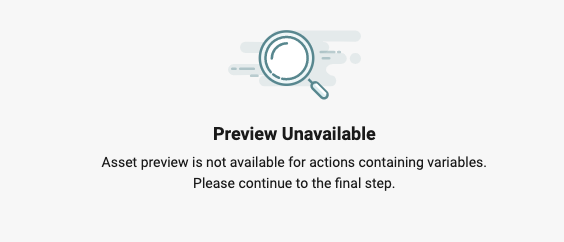
NOTE There is no preview available for Ticket Actions containing a variable, unless there is another OR condition.
- Action fields - The attributes of the IT Glue assets that will be displayed for all BMS tickets meeting the conditions set in the Ticket Conditions step.
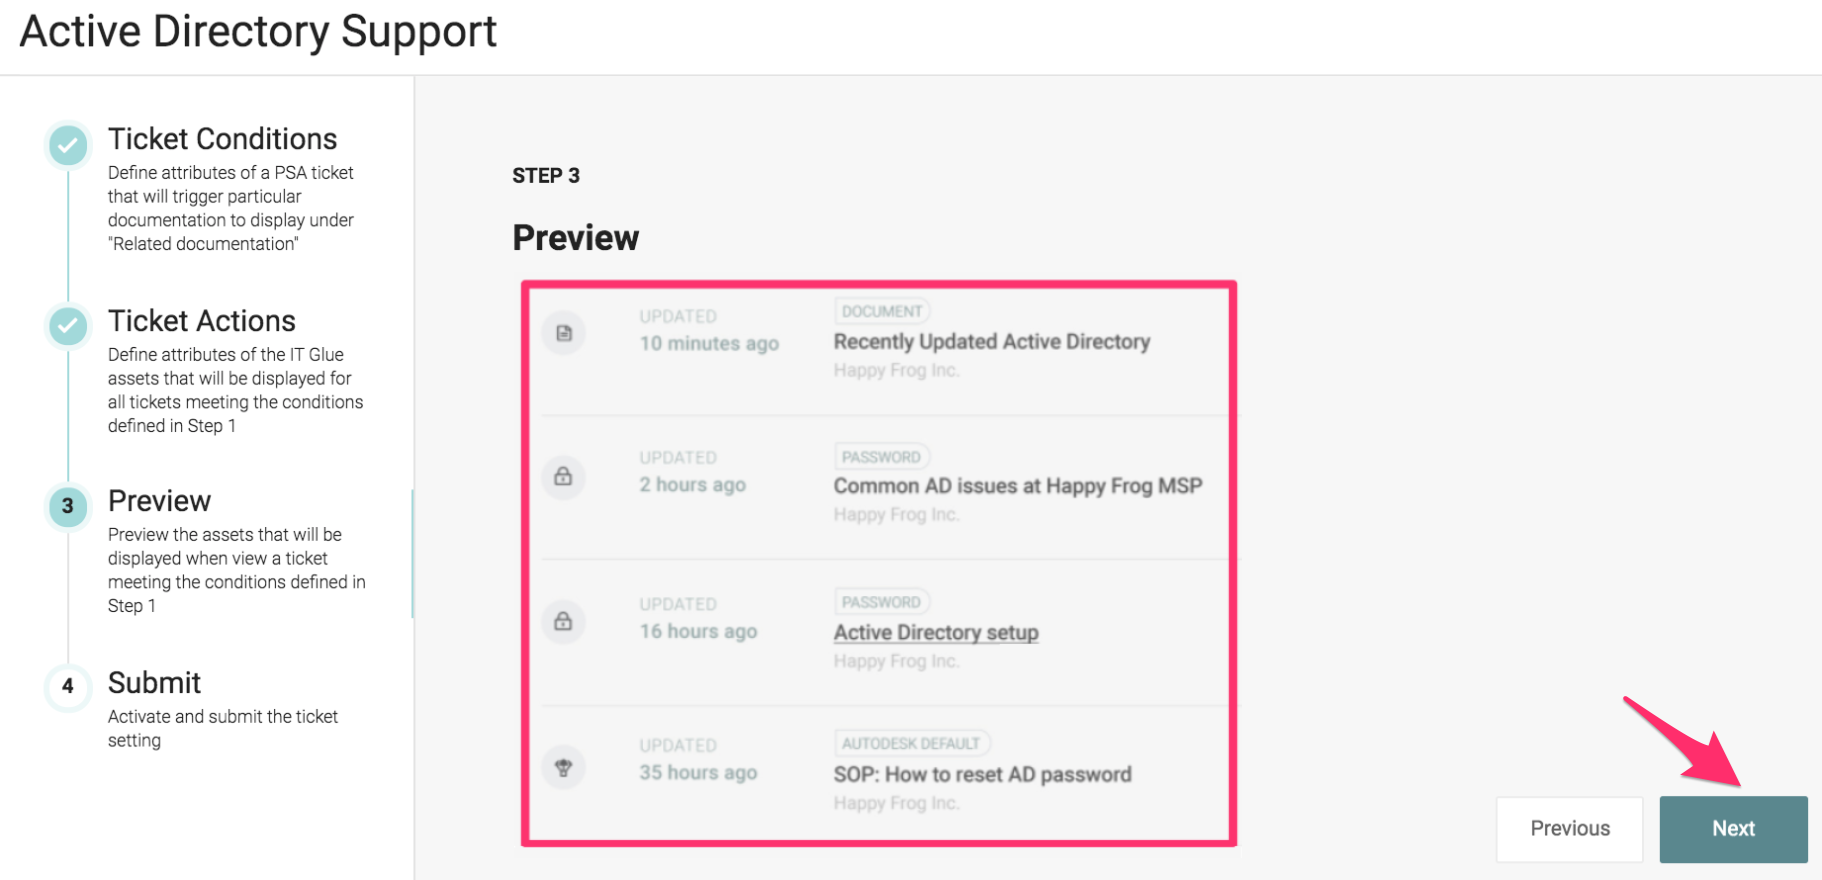
- A Preview Assets step will display. Review all the IT Glue assets resulting from the conditions you set in previous steps. If they match your requirements, click Next.
- Finally, a Submission step will display.
- Review the conditions and actions you set previously. Click Previous should you need to go back and make changes. You can also navigate to any previous step at this point using the left-hand side navigation bar.
- Provide a description for your new ticket setting to help with organization as you create more settings in the future.
- The Activate this ticket setting toggle is set to “YES” by default.
- If “Yes”, the respective results are displayed on your service tickets.
- If “No”, the respective results are not displayed on your service tickets. Toggle to “No” if your setting is still in draft and you would like to edit further before activating it.
- Click Submit to validate and activate your new ticket setting.
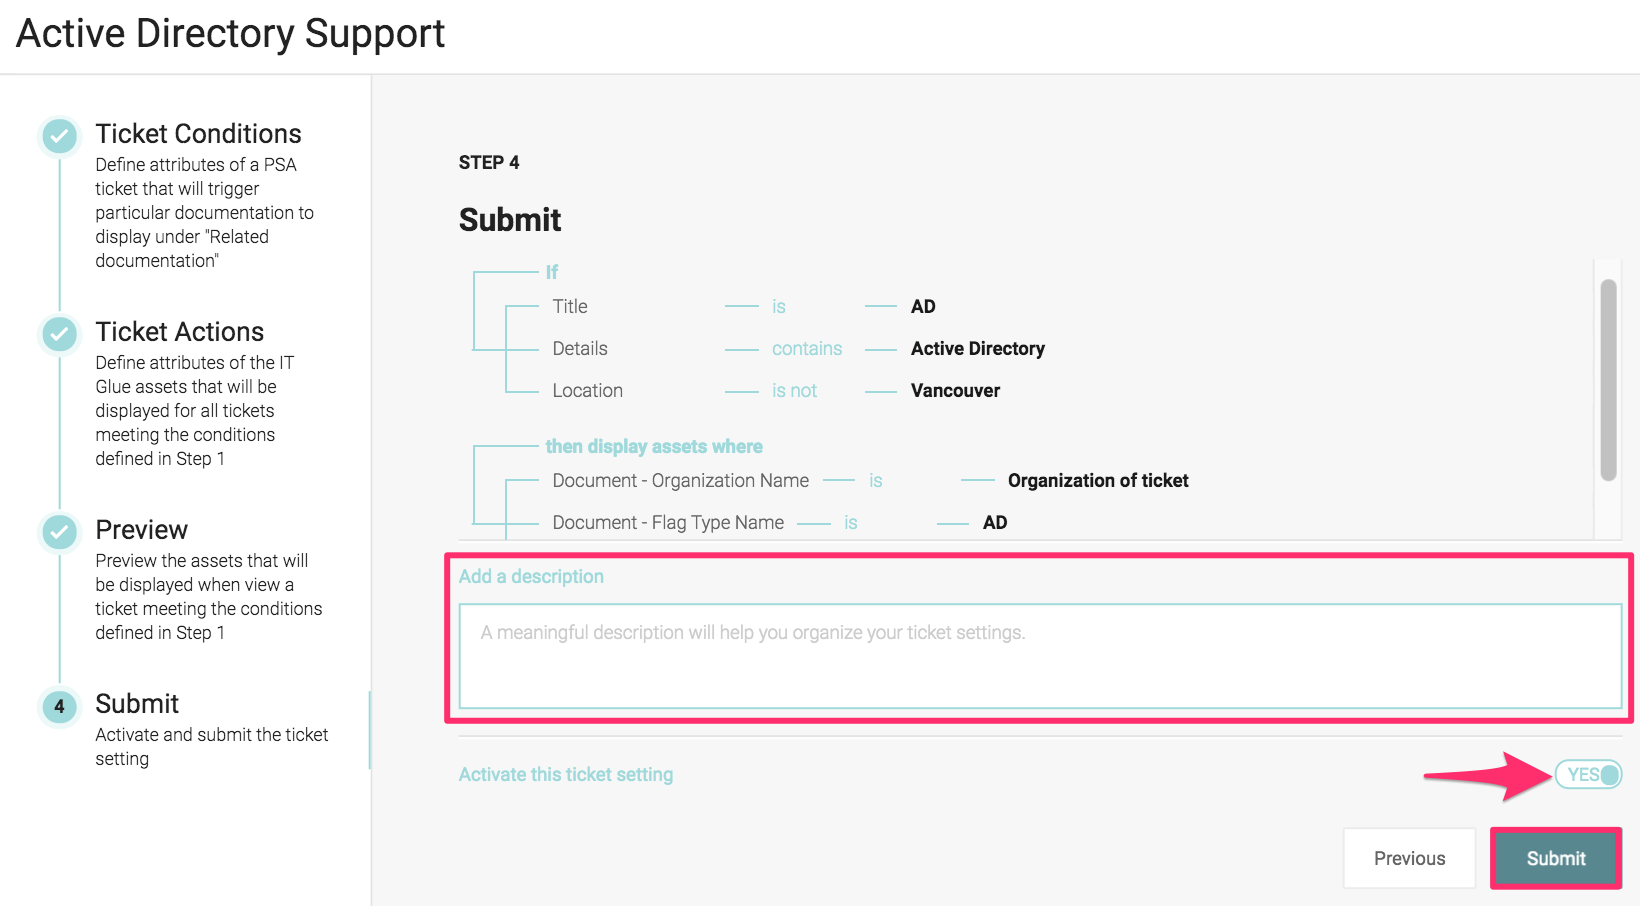
NOTE If there are any fields left blank, your ticket setting will not be submitted. The left side pane will display the specific page that requires attention. Click the red banner to navigate back to that page. After fixing the issue, click Next until you reach the Submission step again. Then, repeat Step 4.
Managing ticket settings
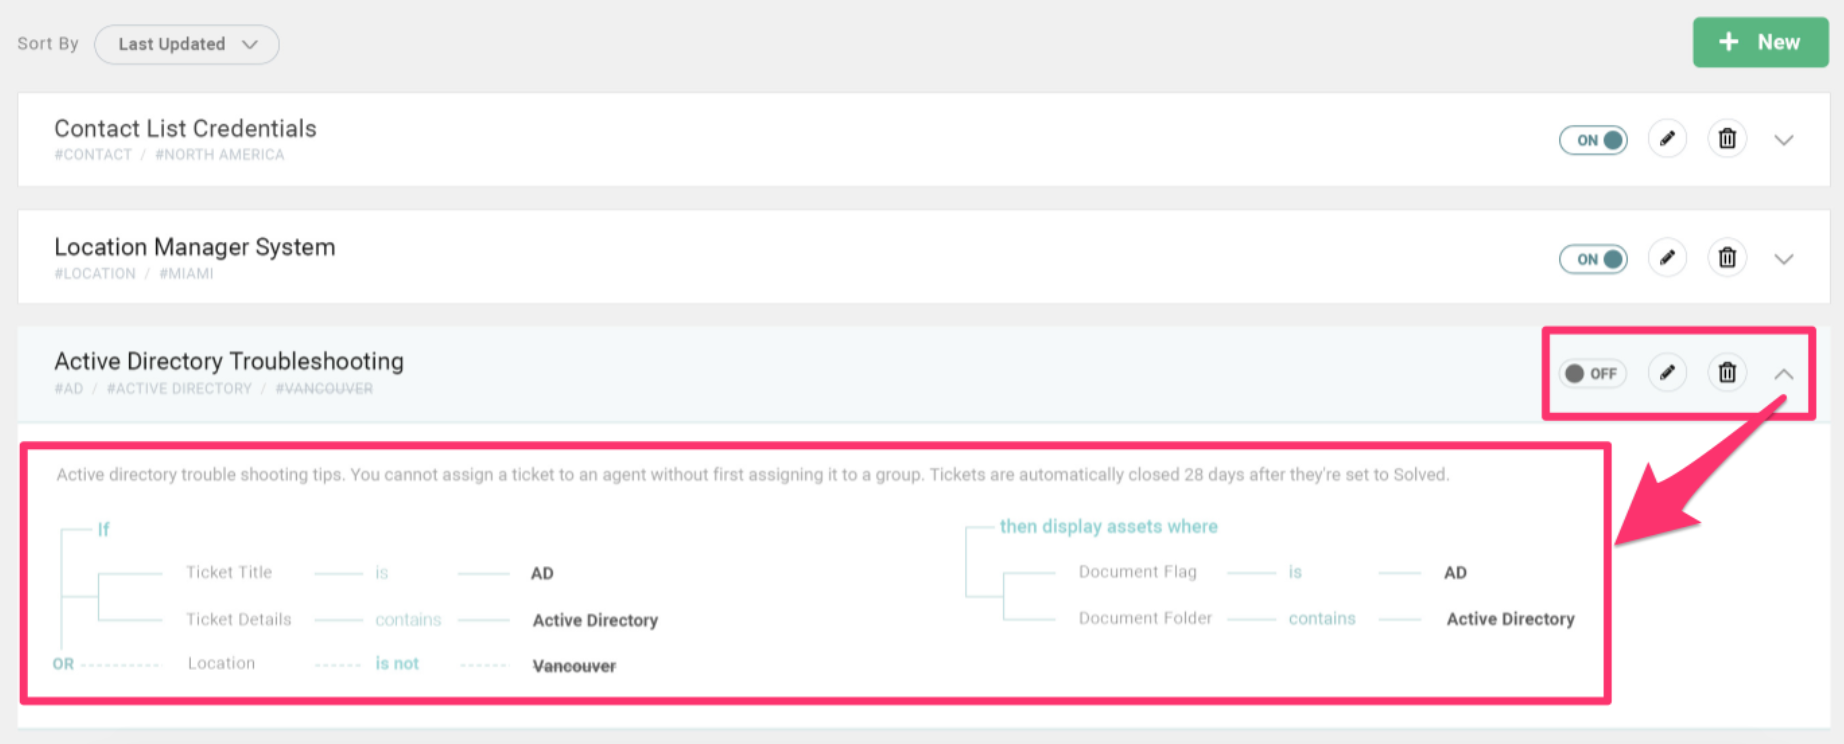
Navigate to Account > Ticket Settings to view and manage all of the existing ticket settings. Use the filter bar at the top of the page to quickly locate a ticket setting by its name, status, or other key words.

Each line will display the setting name, its conditions, and its status (active or inactive). You can edit or delete the settings by clicking on the pencil or trash can icon, respectively. To view details of that setting, click on the name or the drop-down arrow.
Viewing IT Glue documentation and assets in BMS
- Log in to Kaseya BMS and navigate to any existing BMS ticket.
- Open a ticket and click on the Related Documentation tab where you will see a list of suggested IT Glue assets.
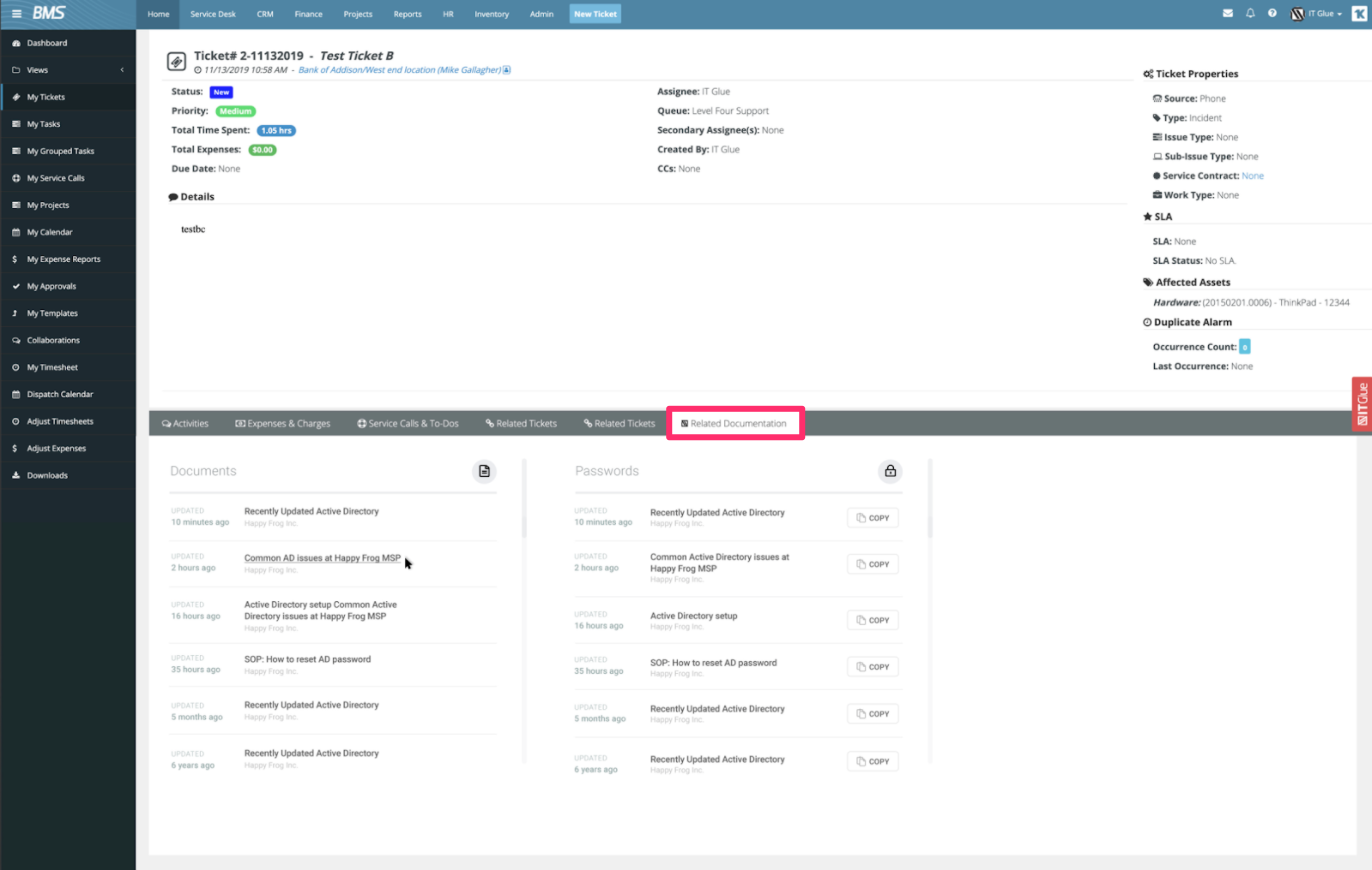
NOTE This list will be the same as the one seen in the Preview Assets page (refer to Step 4, “Creating new ticket settings” section above).
- Click to open any suggested asset within IT Glue. The asset will open as a new tab where you will have all of the usual write, edit, delete functionality of IT Glue. If you haven’t authenticated in IT Glue at this point yet, you will be prompted to log into your account before you can access the related documentation in BMS.
BMS Live Ticketing
To further your ticketing resolution process, BMS Live Ticketing allows you to open, update, and resolve BMS tickets directly in IT Glue without having to switch between the applications. Note that the ticket settings you configured following the steps above will apply to both BMS and IT Glue. For more details, check out here.


