Integrating with Unitrends through UniView
Introduction
Use this article as a guide to create and maintain an integration with UniView which gives you the ability to view backup statuses and appliance information of your configurations directly in IT Glue.
At any time, you can come back to the Active Integrations page (Admin > Integrations) to make changes to the integration.
The UniView integration described below will do the following:
- Enable IT Glue users to view configuration backup information from UniView.
- Display backup status, last backup time and storage for endpoints in IT Glue.
- Ensure customers and assets from Unitrends are automatically matched to IT Glue organizations and configurations.
Matching logic:
- UniView customers are matched to IT Glue organizations based on name.
- If an automatch cannot be made, a suggested match will be displayed on the organization matching page.
- If no suggested match can be found, the organization will remain unmatched.
- UniView assets are matched to IT Glue configurations based on the MAC address.
- If the MAC address is missing, a suggested match based on the name will be displayed.
- If no suggested match can be found, the configuration will remain unmatched.
Prerequisites
- An SSL connection with a valid certificate (not self-signed) from a trusted authority is required.
- You must have Manager or Administrator access to IT Glue.
- You must have Administrator access to Unitrends to obtain your client ID and client secret.
Instructions
Configure UniView
IT Glue talks to UniView via API so we can perform our routine sync. To get started, you need to obtain your client ID and client secret from UniView. These are needed for the authentication within this integration.
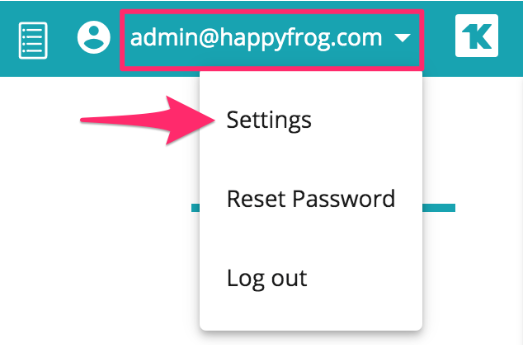
- Log into the UniView portal and click your username in the top-right corner. Click Settings.
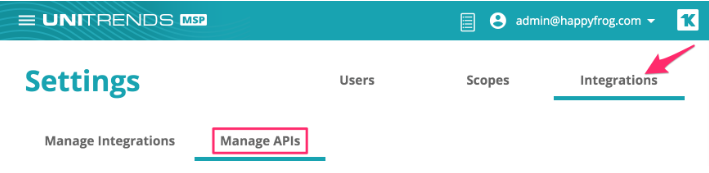
- Click Integrations and then the Manage APIs tab.
- Click the New + button. A pop-up window will appear allowing you to name your new public API credentials. Enter an appropriate name and click Save.

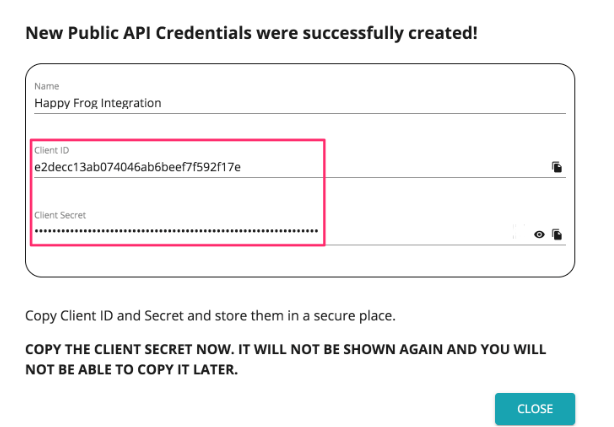
- A second pop-up window will appear showing your new public API credentials; your client ID and secret key. Copy and store both in a secure location.
IMPORTANT Once you close this window, you will not be able to view the client secret again. Ensure that you copy the client secret before you click Close.
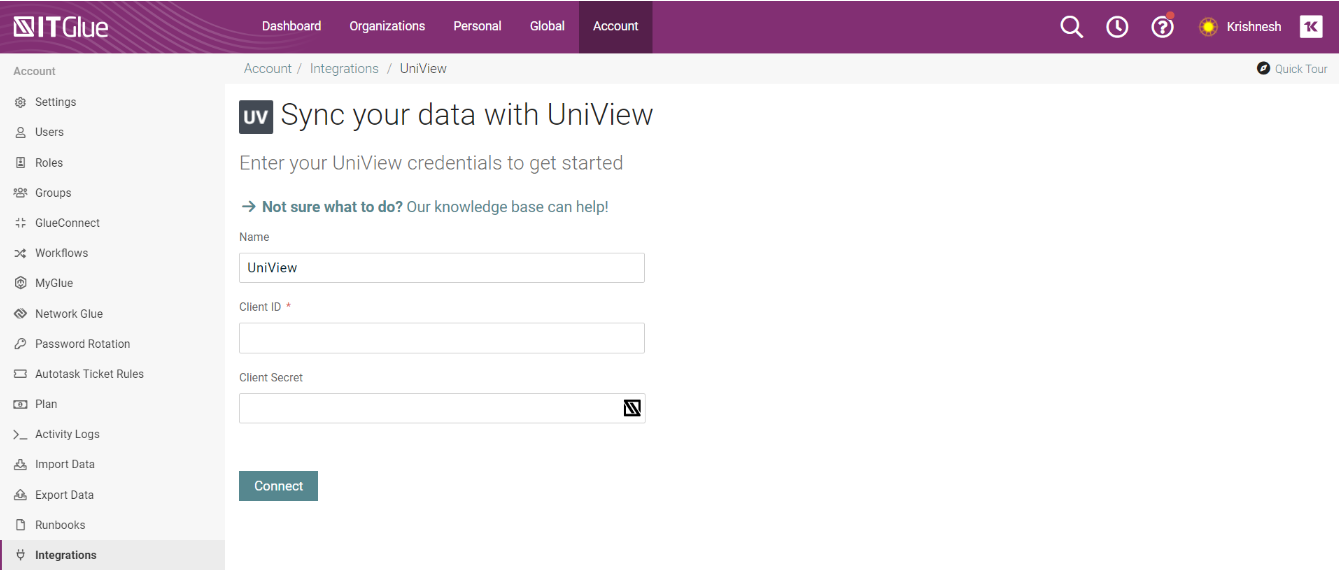
Enter your UniView credentials
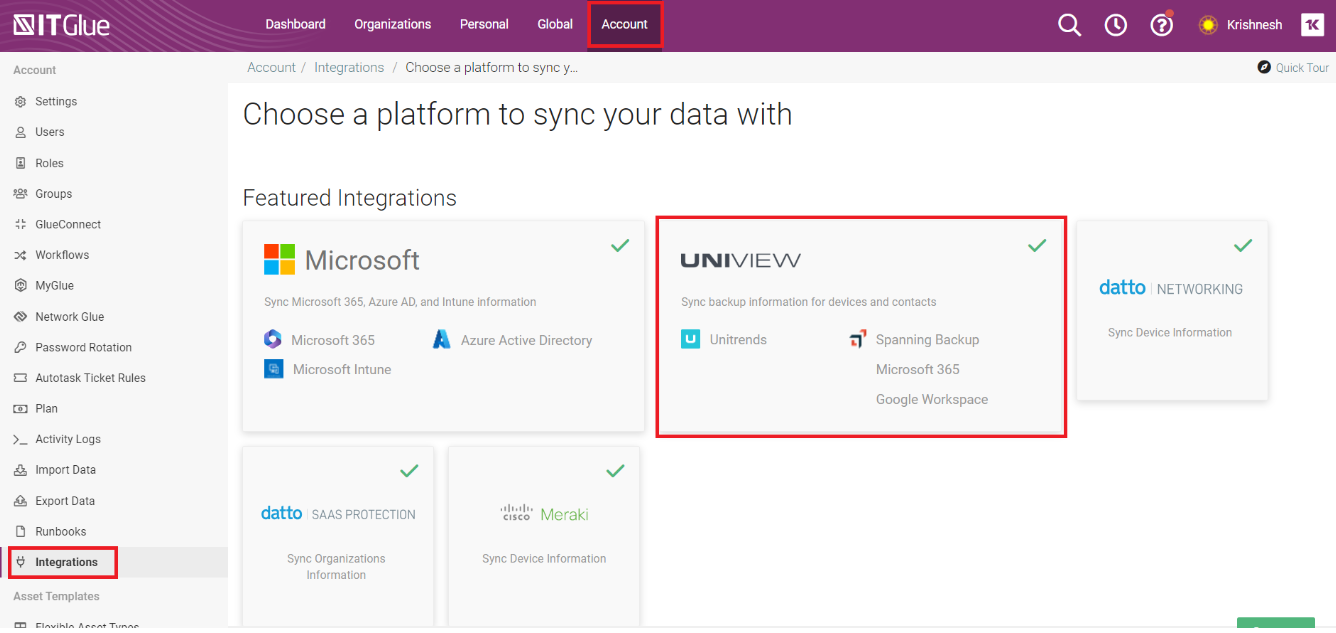
- In IT Glue, navigate to Admin > Integrations and create a new integration by using the Unitrends option.
- Enter your UniView client ID and client secret and then click Connect.
NOTE If the credentials fail for any reason, syncing will stop until you re-enter your credentials.
Sync data
- Navigate to Admin > Integrations, click Actions and Start Manual Sync.
- When the sync is complete, the status column changes from Syncing… to OK.
Organization matching
IT Glue discovers organizations and tries to match them to data in your account. The matching logic can be found in the Introduction section of this article. Anything that isn’t automatically matched will need to be actioned manually.
- From the Integrations page, find Unitrends in the list. Click the Actions drop-down and select Matching.
- In the Unmatched tab, review the unmatched organizations.
- If the suggested match is accurate, click Accept Suggestion.
If there is no suggested match, or it is incorrect, you can search for and choose a different organization using the Match To column.
- If no organization exists in IT Glue, you can choose to create an organization. You can also choose to ignore customers, which means they won’t count as unmatched items in subsequent syncs.
IMPORTANT Warning. Before creating an organization from the matching screen, ensure that no corresponding organization already exists, otherwise a duplicate will be created.
- If any matches are incorrect, click on Actions > Change Match and select a different organization to match to.
Configuration matching
Once all organizations have been matched, the same process should be followed for any unmatched configurations.
- From the Matched tab, choose any organization that has unmatched configurations, click the Actions button, and select Match Devices.
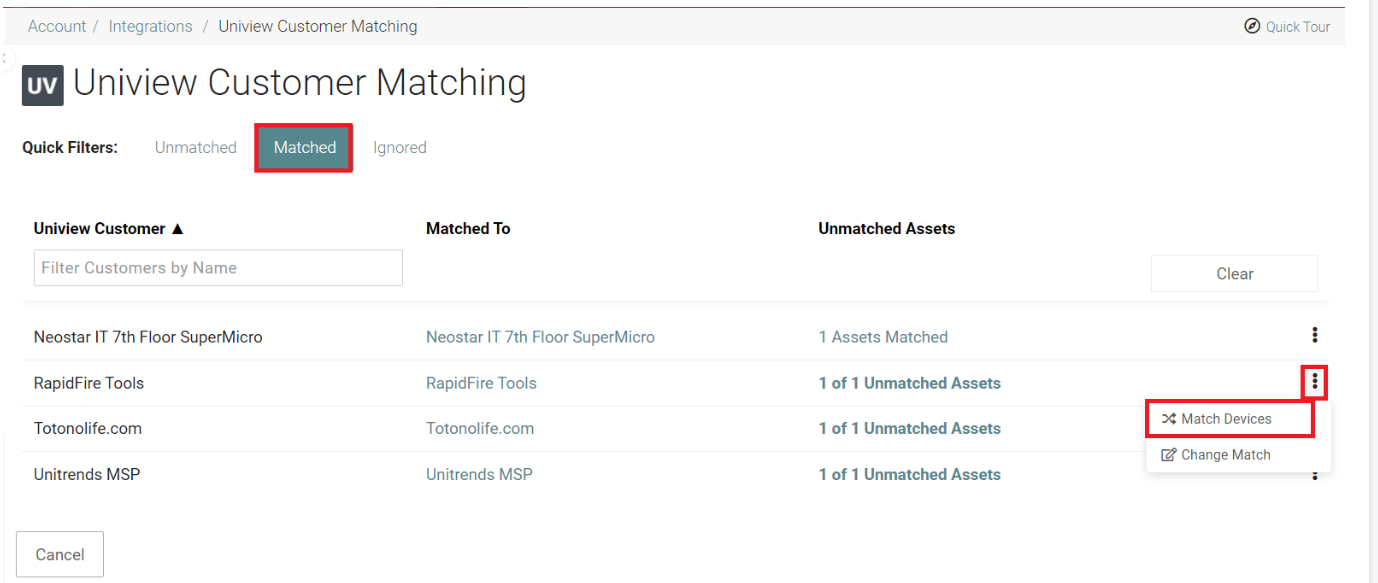
- For any unmatched configurations, you can either accept the suggested match, search for an IT Glue configuration by entering the name in the Match To column, or create a new configuration by clicking Actions > Create Configuration.
- Before you create configurations, first match any of the devices based on MAC addresses, for example, virtual servers. When you’re done matching, you can create (in bulk or individually) any of the remaining devices coming in from Unitrends.
IMPORTANT We don’t recommend that you create configurations from Unitrends if you’d like to then have them populate from IT Glue to your PSA. New items created from such data will not sync with your PSA unless you choose to do so manually by editing and saving each and every item. This is absolutely manual and is not recommended.
- Repeat for each organization until all configurations are actioned.
Viewing UniView data in IT Glue
At the top of the IT Glue Configuration show page, Unitrends data will display the last backup timestamp, the amount of storage used, and whether or not the backup was successful.
At the bottom of the IT Glue Configuration show page, you will see a Unitrends sync badge along with links allowing you to Compare data or Sync now. Here, you can also see the last backup timestamp, the amount of storage used, and whether or not the last backup was successful.


