Setting up single sign-on (SSO) to IT Glue
Introduction
If you're an Administrator or Manager on an Enterprise plan, you can let team members access IT Glue by logging in to a central identity provider. Single sign-on (SSO) provides an easy way to access multiple websites or applications using a single account.
NOTE This topic provides an overview of the SAML (Security Assertion Markup Language) SSO option in your account settings. IT Glue also supports JWT-based SSO. Refer to Configuring JWT settings for single sign-on (SSO).
To configure SAML settings for SSO, you need an identity provider that supports SAML 2.0. This widely supported protocol enables web-based authentication scenarios including cross-domain SSO and federated authentication between SaaS applications, like IT Glue, and on-premise directory systems, such as Active Directory. The key to this feature is the intermediary SAML SSO server, also known as the identity provider.
How it works
Authentication to your subdomain ([subdomain].itglue.com) is handled by your identity provider. Whenever IT Glue or one of your other apps or sites wants to authenticate you via SSO, they'll redirect you to the identity provider. If you are not logged in, you can log in using your SSO credentials. But if you're already logged in, you won't need to log in again. You are immediately redirected back to IT Glue with the necessary authentication token. This token is used to verify that you are authenticated with the identity provider.
Getting started
IMPORTANT It's highly recommended that before you begin the below set of instructions, log in to your IT Glue account twice: once in a regular browser and once in an incognito/private window. Alternatively, you can also log in to two separate browsers. This is to ensure that you are still logged in to your account in case you are locked out in the other window.
Start by logging in to IT Glue as an Administrator or Manager and navigating to the SSO configuration settings of the identity provider, so that you can configure the two simultaneously. Each of your users will need to be provisioned in the identity provider, with exactly the same email address as their IT Glue user account, since that is how IT Glue will identify them.
After configuring SSO in your identity provider, return to IT Glue, and navigate to Admin > Settings > Authentication, turn on the Enable SAML SSO toggle, and paste the following identity provider data into IT Glue.
- Issuer URL: The URL that uniquely identifies your SAML identity provider.
- SAML Login Endpoint URL: The SAML login endpoint URL of the SAML server. IT Glue redirects to this URL for SSO if a session isn't already established.
- SAML Logout Endpoint URL: A URL where IT Glue can redirect users after they sign out of IT Glue.
- Fingerprint: The appropriate value based on the information provided by your identity provider.
- Certificate: The authentication certificate issued by your identity provider (a base-64 encoded X.509 certificate). Be sure to include the entire certificate, including -----BEGIN CERTIFICATE----- and -----END CERTIFICATE------.
NOTE This term may also be called Issuer, Identity Provider, Entity ID, IdP, or IdP Metadata URL.
NOTE This term may also be called Sign-on URL, Remote login URL, SSO URL, SSO Endpoint, SAML 2.0 URL, Identity Provider Sign-in URL, IdP Login URL, or Single Sign-On Service URL.
NOTE This term may also be called SLO Endpoint, SAML Logout URL, Trusted URL, Identity Provider Sign-out URL, or Single Sign-Out Service URL.
This term may also be called Thumbprint.
NOTE This term may also be called Public Certificate or X.509 Certificate.
NOTE IT Glue does not support SSO logout URLs.
_to_ITGlue_pic01.png)
To allow users to log in only with their SSO provider, refer to Enforced SSO Access Control.
You should now have a working SSO implementation for IT Glue, which you can test by navigating to your IT Glue subdomain in a new browser session. This process and the information asked for should be common to all identity providers.
Enable Login with KaseyaOne for IT Glue
To enable log in with KaseyaOne for IT Glue, do the following:
- From the top navigation menu, click Admin.
- On the Settings page, click the Authentication tab.
- Turn on the Enable Login with KaseyaOne toggle in the Single Sign-On section.
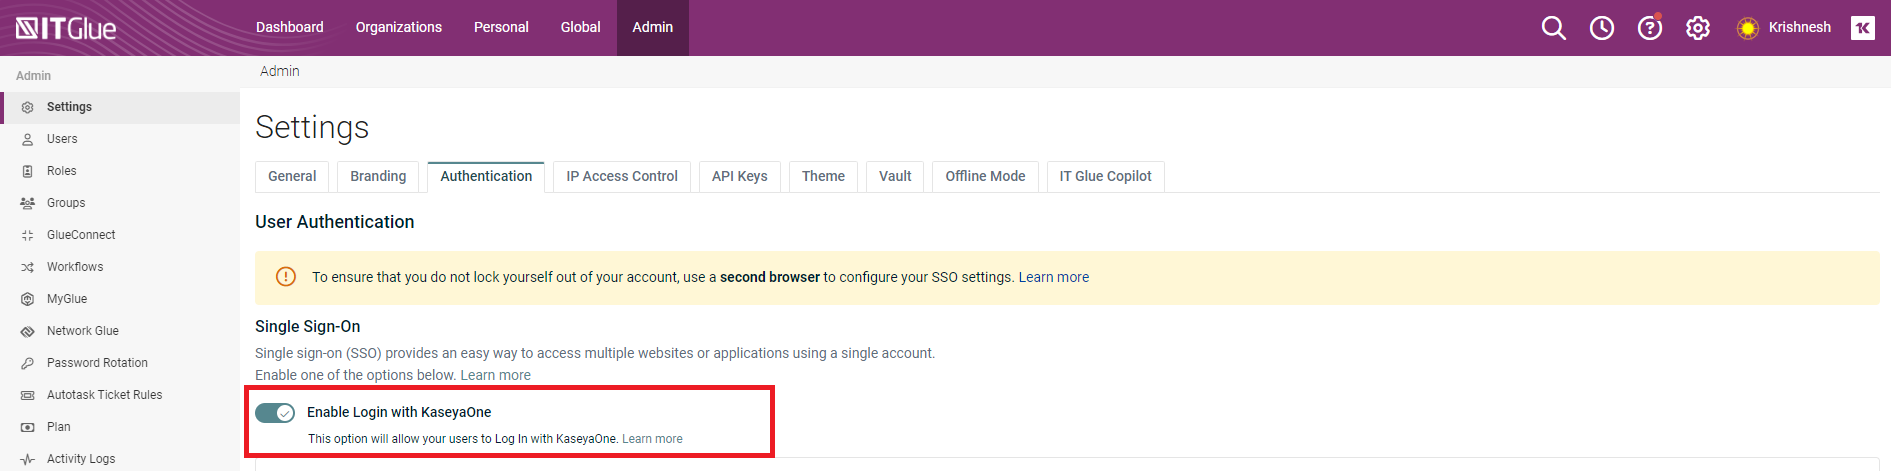
When you turn on this toggle, the Require Log In with KaseyaOne toggle is also automatically enabled but can be turned off.
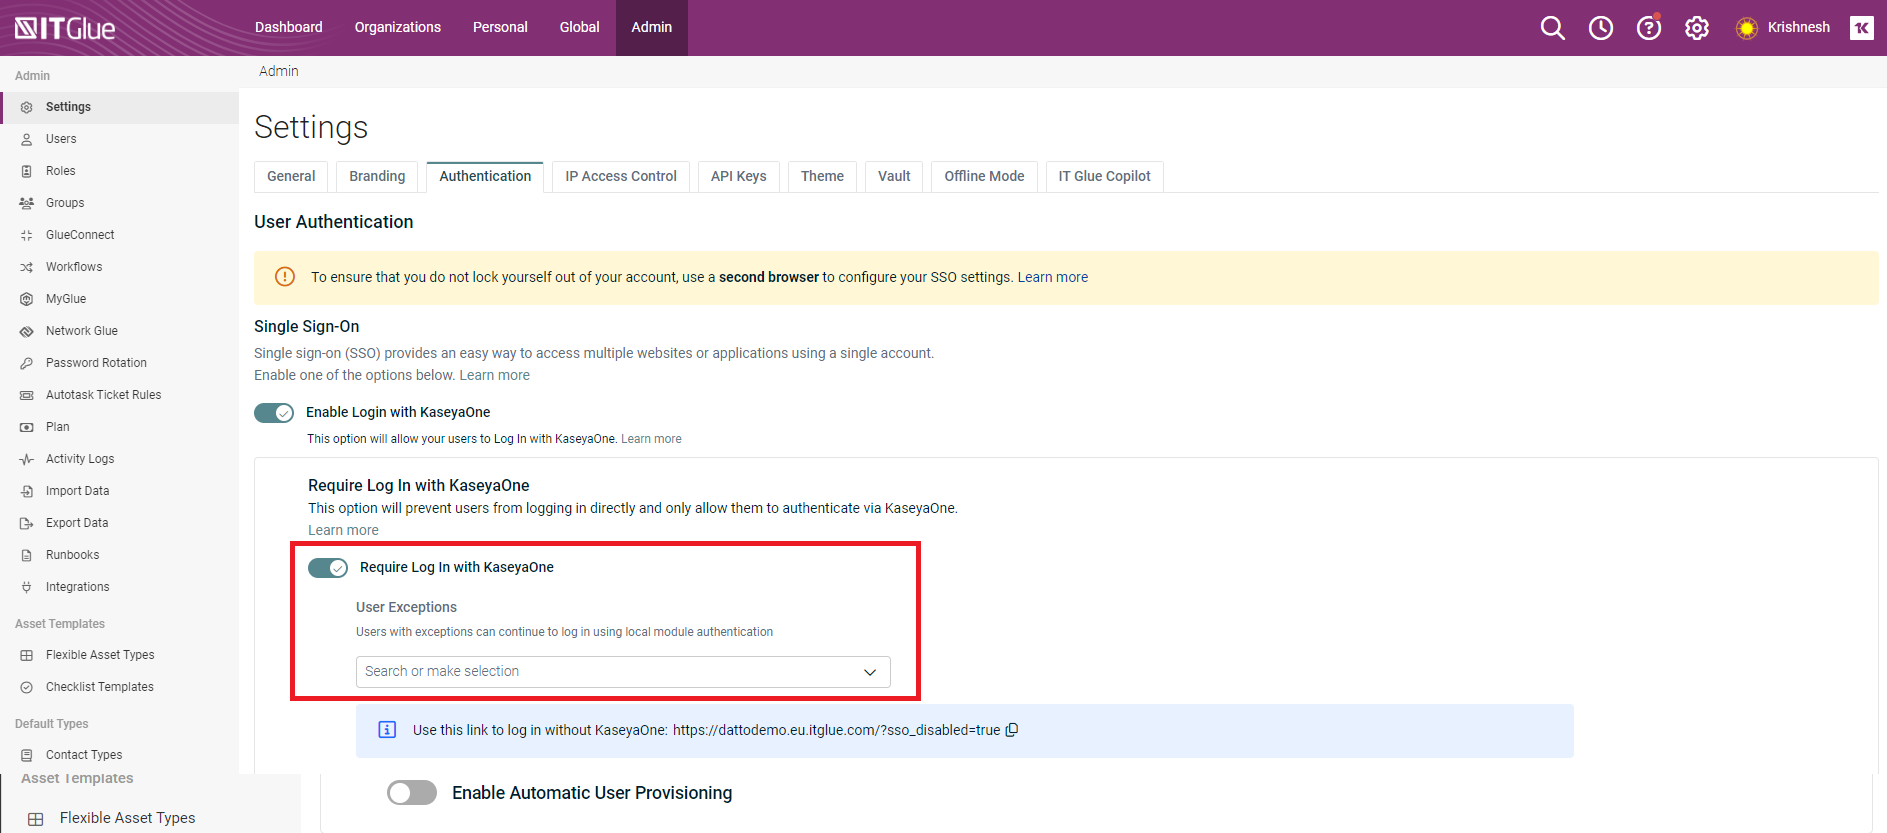
If Require Log in with KaseyaOne is enabled, an Administrator can complete either of the following steps to prevent certain users from being automatically redirected to KaseyaOne for authorization when logging in to IT Glue:
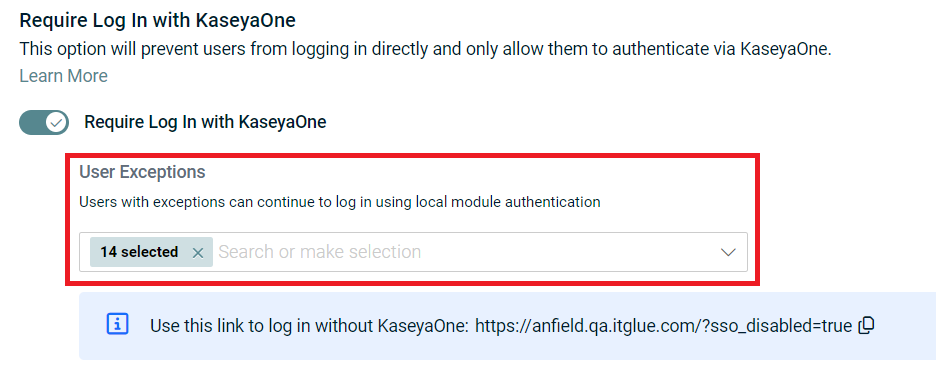
- Add the applicable users to the User Exceptions list.
Provide a login URL with SSO disabled (with the IT Glue subdomain and region of your account) to the applicable users:
- NA: [subdomain].itglue.com/?sso_disabled=true
- EU: [subdomain].eu.itglue.com/?sso_disabled=true
- AU: [subdomain].au.itglue.com/?sso_disabled=true
- Add the applicable users to the User Exceptions list.
-
To enable users in KaseyaOne who are granted access to IT Glue to have an IT Glue user account created automatically, turn on the Enable Automatic User Provisioning toggle.
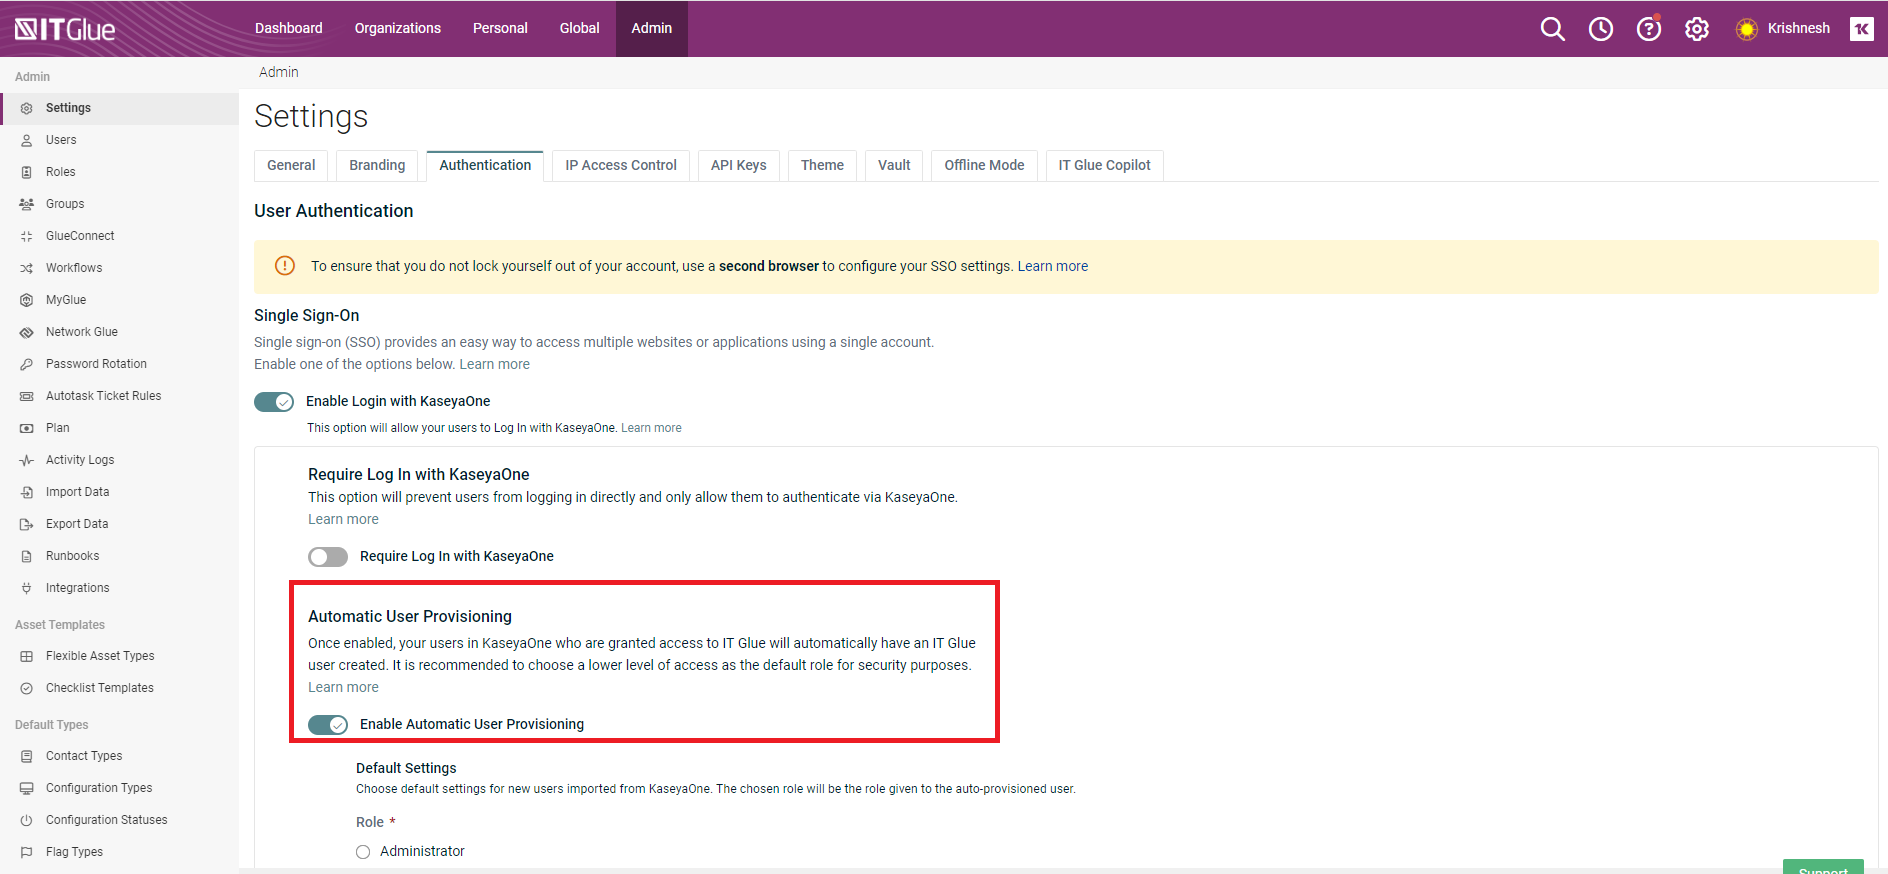
- Choose a role to be assigned to all new users created.
NOTE By default, the role type will be Editor.
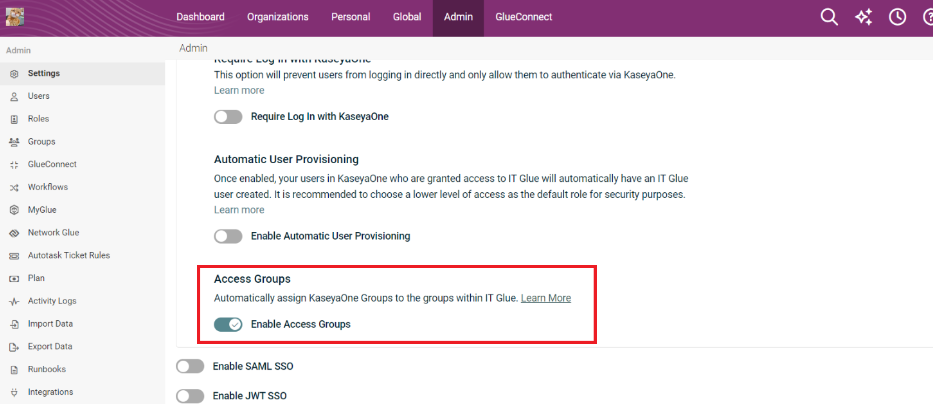
- To automatically assign KaseyaOne groups to the groups within IT Glue, enable the option Enable Access Groups.
NOTE IT Glue uses Role-based Access Control (RBAC) feature to ensure that the changes in KaseyaOne group roles are automatically assigned to groups in IT Glue when you enable this option.
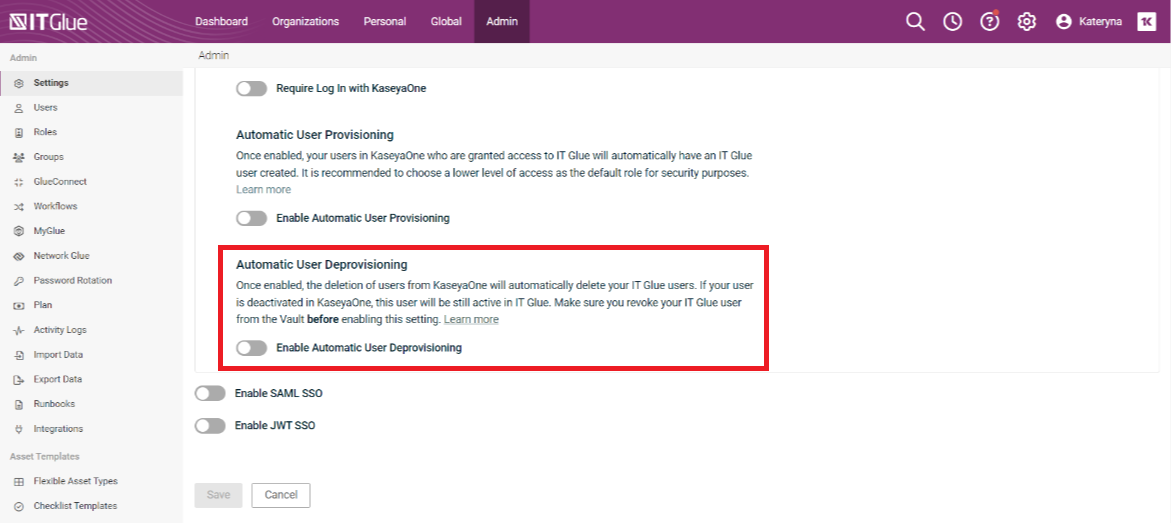
- To automatically delete IT Glue users after these users are deleted in KaseyaOne, enable the option Enable Automatic User Deprovisioning.
IMPORTANT The Automatic User Deprovisioning feature is temporarily disabled and will be available soon.
Deprovisioning records the following two actions in the activity logs:- "Accounts User Deleted by K1" (IT Glue user has been successfully deleted by KaseyaOne master).
- "Accounts User Deletion by K1 Failed - Vault" (when an IT Glue user is protected by Vault but was attempted to be deleted in KaseyaOne by KaseyaOne master).
IMPORTANT When a user is deactivated in KaseyaOne , such a user will still have access to IT Glue.
IMPORTANT When a user is deleted from IT Glue, they will be forced signed out from IT Glue (including web application, browser extensions and iOS/Android applications) when they try to perform any action. All their active sessions will expire. This user will be redirected to the IT Glue login page and they will see the following notification on the login form.
"You have been logged out by your administrator. Please contact your administrator for more details”.IMPORTANT
When a deleted user from IT Glue and later wishes to log in to IT Glue web application, browser extension or mobile app, they will see "Invalid login credentials" banner on a login page.NOTE If you have users added to the Vault, you should remove them from the Vault prior to enabling the Automatic User Deprovisioning option. Only then, the users (who were earlier protected by Vault) when deleted from KaseyaOne will be automatically deleted from IT Glue. These users will not be able to log in back to IT Glue even if they have stored passwords protected by Vault.
- To automatically assign KaseyaOne groups to the groups within IT Glue, enable the option Enable Access Groups.
- Assign these users to groups. You can select one, multiple or all groups individually or select the option Select All Groups to assign users to all the groups.
NOTE The Select All Groups option will be auto-selected for users with Administrator role. Lite users can be assigned to Groups, but there will not be any impact on which Organizations they can access.
- Select which IT Glue Organizations to which the users should have access by using any of the following options:
Add All
Remove All
Allow All Organizations
- Click Save to complete the process.
- After you select this switch, the KaseyaOne log in page automatically opens prompting you to enter your KaseyaOne (username, password, and company name) credentials and then the verification code.
_to_ITGlue_pic03.png)
- After you have successfully logged in to KaseyaOne, you will be redirected back to the IT Glue portal.
Unified login for IT Glue is now enabled and all users will automatically gain access to IT Glue via Log in with KaseyaOne.
Import all IT Glue users to KaseyaOne
After you enable the login with KaseyaOne for IT Glue, you can login to KaseyaOne and do the following steps to import all IT Glue users to KaseyaOne.
- Go to Admin Settings of your KaseyaOne account and access Import From Module > IT Glue.
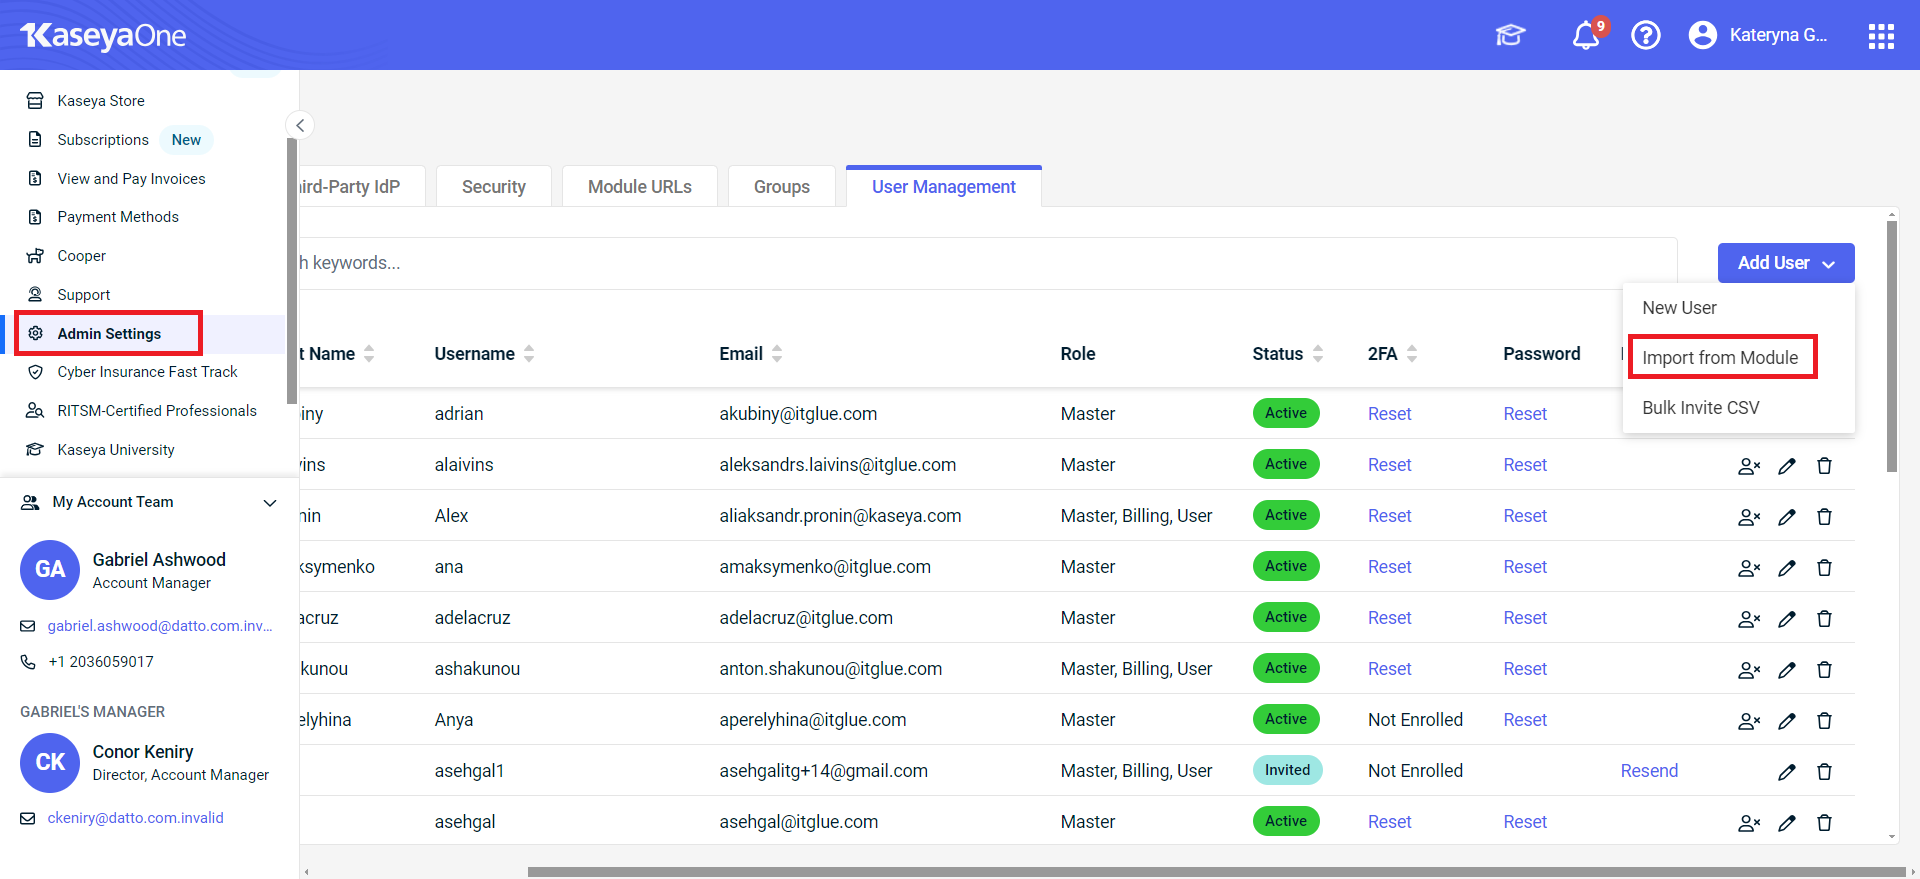
- Select the users to import and click Next.
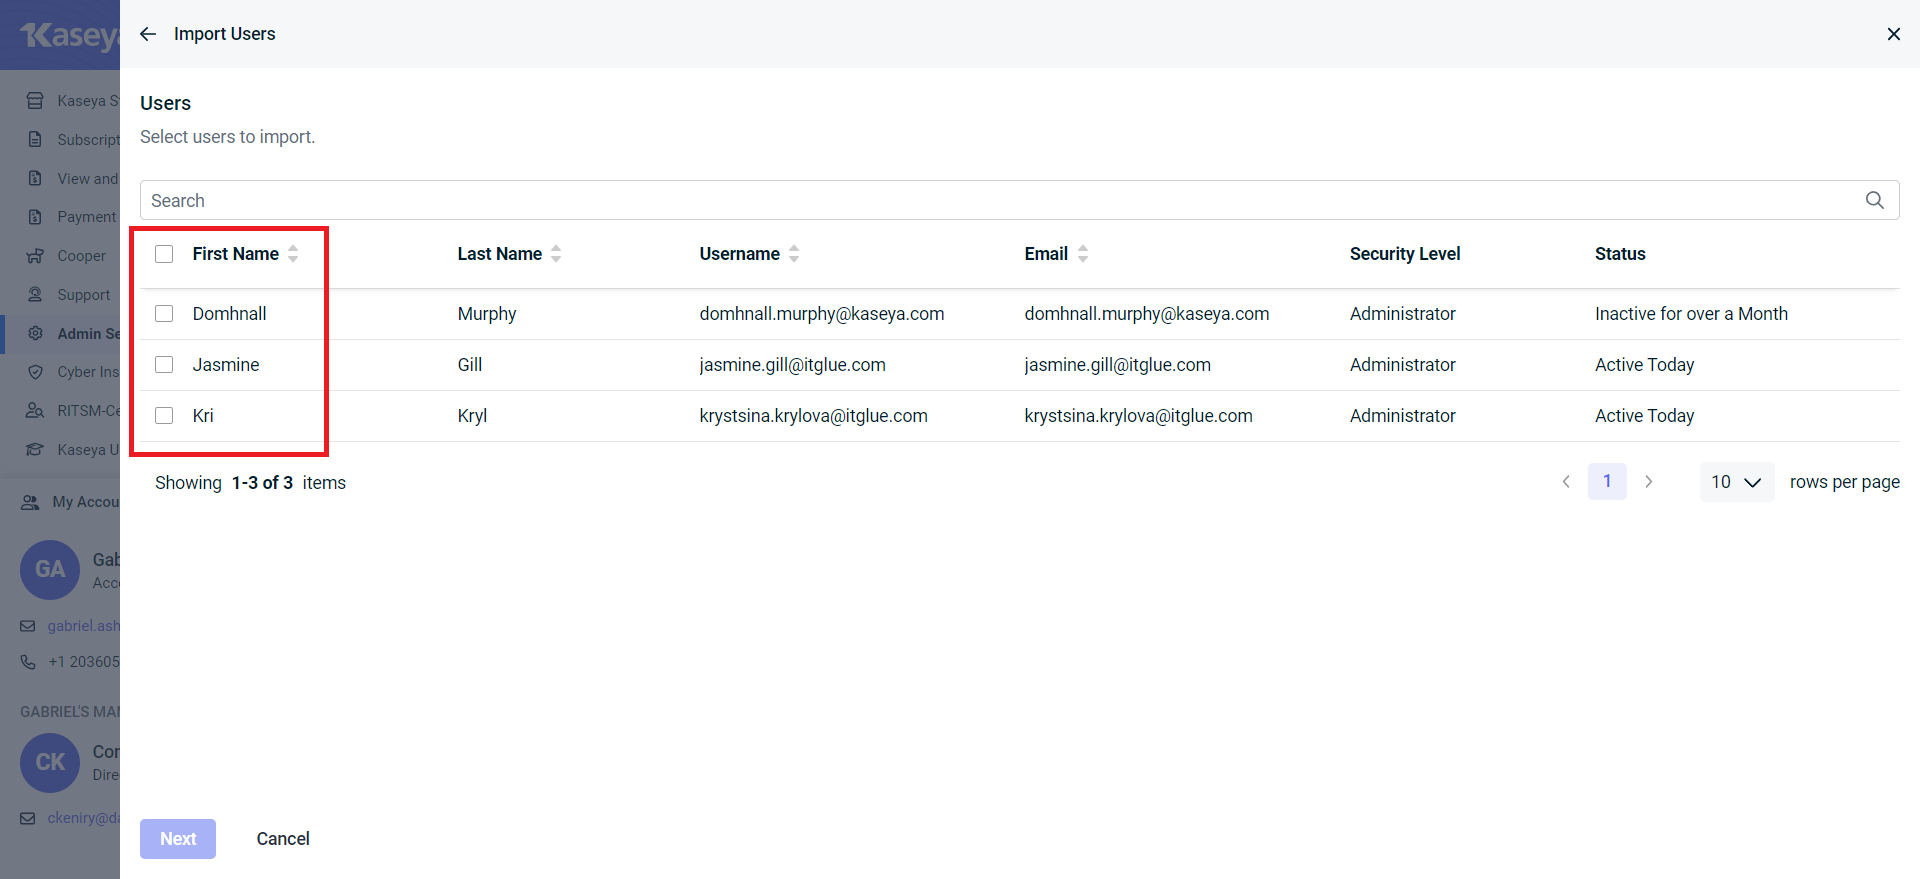
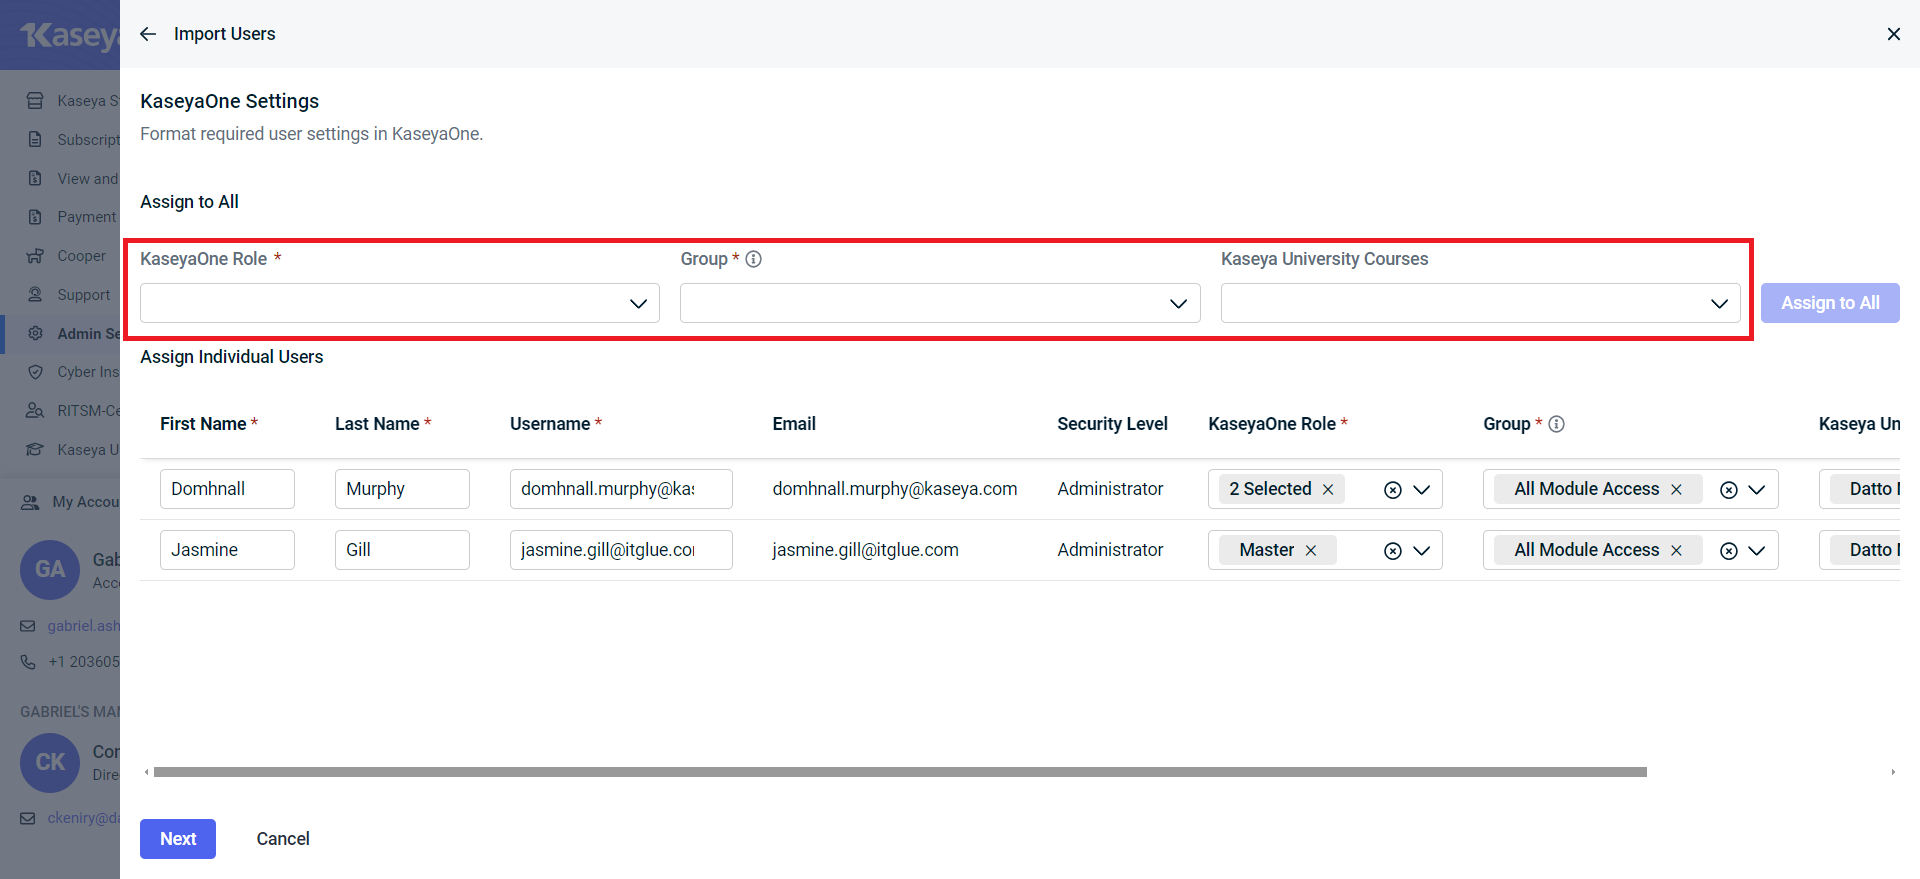
- Format the required KaseyaOne settings and click Next.
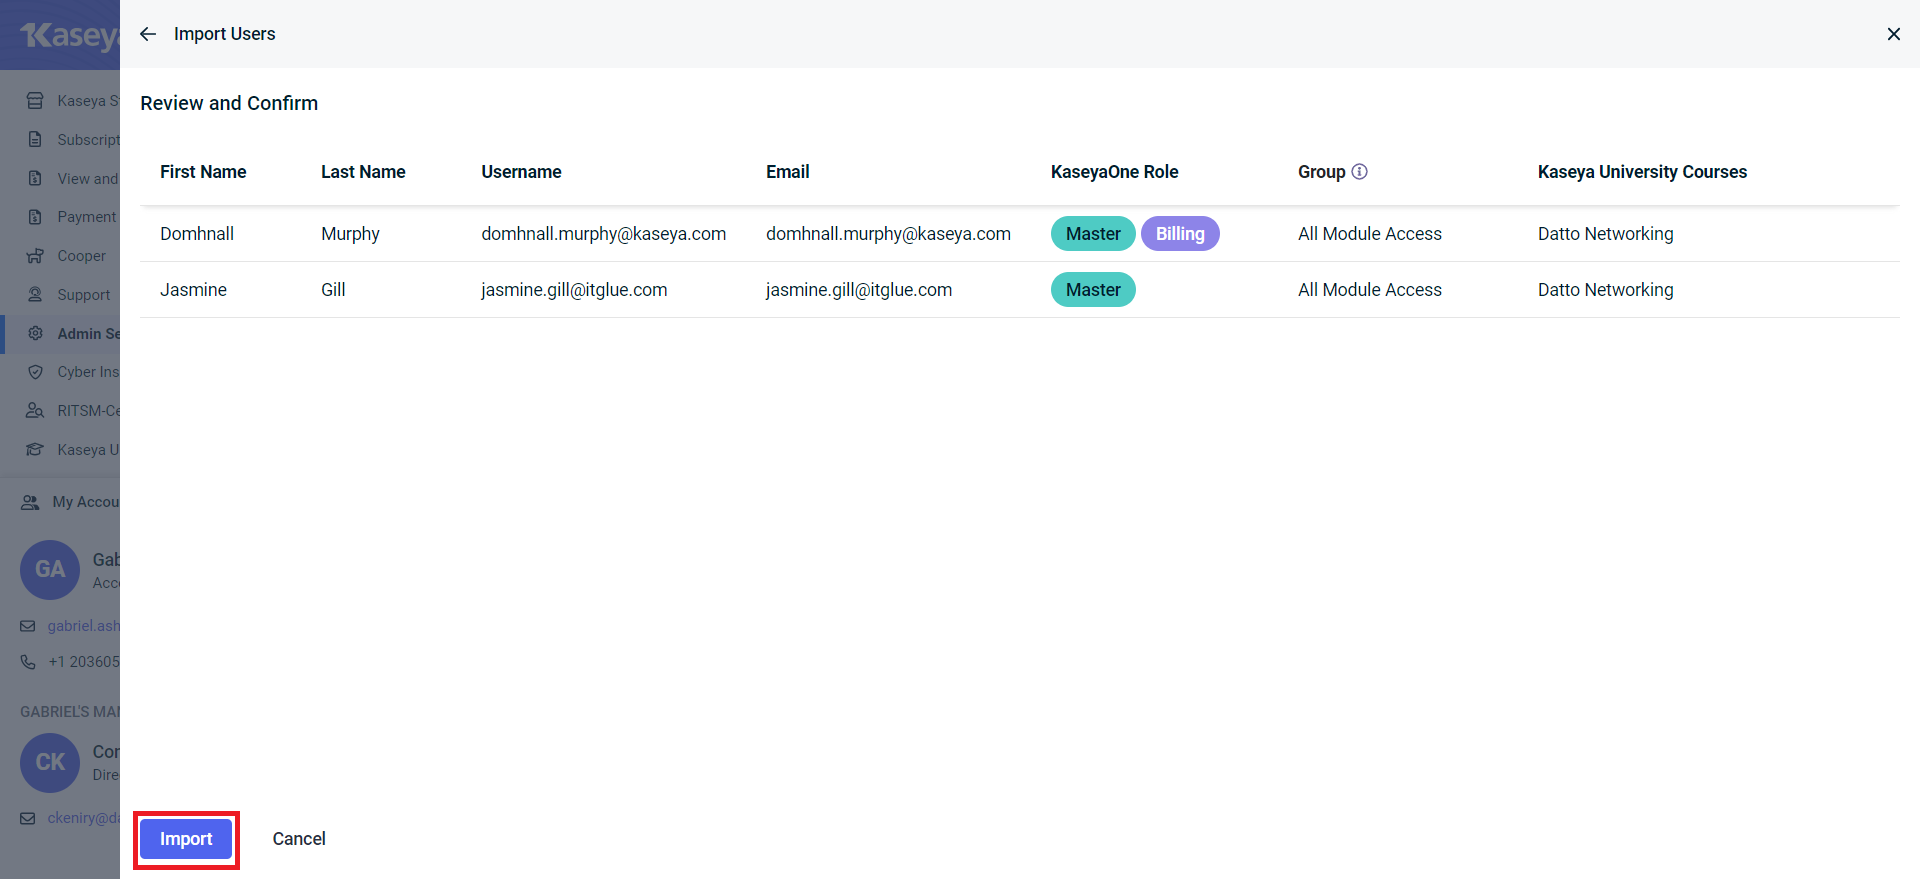
- Click Import.
All the IT Glue users you have selected will now be imported to KaseyaOne.
Related Items
If you use one of the identity providers listed below, we have written separate articles that explain how to configure and test your SAML SSO settings that you should read instead:


